Do you have a question about the PRESONUS StudioLive 16 and is the answer not in the manual?
Lists the items included in the StudioLive Series III mixer package.
Step-by-step instructions for setting input gain levels for optimal signal.
Describes the function of Select buttons and the central role of the Fat Channel.
Covers the integrated SD recorder and USB audio interface for recording.
Details the process of routing audio signals within the mixer.
Diagrams and descriptions of the rear panel I/O for various StudioLive models.
Explains the function and connectivity of various rear panel ports.
Details the microphone and line-level analog input connectors and their features.
Describes the analog output connections including Sub, Mix, Main, and Mono outputs.
Covers AES, Audio Network (AVB), Ethernet, and USB connection types.
Explains the power input and switch functions, including soft power down.
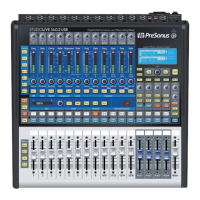
Explains the layout and functions of the mixer's channel strips.
Details how to create and manage DCA groups for controlling multiple channels.
Details the talkback microphone input and its routing options.
Details the functionality of FlexMixes as Aux, Subgroup, or Matrix buses.
Explains how to create and configure auxiliary mixes for monitors or effects.
Explains how to group channels for consolidated control and processing.
Details the unique mono/center bus on the StudioLive 64S.
Introduction to the Fat Channel's capabilities and interface.
Describes how to copy, paste, and save/load Fat Channel settings and presets.
Explains the controls and displays available in Input Mode within the Fat Channel.
Covers the parameters and functions of the Noise Gate and Expander.
Details the specific controls for the Gate/Expander processor.
Explains the different compressor models and their parameters.
Details the controls for the Standard Compressor model.
Details the controls for the Tube Leveling Amplifier compressor model.
Details the controls for the Class-A FET Compressor model.
Explains the different EQ models and their parameters.
Details the controls for the Standard EQ model.
Details the controls for the Passive Program EQ model.
Details the controls for the Vintage 1970s EQ model.
Provides an overview of the different Fat Channel screens and their functions.
Shows the Gate Overview screen with parameters, metering, and graph.
Lists the available compressor plug-in models and their features.
Lists the available EQ models and their behavior.
Explains how to select input sources and use input meters.
Describes the options for choosing Analog, Network, USB, or SD Card as input sources.
Explains how to toggle polarity and phantom power for analog inputs.
Describes how to link channels or buses for stereo operation.
Explains how to assign channels to Main, Mono/Center, or Subgroup outputs.
Guide to setting up a new recording session on the SD card.
Explains how to load saved sessions for playback or virtual soundcheck.
Details the Capture screen interface for multi-track recording.
Guide to using the Virtual Soundcheck feature for mixing without a live band.
Details the internal effects processors, their types, and controls.
Explains how to access and use the Effects Editor for sound processing.
Covers saving and recalling mixer states using Projects and Scenes.
Guide to saving and loading global mixer settings as Projects.
Guide to saving and loading mixer snapshots as Scenes.
Details the Solo bus functionality and its various modes.
Explains AFL, PFL, SIP, Radio, Latch, and CR modes for soloing.
Guide to using the Solo bus for monitoring signals via speakers or headphones.
Instructions on using SIP mode for setting up mixes and dialing in parameters.
Explains how to assign graphic EQs to mixes and access them.
Details the controls and functions for using the graphic EQ.
Guide to using the RTA for monitor system setup and feedback elimination.
Details audio routing options and the Digital Patching screen.
Explains how to use input delay to align audio signals and fix phasing issues.
Explains how to use output delay for speaker alignment and intelligibility.
Explains how to use sidechaining for compressors and gates.
Detailed technical specifications for preamplifiers, inputs, outputs, and digital audio.
Provides solutions to common operational issues and problems.
| Channels | 16 |
|---|---|
| Phantom Power | Yes |
| A/D Resolution | 24-bit |
| USB Audio Interface | Yes |
| Sampling Rate | 44.1 kHz, 48 kHz, 88.2 kHz, 96 kHz |
| Bit Depth | 24-bit |
| Aux Sends | 6 |
| Type | Digital |
| EQ | 4-band Parametric |
| Recording | USB |
| Connectivity | USB |
| Display | LCD |
| Software | Studio One Artist |
| Inputs | 8 x XLR Mic/Line, 8 x XLR/TRS Combo Mic/Line |