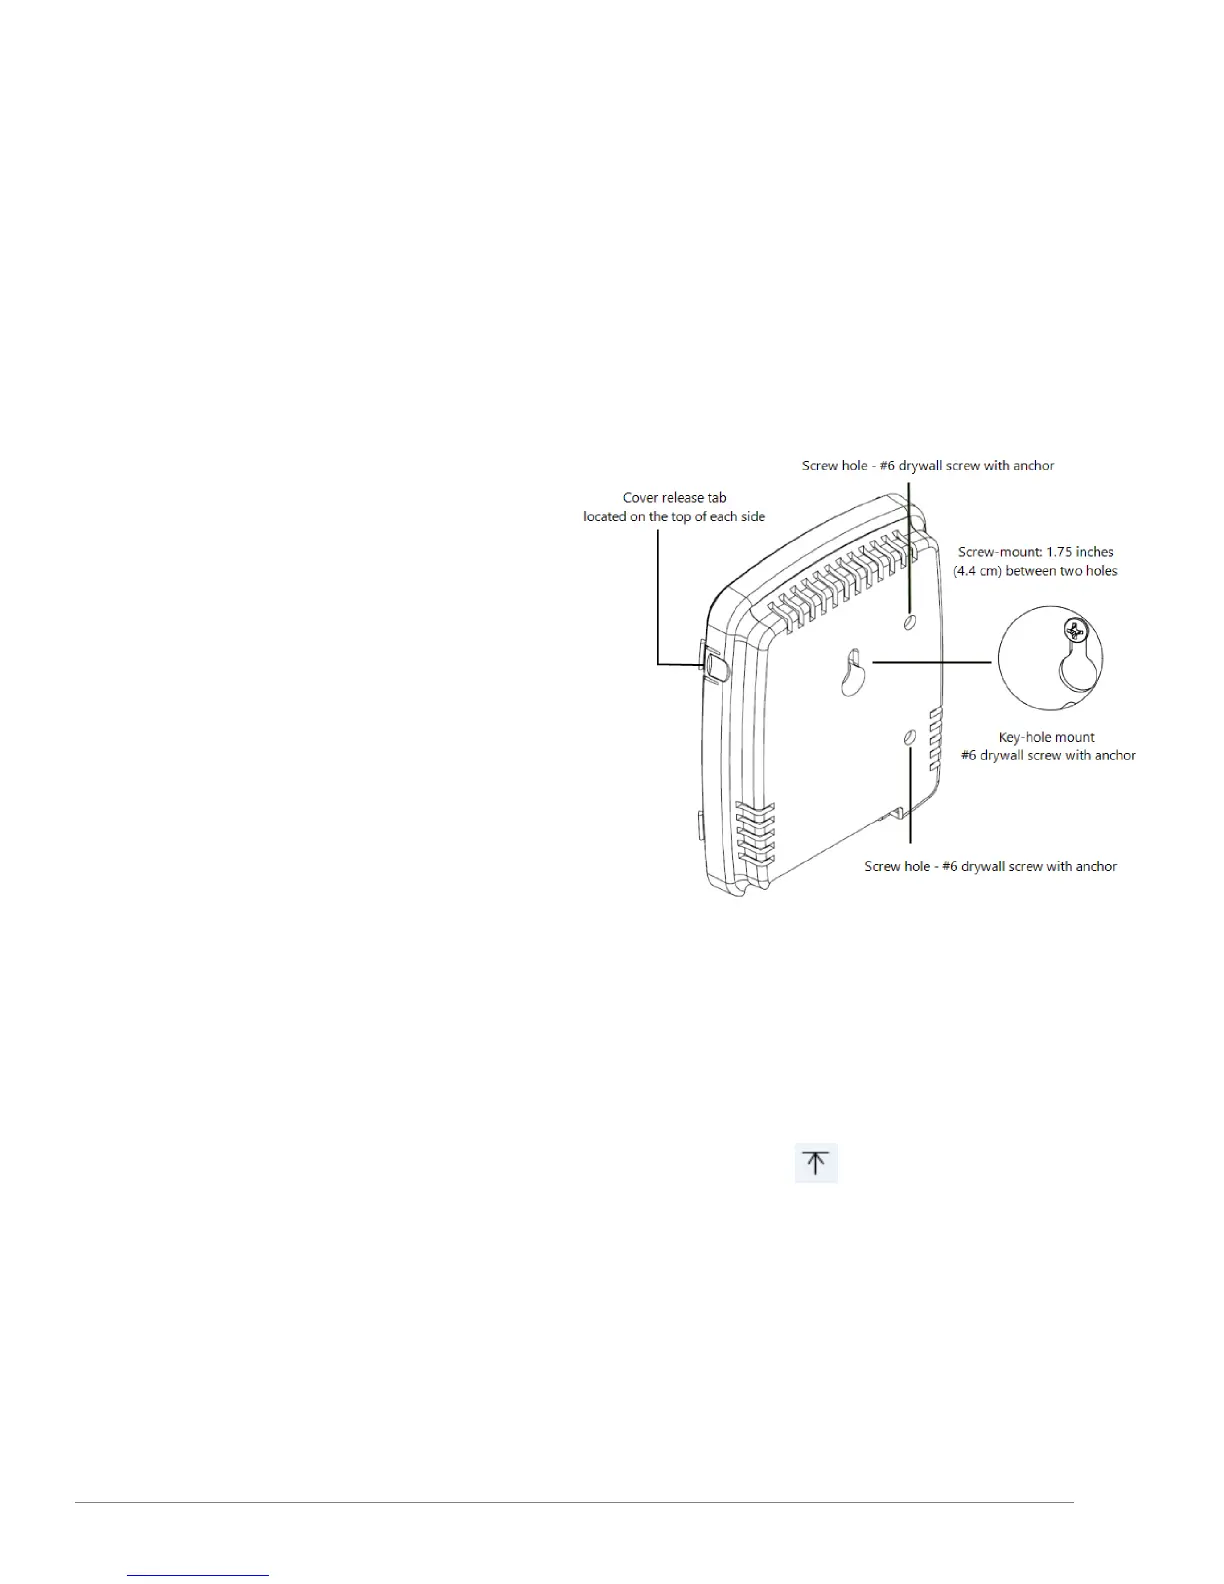
Wall-Mount (Key-Hole) Installation
A Smart-Sync Bridge can be mounted directly to a wall surface by way of a key-hole mount. If a secure-mount is required, the screw
mount installation can be applied with use of two #6" drywall screws and anchors.
How to install a Smart-Sync Bridge to a solid, level wall surface using the key-hole mount method
1.
Remove the device cover; simultaneously press the two tabs located on the top side of the device.
2.
Insert the 3.0v Primex Lithium/Iron Disulfide Battery Pack or two 1.5v Lithium AA batteries. Follow the symbols showing the correct
way to position the positive (+) and negative (-) ends of the battery pack.
3.
Located to the lower-right of the battery compartment,
set the battery on/off switch to the Up (On) position.
4.
Replace the device cover.
5.
Determine the mounting location by referencing the
key-hole slot located on the back of the device.
6.
Mark and pre-drill a mounting hole into the wall
surface. 1.75" distance between the two key-hole slots.
7.
Insert wall anchor into each mounting hole.
8.
Insert a screw into the wall anchor, leaving
approximately 3/8” of the screw head exposed for
hanging.
9.
Attach the device to the wall surface by sliding the key-
hole slot onto the mounting screw. Ensure the device is
properly secured and level.
10.
Orient the Smart-Sync Bluetooth Antenna to point
straight down (vertically) from the device to maximize
its signal reception and verify its securely attached to
device.
11.
Apply power to the device; AC or PoE. It's recommended to dress the cables with self-adhesive hook-and-loop mounting tape.
12.
When power was applied, the device automatically initiated a check-in to your OneVue account. Verify the device LCD displays
Signal OK, which indicates the device has successfully checked-in to your OneVue account.
13.
If the LCD screen does not display Signal OK, it's recommended to initiate a manual check-in to validate the device can connect
to your facility’s network at the installation location. Press and release check-in button .
The device's LCD displays its check-in connection sequence.
Number 1 displayed - radio powered on
Numbers 12 displayed - connected to facility's Ethernet or Wi-Fi network
Numbers 123 displayed - connected to NTP Server and obtained UTC Time
Numbers 1234 displayed - connected to OneVue; sends Smart-Sync Clock statuses to OneVue and downloads update pending
25
Smart-Sync™ Bridge Install Guide