4
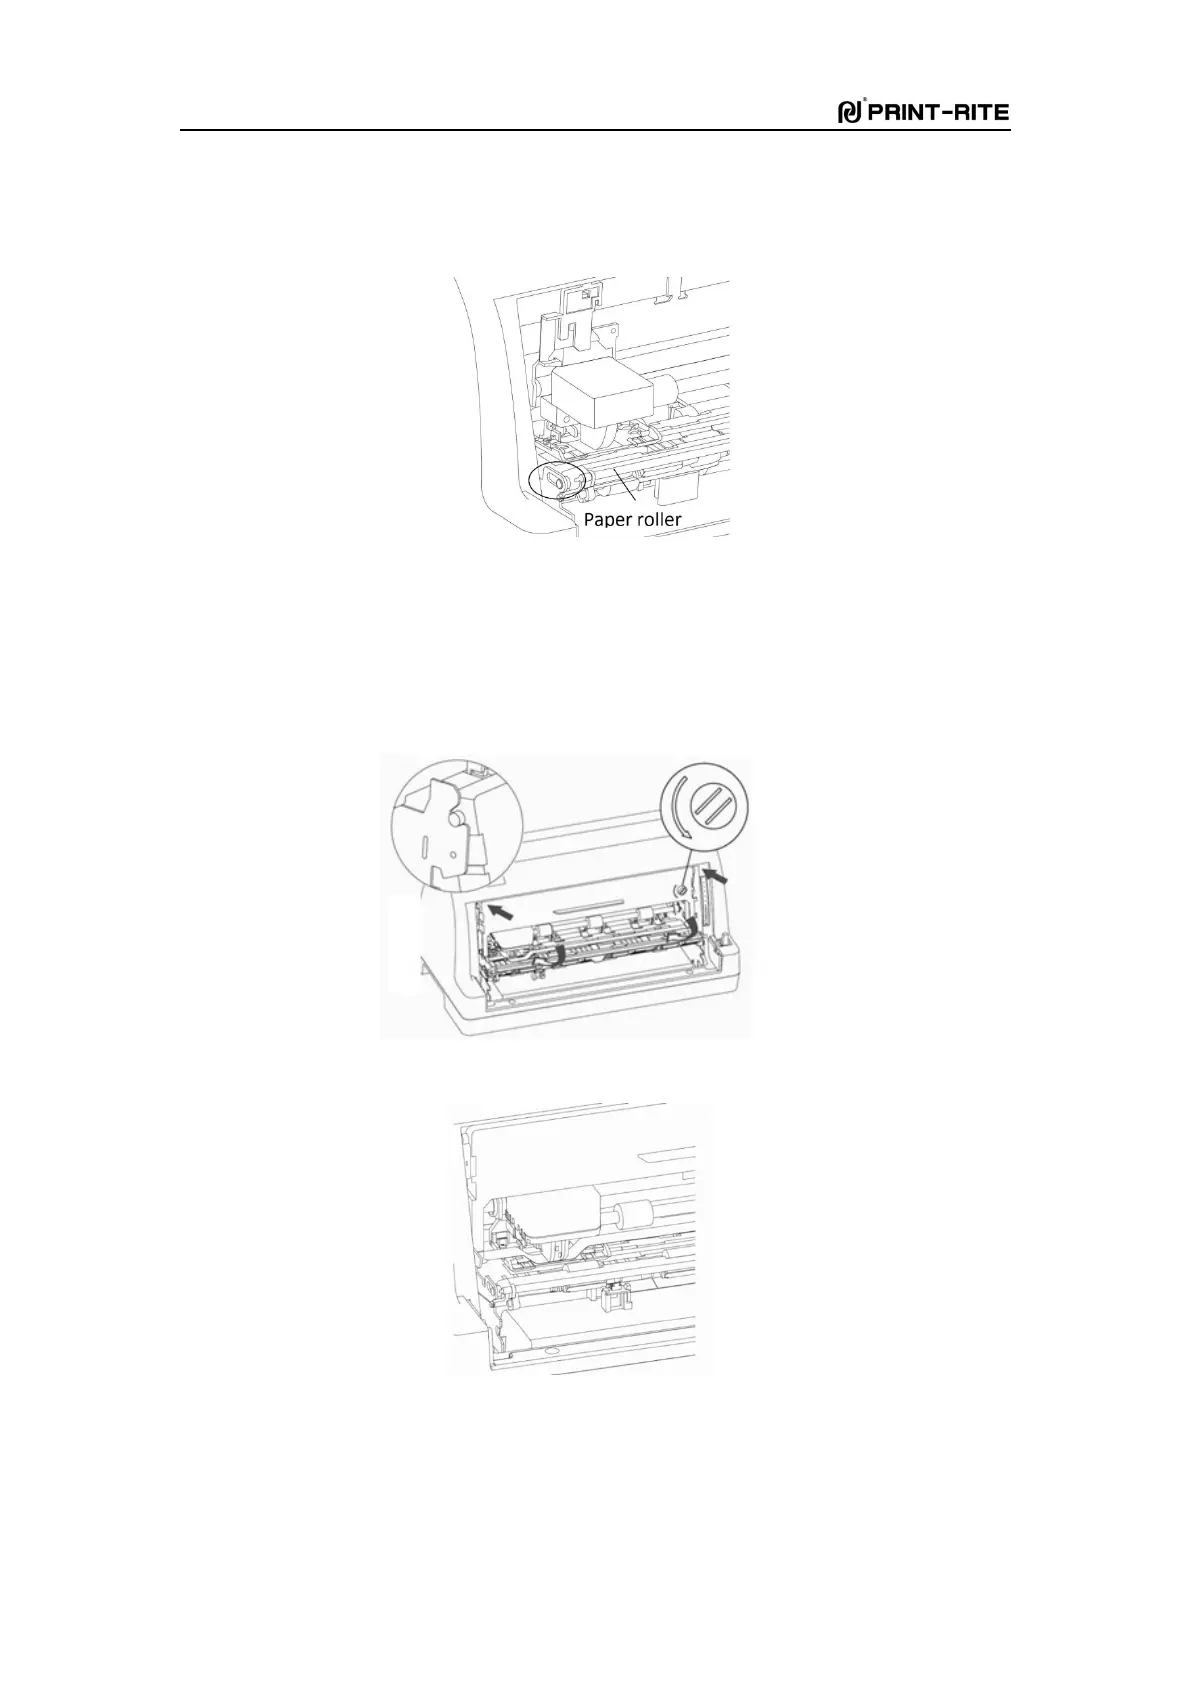
3)
Pull out the paper roller cage horizontally outward to the maxium, flip it upwards to the
position as Fig. 1-6, and move the printhead leftward to the place which is near the left rack
about 1cm.
Fig. 1-6
4)
Take out the ribbon cartridge, turn the knob anticlockwise as Fig. 4 to tighten the ribbon.
Insert the fixed point into the frame in the direction of the arrow, then turn the ribbon
cartridge till it enter into the rack totally. At last, turn the knob again to feed the ribbon
down in to the printhead totally, see Fig. 1-8.
Fig. 1-7
Fig. 1-8
5)
Turn the paper roller cage inwards to the original position as Fig. 1-9 and close the
transparent cover. Installation is done.