SECTION 2
INSTALLING THE PRINTER
20
Procedure (Installing the Printhead):
This procedure assumes that you are installing a Printhead Cartridge into a printer that does NOT have a
Printhead Cartridge installed. If your printer already has a Printhead Cartridge installed, and you wish to
replace the Printhead Cartridge; please refer to the section titled “Replacing the Printhead Cartridge”.
1. Plug in the printer. Turn the printer’s Main Power Switch ON; then press the control panel’s ON/OFF
button. Wait about 45 seconds for the print engine to power-up (ON/OFF button will illuminate).
2. Open the Top Cover.
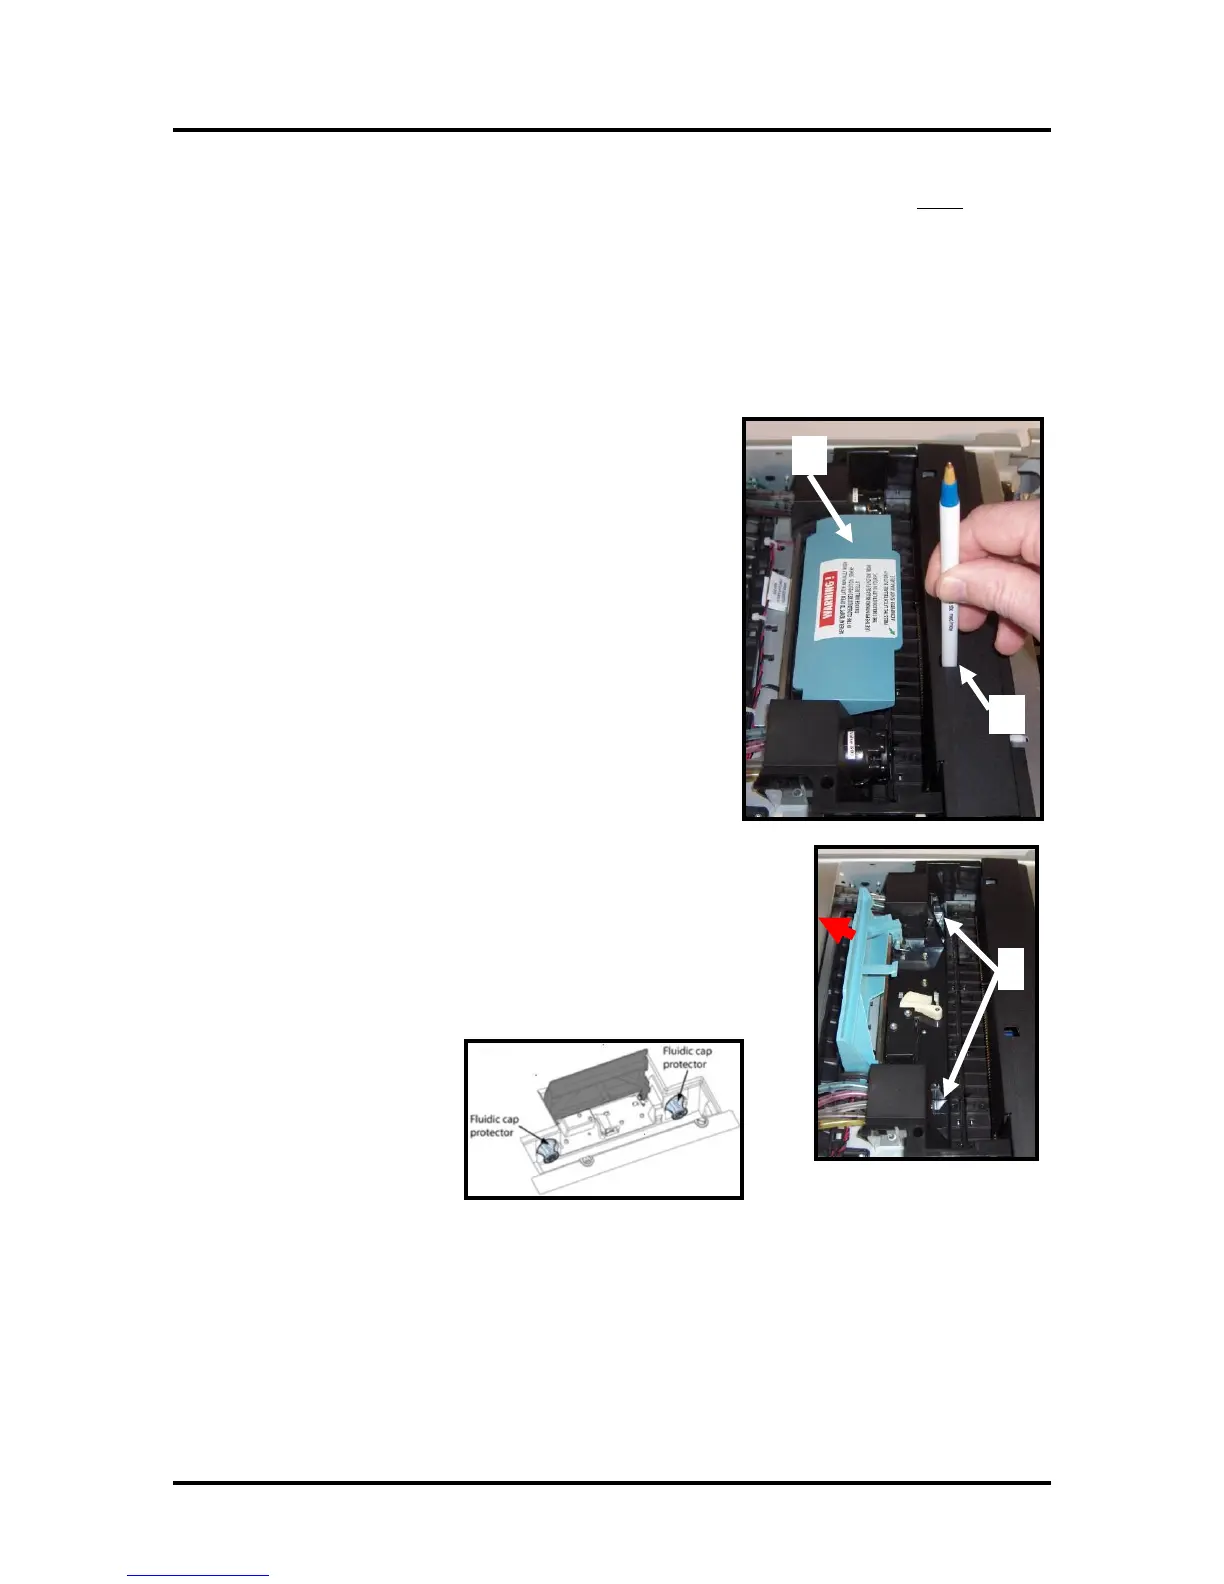
3. If the Printhead Latch [2] is closed; press the “Printhead Latch
Release” button [1]; as shown.
Use a non-metallic item (example: plastic pen) to reach
through the hole and lightly press the button.
The printer will run a routine and then the Printhead Latch [2]
will release so it can be opened.
WARNING! If the printhead latch fails to release do not force
the latch open. Severe damage will result.
Tip: You can perform this same function from your computer
by clicking “Printhead Release” from the “Services” tab of the
“M Series Driver” properties, or the “User Interface” screen of
the M Series “Toolbox” utility.
4. Open the Printhead Latch all the way to fully retract the Ink Couplings
[3].
WARNING! Do not force the latch open or severe damage will result.
Use the “Printhead Latch Release” button.
5. Be sure that all protective packaging materials [4] are removed from
the Ink Coupling [3] areas.