10
11. Make sure that all parts are properly tightened before you use the treadmill. If there are sheets of clear
plastic on the treadmill decals, remove the plastic. To protect the floor or carpet, place a mat under the tread-
mill. Keep the included hex keys in a secure place; the large hex key is used to adjust the walking belt (see
pages 20 and 21).
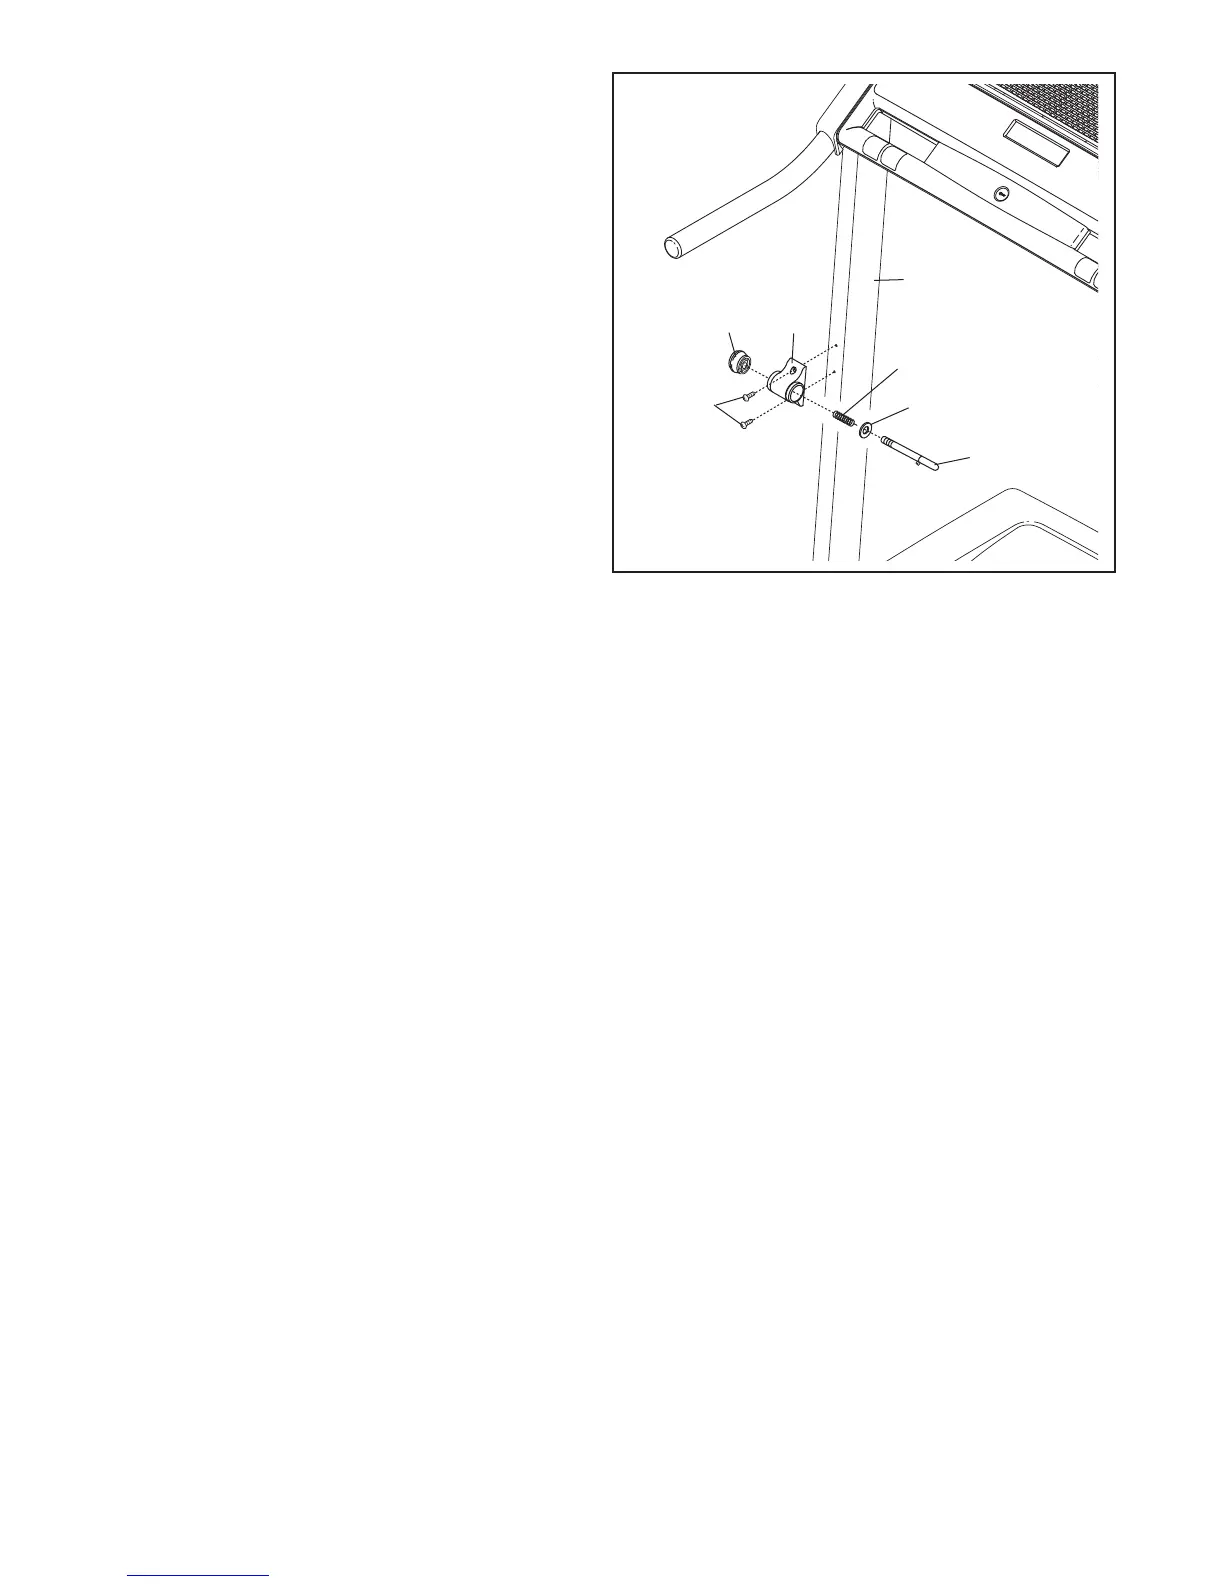
10. Attach the Latch Housing (70) to the Left Upright
(
73) with two M4 x 19mm Latch Screws (A).
Make sure that the large hole in the Latch
Housing is on the side shown. Do not over-
tighten the Screws.
Remove the knob from the latch pin. Make sure
that the collar and the spring are on the latch
pin. Then, insert the latch pin into the Latch
Housing (70), and tighten the knob back onto
the latch pin.
A
Spring
Knob
70
1
0
7
3
Pin
Collar





 To Next Page