11
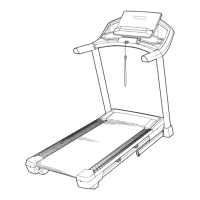
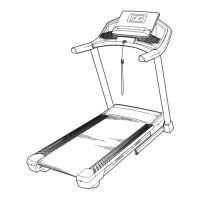
6. Attach a Handrail (84) to the Right Upright (90)
with a 5/16" x 2 1/2" Screw (28) and a 5/16" Star
Washer (11) in the location shown. Make sure
not to pinch the Upright Wire (81). Do not
fully tighten the Screw yet.
Attach the other Handrail (not shown) to the
Left Upright (89) in the same way. Note: There
are no wires on the left side.
Then, remove and discard the two indicated
screws (E) from each Handrail (84) (only one
Handrail is shown).
11
81
84
E
28
6
90
93
84
84
7
81
A
28
11
9
5
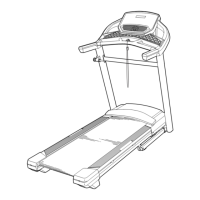
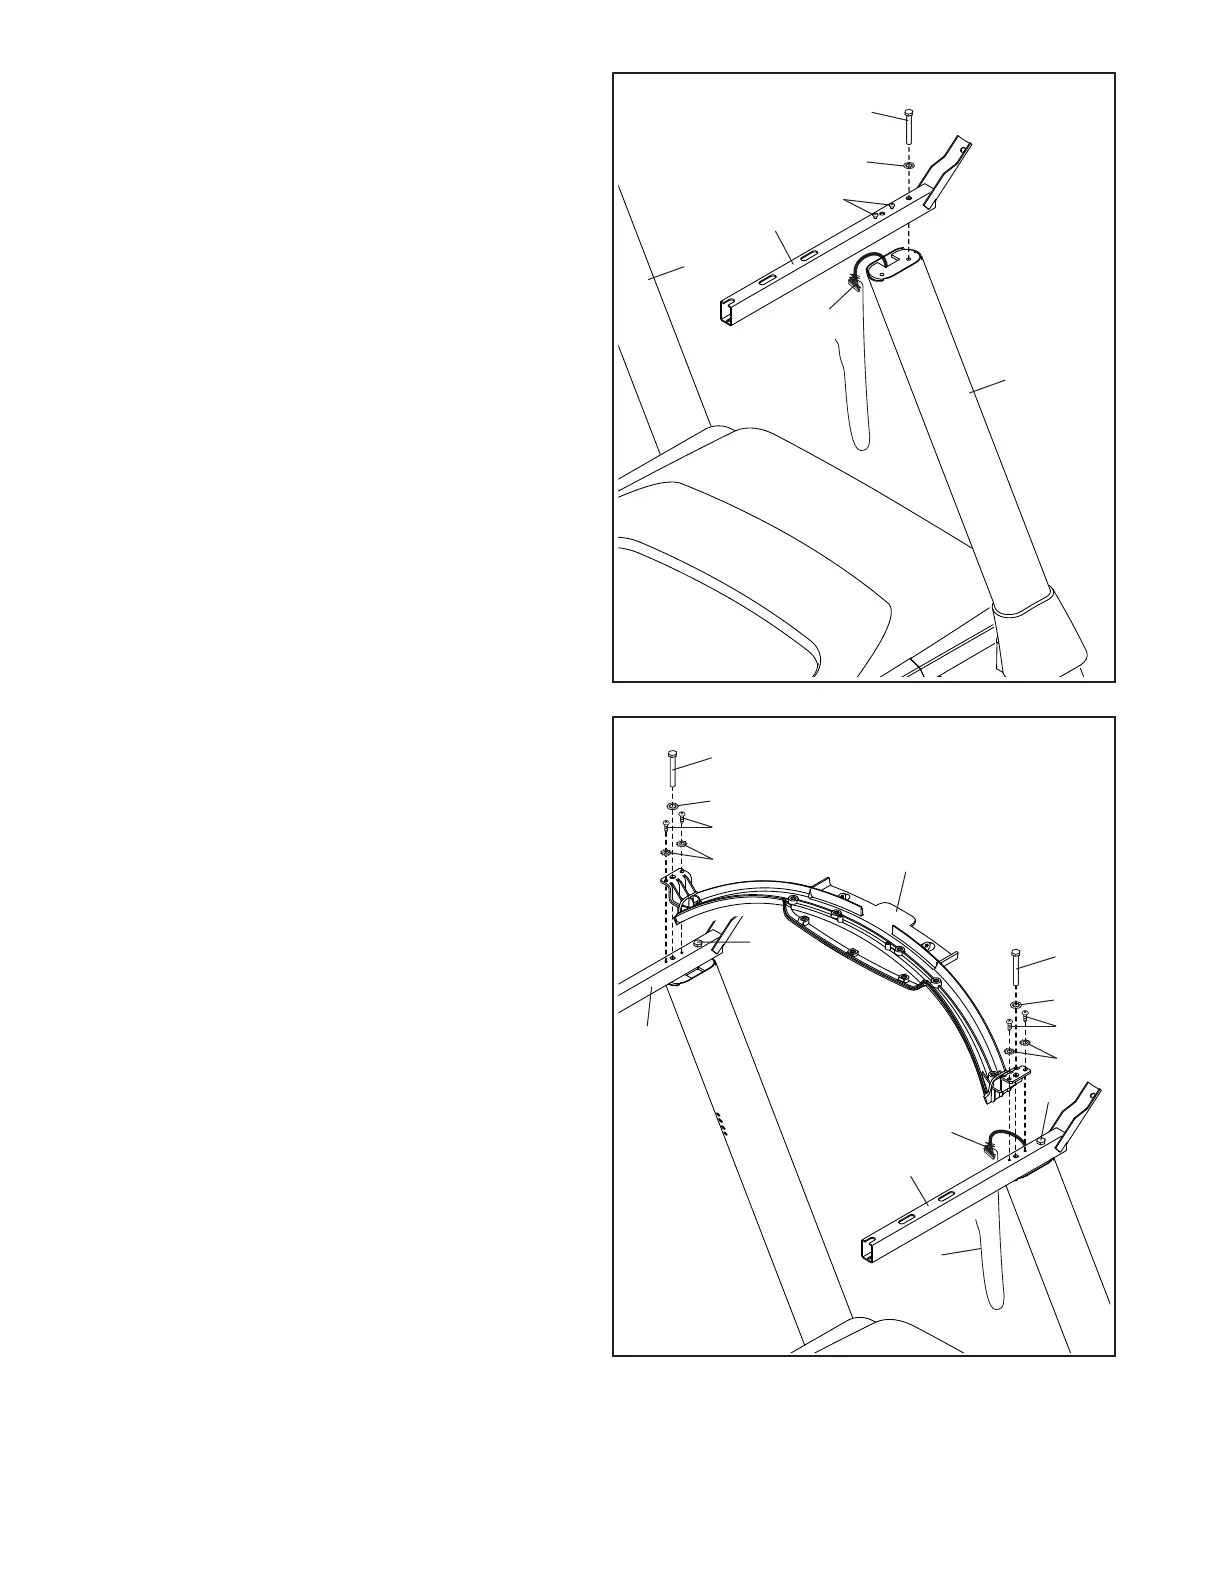
7. IMPORTANT: To avoid damaging the Pulse
Crossbar (93), do not use power tools and do
not overtighten the #10 x 3/4" Screws (9).
Orient the Pulse Crossbar (93) as shown. Attach
the Pulse Crossbar to the Handrails (84) with
four #10 x 3/4" Screws (9) and four #10 Star
Washers (5); start all four Screws, and then
tighten them. Make sure not to pinch the
Upright Wire (81).
Tighten two 5/16" x 2 1/2" Screws (28) with two
5/16" Star Washers (11) into the Pulse Crossbar
(93) as shown.
Next, firmly tighten the four 5/16" x 2 1/2"
Screws (28).
Then, remove the wire tie (A) from the Upright
Wire (81).
28
28
28
11
9
5
89
 Loading...