8
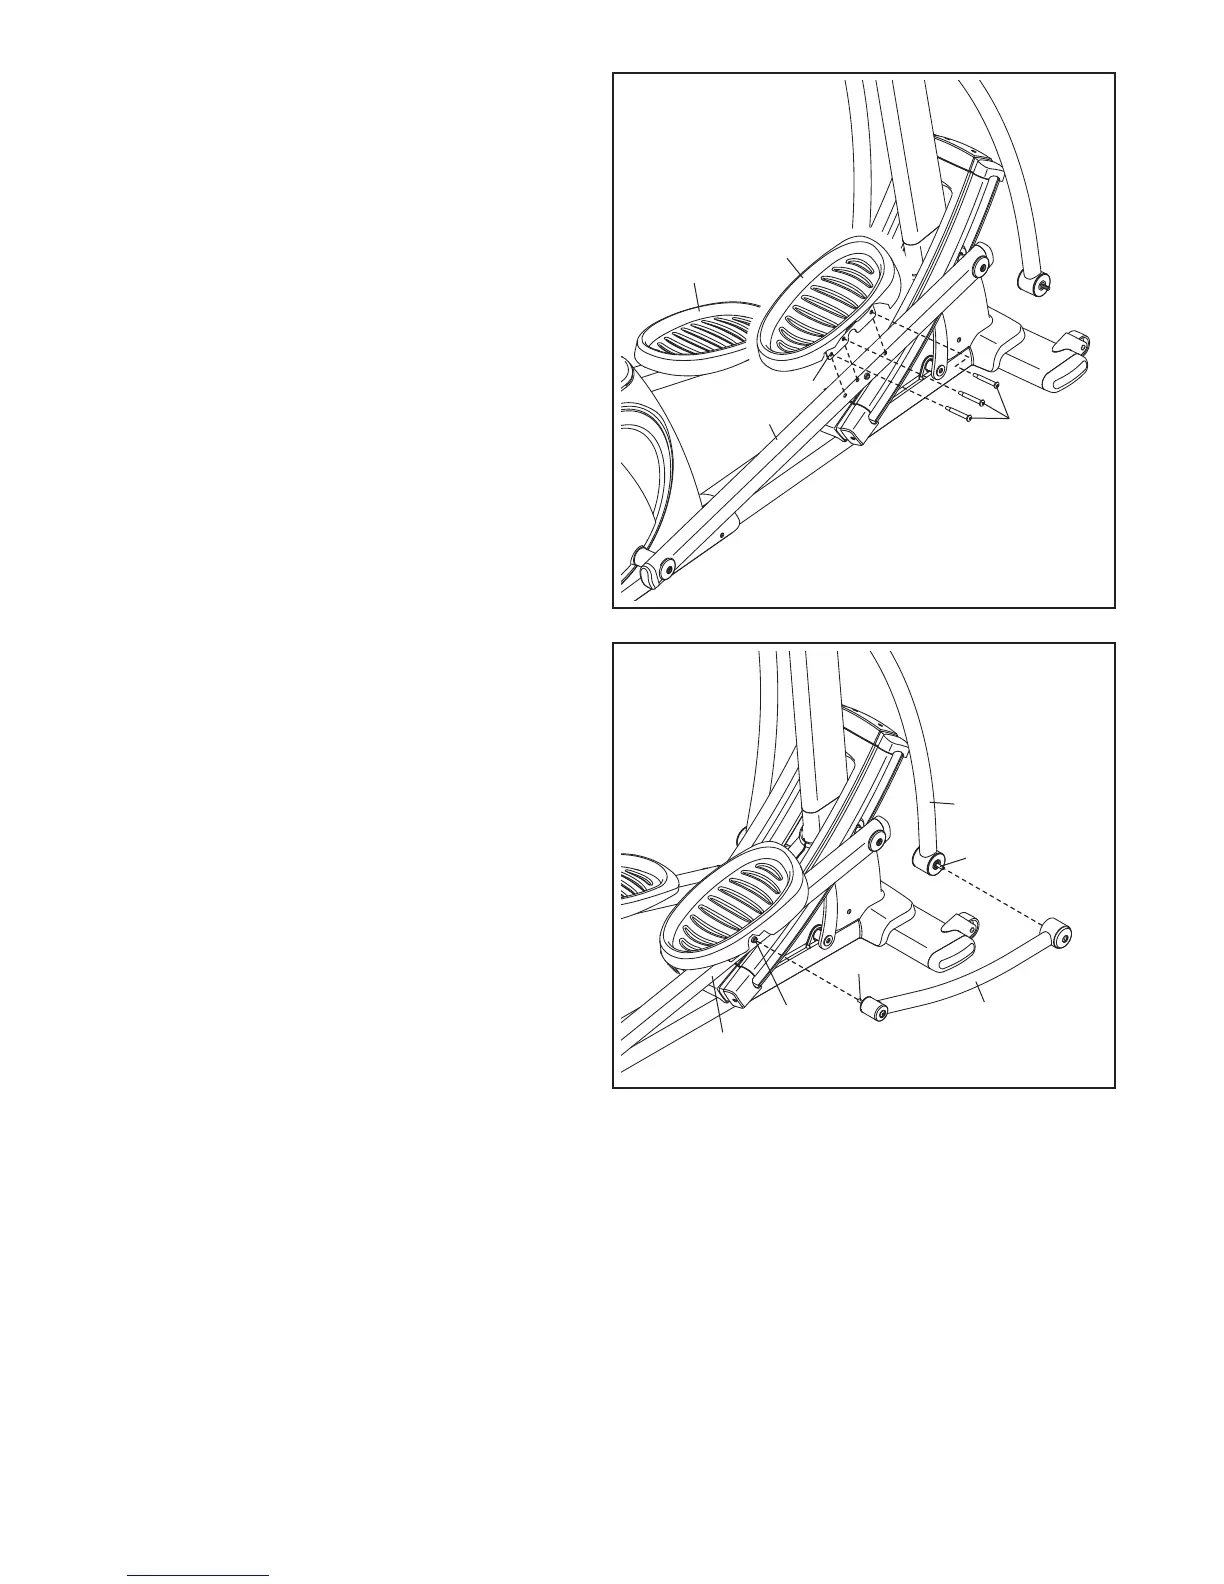
6. Identify the Right Link Arm (10), which is
marked with a “Right” sticker.
Locate the M12 x 97mm Shoulder Patch Screw
(71) in one end of the Right Link Arm. Turn the
Shoulder Patch Screw into the indicated post on
the Right Pedal Arm (8) halfway.
Next, locate the M12 x 97mm Shoulder Patch
Screw (71) in the Right Upper Body Leg (12).
Tighten the Shoulder Patch Screw into the post
on the Right Link Arm (10).
Finish tightening the M12 x 97mm Shoulder
Patch Screw (71) into the Right Pedal Arm (8).
Repeat this step to attach the Left Link Arm
(not shown).
6
5
5. Identify the Right Pedal Plate (107), which is
attached to the Right Pedal (62). The Right
Pedal is marked with a “Right” sticker.
Attach the Right Pedal Plate (107) to the Right
P
edal Arm (8) with three 3/8" x 2 1/2" Patch
Screws (88).
Repeat this step to attach the Left Pedal
Plate (not shown) and the Left Pedal (56).
62
56
88
Post
8
10
12
107
8
71
71
 Loading...