B
A
Connection
Insert the plug-in receiver into plug-in
socket X9.
Teaching-in the transmitter codes
Press the programming button (A)
and hold for more than 1.6 seconds. The
programming mode is activated. The LED (B)
ashes.
Press the channel button on your
transmitter.
Once the remote control has saved the
transmitter code, the LED lights up for
approximately 4 seconds.
It is possible to teach-in up to 15 transmitter codes. If all
memoryspacesarefull,theLEDashesrapidly.
Selectively deleting a transmitter code
Press the programming button (A) and hold for more than
1.6 seconds. The programming mode is activated.
TheLED(B)ashes.
Keep pressing the programming button. The delete mode is
activated.TheLEDashesveryfast.
Press the required channel button on your transmitter.
When the LED lights up for approximately 4 seconds, the
transmitter code in question has been deleted.
Thedeletionprocedurecanbecancelledbybrieypressing
the programming button.
RESET (DELETE ENTIRE MEMORY)
Press the programming button (A) and hold for more than
1.6 seconds. The programming mode is activated.
TheLED(B)ashes.
Keep pressing the programming button.
Thedeletemodeisactivated.TheLEDashesveryfast.
Press the programming button again for more than
1.6 seconds.
When the LED lights up for approximately 4 seconds, all of
the memory spaces have been deleted.
Thedeletionprocedurecanbecancelledbybrieypressing
the programming button.
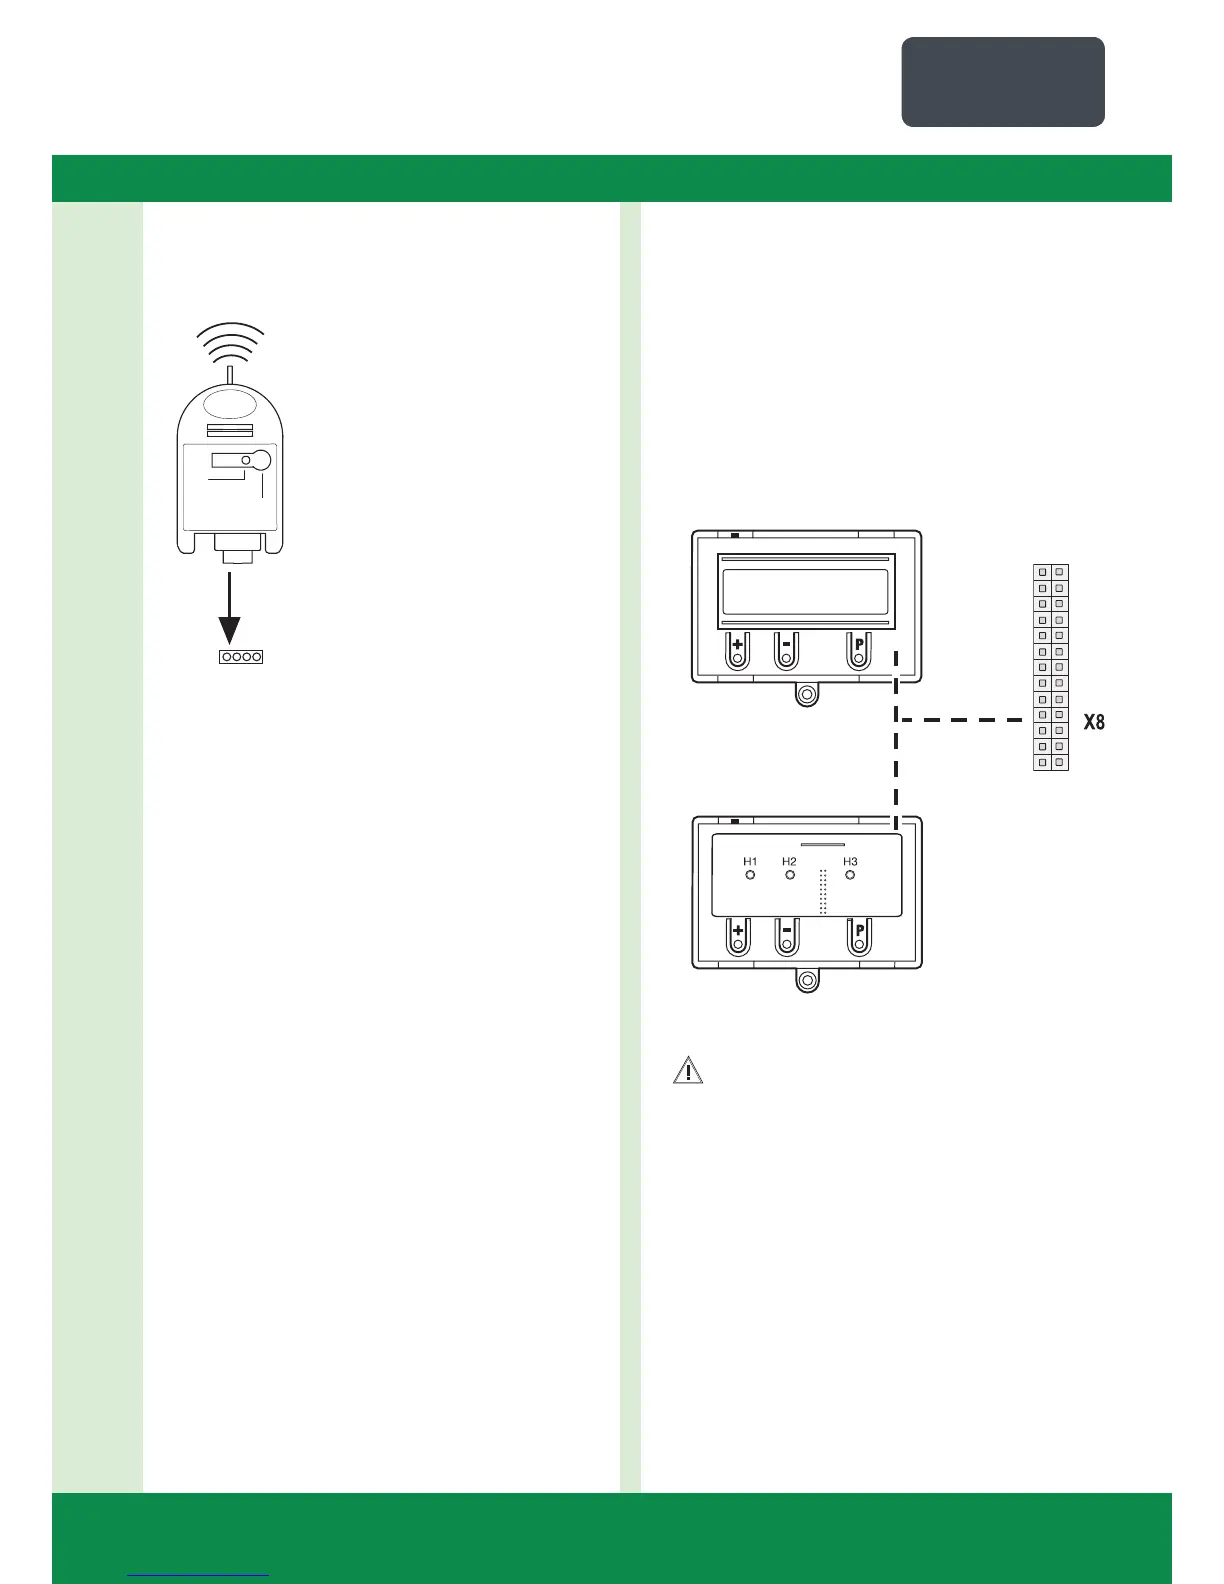
5.12 Connection for LCD monitor / LED module
With the LCD monitor, you have complete access to all of the
menu settings and parameters of the control unit.
Ô “7. Programming“
The LED module can only be used to set the two end
positions.
Ô “7. Programming“
Plug-in socket X8
*
* either/or