EasyManua.ls Logo

Pro1 Technologies T755WHO - User Manual

Pro1 Technologies T755WHO
11 pages
Print Icon
To Next Page IconTo Next Page
Loading...
T755WHO
Installation Manual
Thermostat Application Guide
Description
Gas or Oil Heat
Electric Furnace
Heat Pump (No Aux. or Emergency Heat)
Heat Pump (With Aux. or Emergency Heat)
Multi-Stage Systems
Heat Only Systems
Cool Only Systems
Millivolt
Yes
Yes
Yes
Yes
Yes
No
Power Type
Battery Power*
Hardwire (Common Wire)
Hardwire (Common Wire) with
Battery Backup
Table of Contents
Installation Tips
Private Label Badge
Thermostat Quick Reference
Wireless Communication Tips
Connecting To The PROsync
Wireless System
Wiring The Equipment Module
Wiring
Benets To Using The PROsync
Wireless System
Technician Setup Menu
Setting the Humidity
Programming
Specications
Page
A trained, experienced
technician must install this
product.
Carefully read these
instructions. You could damage
this product or cause a
hazardous condition if you fail
to follow these instructions.
Una version en español de este
manual se puede descargar en
la pagina web de la compañia.
Rev. 2321
U.S. Registered Trademark. Patents pending
Copyright 2023 All Rights Reserved.
2-6
11
1
Yes
Yes
12
Installation Tips
2
Installation Tips
The thermostat should be installed approximately 4 to 5 feet above the
oor. Select an area with average temperature and good air circulation.
• Close to hot or cold air ducts
That are in direct sunlight
With an outside wall behind the thermostat
• In areas that do not require conditioning
Where there are dead spots or drafts (in corners or behind doors)
Where there might be concealed chimneys or pipes
Wall Locations
Pick an installation location that is easy for the user to access. The temperature
of the location should be representative of the building.
Installation Tip
Do not install thermostat in these locations:
3
4
Installation Tips
13-16
17-18
8-9
7
10
19-35
36
Humidity
Dual Fuel
Yes
Yes
Pro1 Technologies
Toll Free: 888-776-1427
Web: www.pro1iaq.com
Hours of Operation: M-F 9AM - 6PM Eastern
P.O. Box 3377
Springeld, MO 65808-3377
37-42
43-44
When performing an attic installation, instead of placing the
equipmentmodule in the attic, locate the closet nearest to the air
conditioning unit. We reccomend mounting the Equipment module
high on the wall inside the closet or on the ceiling of the closet. This
location will insure the equipment module is below the 150°F
maximum ambient temperature specication while also allowing easy
technician viewing.
Installation Tips
Do not install the base module in locations:
That are behind a chimney
Where temperature could exceed 150°F
Where rain or snow or extreme hot or cold is possible
Note: This base module is NOT weatherproof.
Equipment Module -Attic Location
The PROsync System has been tested in many dierent types of building construction including wood, steel beam, and brick in spaces over
5500 square feet. The wireless range performs well across multiple oors successfully. The PROsync radios constantly search for open
channels to avoid interference and ensure messages are received. The PROsync system has been shown to reliably transmit data across
hundreds of feet indoors and over 1000 feet line of sight.
Living space
closet
Attic
Good
Living Space
Good
Good
No
Wireless Range
Equipment Module - Basement Location
*PM-T755WHO-IM-2321*
PM-T755WHO-IM-2321
Question and Answer IconNeed help?

Do you have a question about the Pro1 Technologies T755WHO and is the answer not in the manual?

Summary

Installation Tips

Wall Locations

Describes ideal placement for the thermostat.

Equipment Module Location

Recommends placement for attic and basement modules.

Installation Restrictions

Lists unsuitable locations for thermostat and base module.

Thermostat Subbase Installation

Electrical Hazard Warning

Warns about disconnecting power before installation.

Mercury Disposal Information

States products are mercury-free and advises proper disposal.

Wiring Guidance

Provides specific wiring instructions for modules and connections.

Thermostat Quick Reference

Getting to know your thermostat

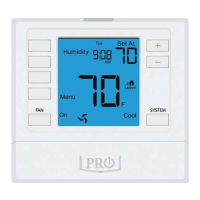
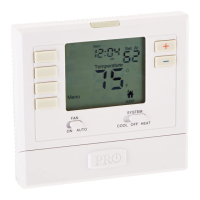
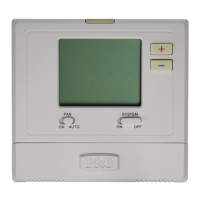
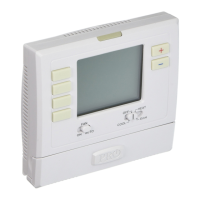
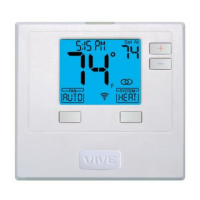
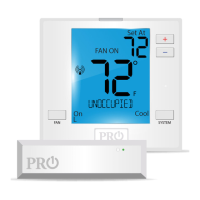
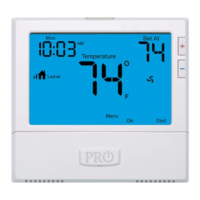
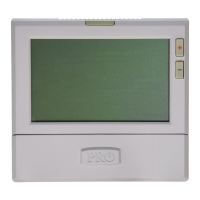
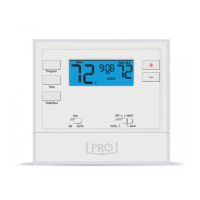
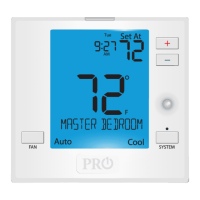
Explains thermostat display and button functions.

Wireless Communication Setup

Setup Steps

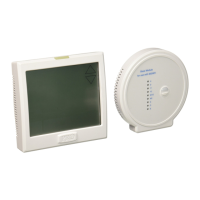
Outlines the process to establish wireless communication.

Private Label Badge

Removing the Badge

Instructions on how to detach the magnetic badge.

Adding A Remote Sensor

Establishing Communication

Describes how to link remote sensors to the equipment module.

Network Troubleshooting

Provides guidance for connectivity issues between devices.

Wiring For The Equipment Module

Electrical Hazard Caution

Warns about electrical risks during installation.

Wiring Instructions

Details connection steps, tips, and specifications for wiring.

Terminal Explanations

Clarifies the function of specific terminals like C and D.

Wiring Terminals

Equipment Module Terminals

Details terminal functions for different system types.

Master Thermostat Terminals

Details terminal functions for the main thermostat.

Wiring Tips and Diagrams

Provides connection guidance and typical system examples.

PROsync Wireless System Benefits

System Averaging

Averages readings from multiple remotes for accurate home temperature.

Scheduling

Allows different rooms to be controlled at different times of day.

Occupancy Sensing Modes

Utilizes built-in sensors to adjust comfort based on room occupancy.

Wiring Diagrams

Typical 2 H;2 C System (2 Transformer)

Illustrates wiring for a two-stage heat, two-stage cool system.

Typical Cool-Only System

Illustrates wiring for a cool-only system with fan.

Typical Heat Only System

Illustrates wiring for a heat-only system with fan.

Typical 2 H;1 C Heat Pump System

Illustrates wiring for a two-stage heat, one-stage cool heat pump.

Technician Setup Menu

PTAC Mode and Fan Speeds

Configures settings for PTAC units and fan speed control.

Filter Change Reminder

Sets up reminders for air filter replacement based on runtime.

Room Temperature Calibration

Adjusts the displayed room temperature reading.

Swing Settings

Adjusts cycle rate for heating and cooling for comfort control.

Technician Setup: System Configuration

Dual Fuel and Heat Pump Settings

Configures auxiliary heat type and heat pump operation.

Fan and Compressor Controls

Sets fan operation, minimum compressor run time, and short cycle delay.

Cooling Fan Delay

Manages fan operation timing for cooling mode.

Program Options

Selects between 7-day, 5+1+1, or non-programmable schedules.

Technician Setup: IAQ and Air Quality

IAQ Mode Cycle and Minutes

Configures fan cycles per hour and minimum runtime for IAQ mode.

Fresh Air Mode and Terminal

Enables fresh air intake and selects the terminal for damper control.

Technician Setup: Temperature Limits

Heat and Cool Setpoint Limits

Sets maximum heating and minimum cooling setpoint limits.

Cycle Minimizer

Adjusts swing settings to reduce system cycles during unoccupied periods.

Keypad Lockout

Configures the thermostat to restrict access to keys or functions.

Technician Setup: Free Cooling and Dual Fuel

Free Cooling Terminal

Selects a terminal for free cooling functions.

Dual Fuel Balance Point

Configures system behavior based on outdoor temperature for dual fuel.

Electric Auxiliary Cut In;Out

Defines outdoor temperature points for electric auxiliary heat activation.

Technician Setup: Humidity Control

Humidify and Dehumidify Settings

Enables humidity addition in heat mode and removal in cool mode.

Balance Point Run Time

Sets how long auxiliary terminals energize after balance point is met.

Technician Setup: Display and Occupancy

Temperature Units and Clock Display

Selects Fahrenheit/Celsius and 12/24 hour clock format.

Display Light and Keypad Lockout

Configures display brightness and keypad access.

Freeze Protection

Enables protection to prevent freezing during communication loss.

Device Name and Pairing

Allows naming devices and pairing with the equipment module.

Technician Setup: Humidity Calibration

Humidity Calibration

Allows the installer to calibrate the ambient humidity display.

Automatic Humidity Adjusting

Adjusts indoor humidity based on outdoor temperature changes.

Dehumidify With AC

Forces A/C to run longer to remove humidity when needed.

Over Cool Limit

Sets the maximum degrees the thermostat will overcool to satisfy humidity.

Technician Setup: Occupancy Control

Occupancy Mode Selection

Chooses between 'Last Seen' or 'System Average' occupancy sensing.

Duration of Occupancy

Sets how long the thermostat stays in occupancy mode after sensing.

Occupied;Unoccupied Settings

Defines temperature setpoints for occupied and unoccupied states.

Setting The Humidity

Humidity Pad Reminder

Enables a reminder for the user to change the humidity pad.

UV Lamp Reminder

Enables a reminder for the user to change the UV light bulb.

IAQ Cell Reminder

Enables a reminder for the user to change the IAQ Cell.

Ambient Humidity Display

Shows ambient humidity and outdoor temperature if sensor is installed.

Programming

Set Time (If using programming)

Guides on setting the current day of the week and time.

Default Programming

Presents the factory default energy-saving program schedule.

Set Program Schedule For Four Time Periods

Instructions for customizing weekday, Saturday, and Sunday schedules.

Temporary & Permanent Hold Feature

Explains how to temporarily or permanently override the schedule.

Specifications

Temperature and Load Ratings

Details temperature display/control ranges and terminal load ratings.

Power Source and Dimensions

Specifies power requirements, operating ambient, and physical size.

FCC Compliance

States compliance with FCC rules and potential interference guidelines.

FCC RF Exposure Statement

Provides guidelines for safe installation and proximity to the body.

Pro1 Technologies T755WHO Specifications

General IconGeneral
BrandPro1 Technologies
ModelT755WHO
CategoryThermostat
LanguageEnglish

Related product manuals