34
4 PRESS AND HOLD THE P+ BUTTON TO CONFIRM YOUR CHANGE
The CDP’s display will show done when it has saved your choice to non-
volatile memory. You may either allow the CDP to time-out (return to nor-
mal operation), or press program + again to advance to user setting #3:
autostandby (see next section).
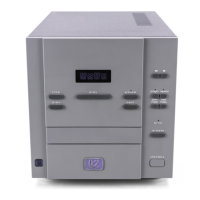
Autostandby The CDP can be set to automatically enter standby after a period of inactivity.
Specifically, you may elect to have the CDP enter standby after 5, 15, 30, or 60
minutes without a signal (e.g., CD in stop, or pause, or extended pause, or lack-
ing an active digital signal in one of the external digital inputs). You may also
elect to leave this autostandby feature in its default “off” setting (meaning that
the CDP will go into standby only when explicitly told to do so). To change your
autostandby preference:
1 PRESS AND HOLD P+ UNTIL THE LEFT DISPLAY SHOWS “U1”
This gets you into the User Setup menu (U1 stands for “User setting #1”).
2 PRESS P+ TWICE MORE TO ADVANCE TO “U3”
User Setting #3 is the for autostandby. You will notice either dashes or a
number displayed in the round display, corresponding to the number of
minutes selected (as shipped from the factory, you will see two dashes to
indicate autostandby off: --).
3 PRESS THE “PREV” OR “NEXT” BUTTON TO SELECT YOUR PREFERENCE
You may select autostandby off (--), or 5, 15 , 30, or 60 minutes. (Alternatively,
you may use up or down on the remote control.)
4 PRESS AND HOLD THE P+ BUTTON TO CONFIRM YOUR CHANGE
The CDP’s display will show done when it has saved your choice to non-
volatile memory. You may either allow the CDP to time-out (return to nor-
mal operation), or press program + again to return to user setting #1: fixed
or adjustable outputs.