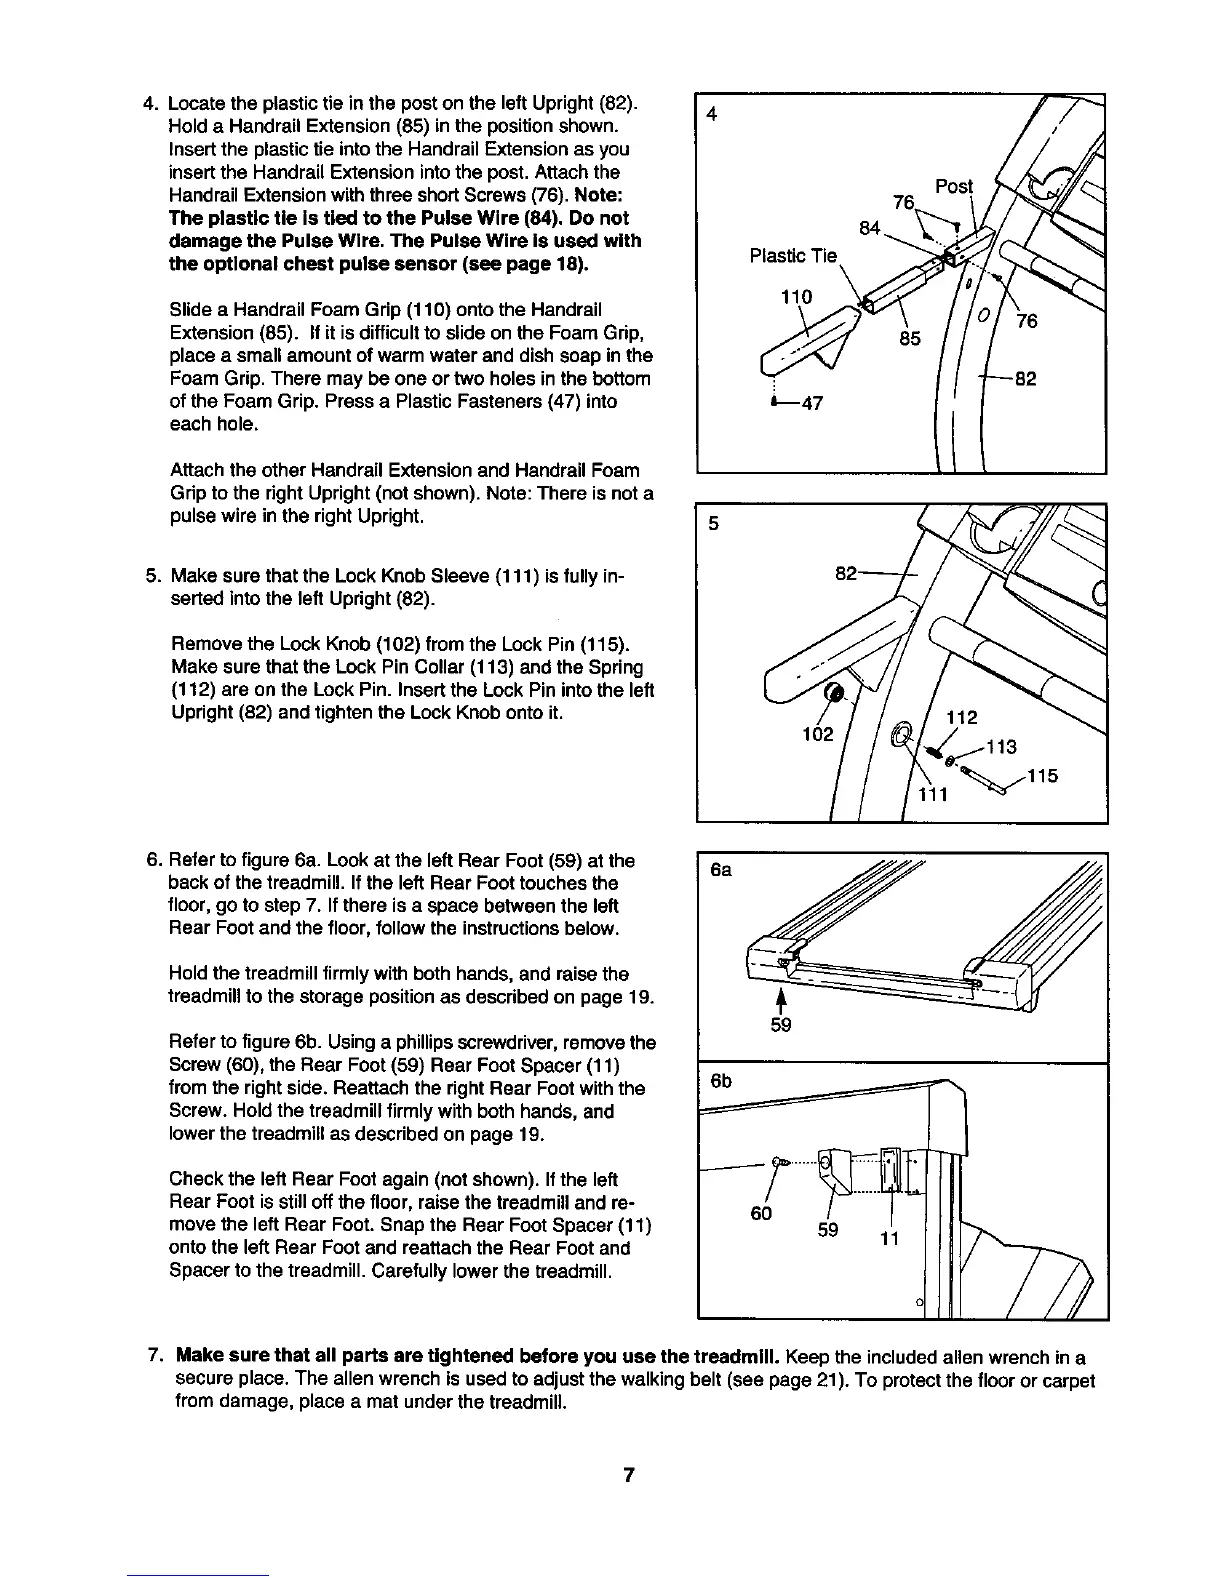
4. Locate the plastictie in the poston the left Upright (82).
Hold a Handrail Extension (85) in the positionshown.
Insertthe plastictie intothe Handrail Extensionas you
insertthe Handrail Extension intothe post. Attachthe
HandrailExtensionwiththree shortScrews (76). Note:
The plastic Ue Is tied to the Pulse Wire (84). Do not
damage the Pulse Wire. The Pulse Wire Is used with
the optional chest pulse sensor (see page 18).
Slidea Handrail Foam Grip (110) ontothe Handrail
Extension(85). I1itisdifficultto slideon the Foam Grip,
place a small amount ofwarm water and dish soap inthe
Foam Grip.There may be one or two holes in the bottom
of the Foam Grip. Press a PlasticFasteners (47) into
each hole.
Attachthe other Handrail Extensionand HandrailFoam
Gripto the rightUpright (not shown). Note: There is not a
pulsewire in the right Upright.
5. Make sure thatthe LockKnob Sleeve (111) is fully in-
serted into the left Upright(82).
Remove the Lock Knob (102) from the Lock Pin (115).
Make sure that the Lock Pin Collar(113) and the Spring
(112) are on the Lock Pin. Insertthe Lock Pininto the left
Upright(82) and tighten the Lock Knobontoit.
5
PlasticTie
110
102
Post
85
76
-82
-115
6. Refer to figure 6a. Lookat the left Rear Foot (59) at the
backof the treadmill. Ifthe left Rear Foottouches the
floor, go to step 7. Ifthere is a space between the left
Rear Footand the floor, follow the instructionsbelow.
Hold the treadmillfirmly with both hands,and raise the
treadmillto the storagepositionas describedon page 19.
Refer to figure 6b. Usinga phillipsscrewdriver,removethe
Screw (60), theRear Foot (59) Rear FootSpacer (11)
from the rightside. Reattach the rightRear Footwiththe
Screw. Hold thetreadmillfirmly with bothhands, and
lowerthe treadmillas describedon page 19.
Check the leftRear Foot again (not shown). If the left
Rear Foot is still off the floor, raise the treadmill and re-
move the left Rear Foot. Snap the Rear Foot Spacer (11)
onto the left Rear Foot and reattach the Rear Foot and
Spacer to the treadmill. Carefully lower the treadmill.
6a
6b
59
60
7. Make sure that all parts are tightened before you use the treadmill. Keep the includedallen wrenchin a
secure place. The allenwrenchis used toadjustthe walkingbelt (see page 21).To protectthe flooror carpet
from damage, place a mat underthe treadmill.
7