Do you have a question about the ProForm CADENCE LX25 and is the answer not in the manual?
Toll-free number for immediate customer assistance from trained technicians.
Read all precautions and instructions before using the equipment.
Place on a level surface with clearance and consider floor protection.
Keep children/pets away, adhere to weight limits, wear proper attire.
Use surge protector, grounded outlets, and keep cords away from heat.
Hold handrails, adjust speed gradually, inspect parts regularly.
Consult physician before exercise; heed safety decal warnings.
Read manual carefully before use. Contact customer service for questions.
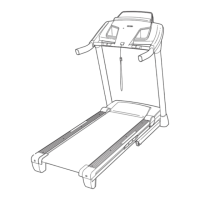
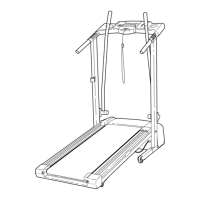
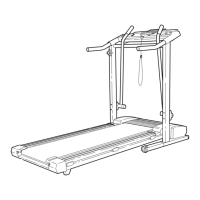
Familiarize yourself with the labeled parts of the treadmill.
Requires two people, cleared area, packing materials, and specific tools.
Lay treadmill on its side and attach extension legs with screws.
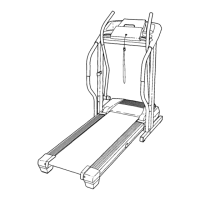
Carefully raise the treadmill to the upright position.
Insert handrails into console and secure with console plate screws.
Features Performant Lube. Do not apply silicone spray or other substances.
Steps for connecting power, using surge protectors, and grounding.
Description of TIME, DISTANCE, CALORIES, SPEED, and PULSE displays.
Controls for adjusting speed, including training zones.
Location and function of the pulse sensor for heart rate monitoring.
Do not stand on belt when starting; wear safety clip; adjust speed gradually.
Ensure power cord is plugged in and key is attached to clothing.
Insert key to activate displays; press ON/RESET or start belt to turn on.
Turn speed control counterclockwise to RESET before restarting belt.
Turn speed control clockwise to start belt at slow speed, then step on.
Understand the DISTANCE, TIME, CALORIES, and SPEED displays.
Place thumb on pulse sensor, apply pressure, and hold for reading.
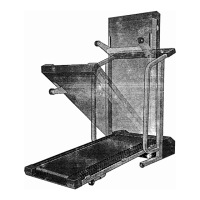
Unplug cord. Hold treadmill, lift halfway, secure storage latch over catch.
Place mat under treadmill, keep out of direct sunlight, avoid high temperatures.
Ensure storage latch is closed. Tilt back, roll on front wheels, move carefully.
Press storage latch with thumb, pivot treadmill, and lower to floor.
Solve problems by following steps; call customer service if needed.
Check cord, surge protector, outlet, and key insertion.
Check circuit breaker, cord connection, and key insertion.
Check batteries. Verify reed switch and magnet alignment for speed reading.
Check surge protector. Adjust rear roller bolts if belt is overtightened or loose.
Adjust rear roller bolts to center the belt if it shifts left or right.
Tighten both rear roller bolts to correct belt slippage.
Consult physician before exercise; use pulse sensor as an aid.
Use heart rate chart for fat burning, aerobic, and performance intensity.
Structure workouts with warm-up, training, cool-down, and aim for 3+ weekly sessions.
Basic stretches with descriptions and target muscles for flexibility.
Call customer service with product model, name, serial number, and key/part numbers.
90-day warranty for defects, excludes damage from misuse or unauthorized repair.