Installation
Wall Mounted
Mount on a Wall
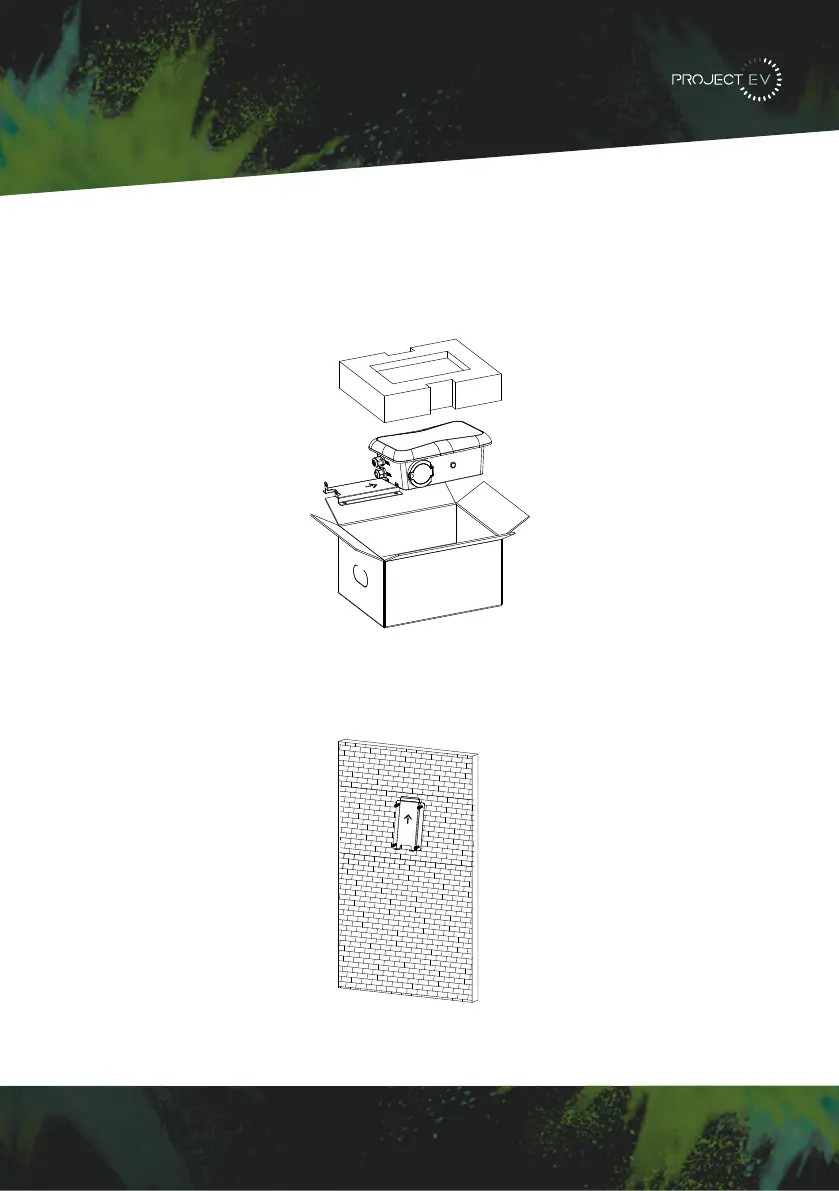
1. Open the packaging, you’ll see a charge point, a mounting bracket, and a bag of
mounting accessories. There is also an RFID card (where applicable), if the charge point is
an RFID version.
2. Remove the mounting bracket from the charge point, use it as a template to mark the
position of the 10mm drill holes. Drill the holes and hammer the expansion bolts in the
accessories bag into the holes. Then use the fixings provided to fit bracket to wall.
,, 3DFNDJLQJOLVW
1R 1DPH
4W\
5HPDUN
&KDUJHU
8VHUPDQXDO
4XDOLW\FHUWLILFDWH
0RXQWLQJEUDFNHW
&DEOHKRRN
67;
6WDLQOHVVVWHHOKH[KHDG
VHOIGULOOLQJVFUHZV
;
3ODVWLFH[SDQVLRQSOXJV
)RUFDEOHGYHUVLRQ
IRUVRFNHWYHUVLRQIRUFDEOHG
YHUVLRQRIWKHVFUHZVDUH
IRUFDEOHKRRNIL[LQJ
IRUVRFNHWYHUVLRQIRU
FDEOHGYHUVLRQRIWKHSOXJV
DUHIRUFDEOHKRRNIL[LQJ
,,, ,QVWDOODWLRQDQGZLULQJ
0RXQWRQDZDOO
2SHQWKHSDFNDJLQJ\RX¶OOVHHDFKDUJHSRLQWDPRXQWLQJEUDFNHWDXVHUPDQXDO
DQGDEDJRIPRXQWLQJDFFHVVRULHV7KHUHLVDOVRDQ5),'FDUGLIWKHFKDUJHSRLQWLV5),'
YHUVLRQ)RUFDEOHGYHUVLRQDFDEOHKRRNHULVDOVRLQFOXGHGLQVLGH
5HPRYHWKHPRXQWLQJEUDFNHWIURPWKHFKDUJHSRLQWXVHLWDVDWHPSODWHWRPDUN
WKH SRVLWLRQ RI WKH GULOO KROHV 'ULOO WKH KROHV DQG KDPPHU WKH H[SDQVLRQ EROWV LQ WKH
DFFHVVRULHVEDJLQWRWKHKROHV7KHQIL[WKHPRXQWLQJEUDFNHWRQWRWKHZDOO
8VHUFDUG
5),'IXQFWLRQZLOOEHHTXLSSHG
ZLWKXVHUFDUG
II. Packaging List III. Installation and wiring
No. Name Qty Remark
1 Charger 1
2 User manual 1
3 Quality certicate 1
4 Mounting bracket 1
5 Cable hook 1 For cables version
6
ST6.3X40
Stainless steel hex-head
self drilling screws
4-7
4 for socket version, 7 for cabled
version (3 of the 7 screws are for
cable hook xing
7
12x46
Plastic expansion plugs
4-7
4 for socket version, 7 for cabled
version (3 of the 7 screws are for
cable hook xing
8 User card 1
RFID function will be equipped with
user card
3.1 Mount on a wall
3.1.1 Open the packaging, you’ll see a charge point, a mounting bracket, a user manual
and a bag of mounting accessories. There is also an RFID card if the charge point is
RFID version. For cabled version, a cable hooker is also included inside.
3.1.2 Remove the mounting bracket from the charge point, use it as a template to mark
the position of the drill holes. Use the expansion bolts from the accessories bag and
hammer these into the drilled holes. Then x the mounting bracket onto the wall.
6 7
,, 3DFNDJLQJOLVW
1R 1DPH
4W\
5HPDUN
&KDUJHU
8VHUPDQXDO
4XDOLW\FHUWLILFDWH
0RXQWLQJEUDFNHW
&DEOHKRRN
67;
6WDLQOHVVVWHHOKH[KHDG
VHOIGULOOLQJVFUHZV
;
3ODVWLFH[SDQVLRQSOXJV
)RUFDEOHGYHUVLRQ
IRUVRFNHWYHUVLRQIRUFDEOHG
YHUVLRQRIWKHVFUHZVDUH
IRUFDEOHKRRNIL[LQJ
IRUVRFNHWYHUVLRQIRU
FDEOHGYHUVLRQRIWKHSOXJV
DUHIRUFDEOHKRRNIL[LQJ
,,, ,QVWDOODWLRQDQGZLULQJ
0RXQWRQDZDOO
2SHQWKHSDFNDJLQJ \RX¶OOVHHDFKDUJHSRLQW DPRXQWLQJEUDFNHWDXVHUPDQXDO
DQGDEDJRIPRXQWLQJDFFHVVRULHV7KHUHLVDOVRDQ5),'FDUGLIWKHFKDUJHSRLQWLV5),'
YHUVLRQ)RUFDEOHGYHUVLRQDFDEOHKRRNHULVDOVRLQFOXGHGLQVLGH
5HPRYHWKHPRXQWLQJ EUDFNHW IURP WKH FKDUJH SRLQWXVHLWDVDWHPSODWHWRPDUN
WKH SRVLWLRQ RI WKH GULOO KROHV 'ULOO WKH KROHV DQG KDPPHU WKH H[SDQVLRQ EROWV LQ WKH
DFFHVVRULHVEDJLQWRWKHKROHV7KHQIL[WKHPRXQWLQJEUDFNHWRQWRWKHZDOO
8VHUFDUG
5),'IXQFWLRQZLOOEHHTXLSSHG
ZLWKXVHUFDUG
II. Packaging List III. Installation and wiring
No. Name Qty Remark
1 Charger 1
2 User manual 1
3 Quality certicate 1
4 Mounting bracket 1
5 Cable hook 1 For cables version
6
ST6.3X40
Stainless steel hex-head
self drilling screws
4-7
4 for socket version, 7 for cabled
version (3 of the 7 screws are for
cable hook xing
7
12x46
Plastic expansion plugs
4-7
4 for socket version, 7 for cabled
version (3 of the 7 screws are for
cable hook xing
8 User card 1
RFID function will be equipped with
user card
3.1 Mount on a wall
3.1.1 Open the packaging, you’ll see a charge point, a mounting bracket, a user manual
and a bag of mounting accessories. There is also an RFID card if the charge point is
RFID version. For cabled version, a cable hooker is also included inside.
3.1.2 Remove the mounting bracket from the charge point, use it as a template to mark
the position of the drill holes. Use the expansion bolts from the accessories bag and
hammer these into the drilled holes. Then x the mounting bracket onto the wall.
6 7
10