9
3.9 Limit switches installation
3.9.1 Mechanical limit switches
Picture 19: Cam installation on rack
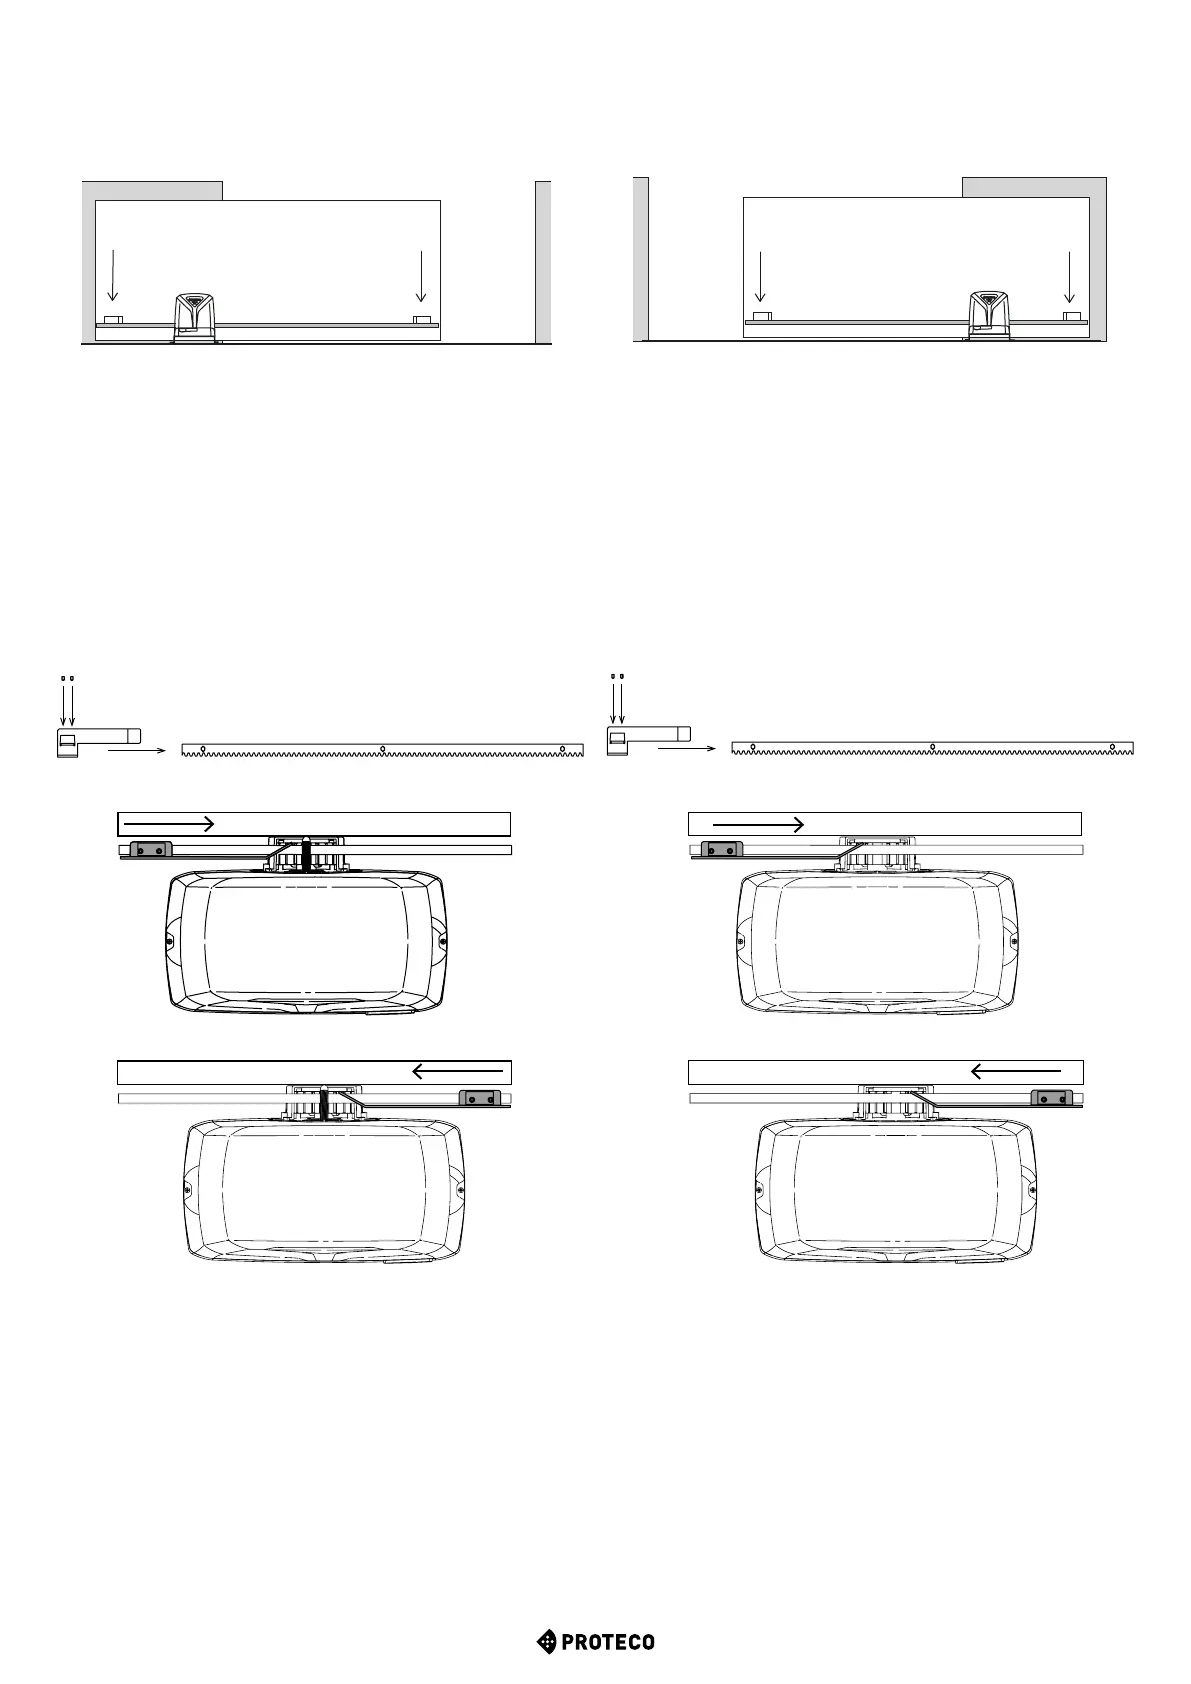
Picture 18
Once the motor position is determined, adjust limit switches
accordingly. (Picture 18)
•
Manually close the gate and keep a margin of 3 cm before
reaching the closing mechanical stop.
•
Fit the two dowels to the limit switch cam.
•
Lean the cam and slide until the limit switch is activated.
•
Tighten the dowels to secure the cam to the rack.
•
Manually move the gate to opening position and repeat the same
procedure.
•
Take the dowels and fix the limit switch cams.
CLICK
CLICK
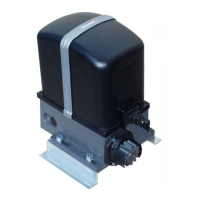
Picture 20
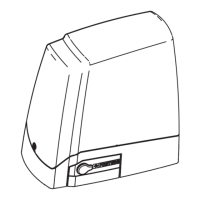
Picture 22
Once the motor position is determined, adjust limit switches
accordingly. (Picture 22)
• Manually close the gate and keep a margin of 3 cm before
reaching the closing mechanical stop.
• Fit the two dowels to the closing limit switch cam.
• Lean the cam and slide until the limit switch is activated.
• Tighten the dowels to secure the cam to the rack.
• Manually move the gate to opening position and repeat the
same procedure.
• T
ake the dowels and fix the limit switch cams.
Picture 23: Cam installation on rack
3.9.2 Magnetic limit switches
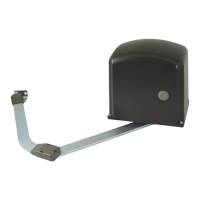
Picture 24
Picture 25
Once the installation of the limit switch cams has been completed,
proceed to general test. (Pictures 24/25).
This procedure guarantees the correct functioning of the automation
and preserves the good mechanical condition of the gate.
ATTENTION: The magnetic limit switch is activated when
approaching the magnetic area.
Leave the gear and control unit visible to double check the
good operation of the system.
ATTENTION: Remove any exceeding rack.
Picture 21
Once the installation of the limit switch cams has been completed,
manually move the gate in opening and closing and check
that cams always activate the limit switch without reaching
the mechanical stop. (Pictures 20/21
)
This check guarantees the correct functioning of the automation
and preserves the good mechanical condition of the gate.
ATTENTION: Remove any exceeding rack.
RH LIMIT SWITCH
LH LIMIT SWITCH
RH LIMIT SWITCH
LH LIMIT SWITCH