7
1
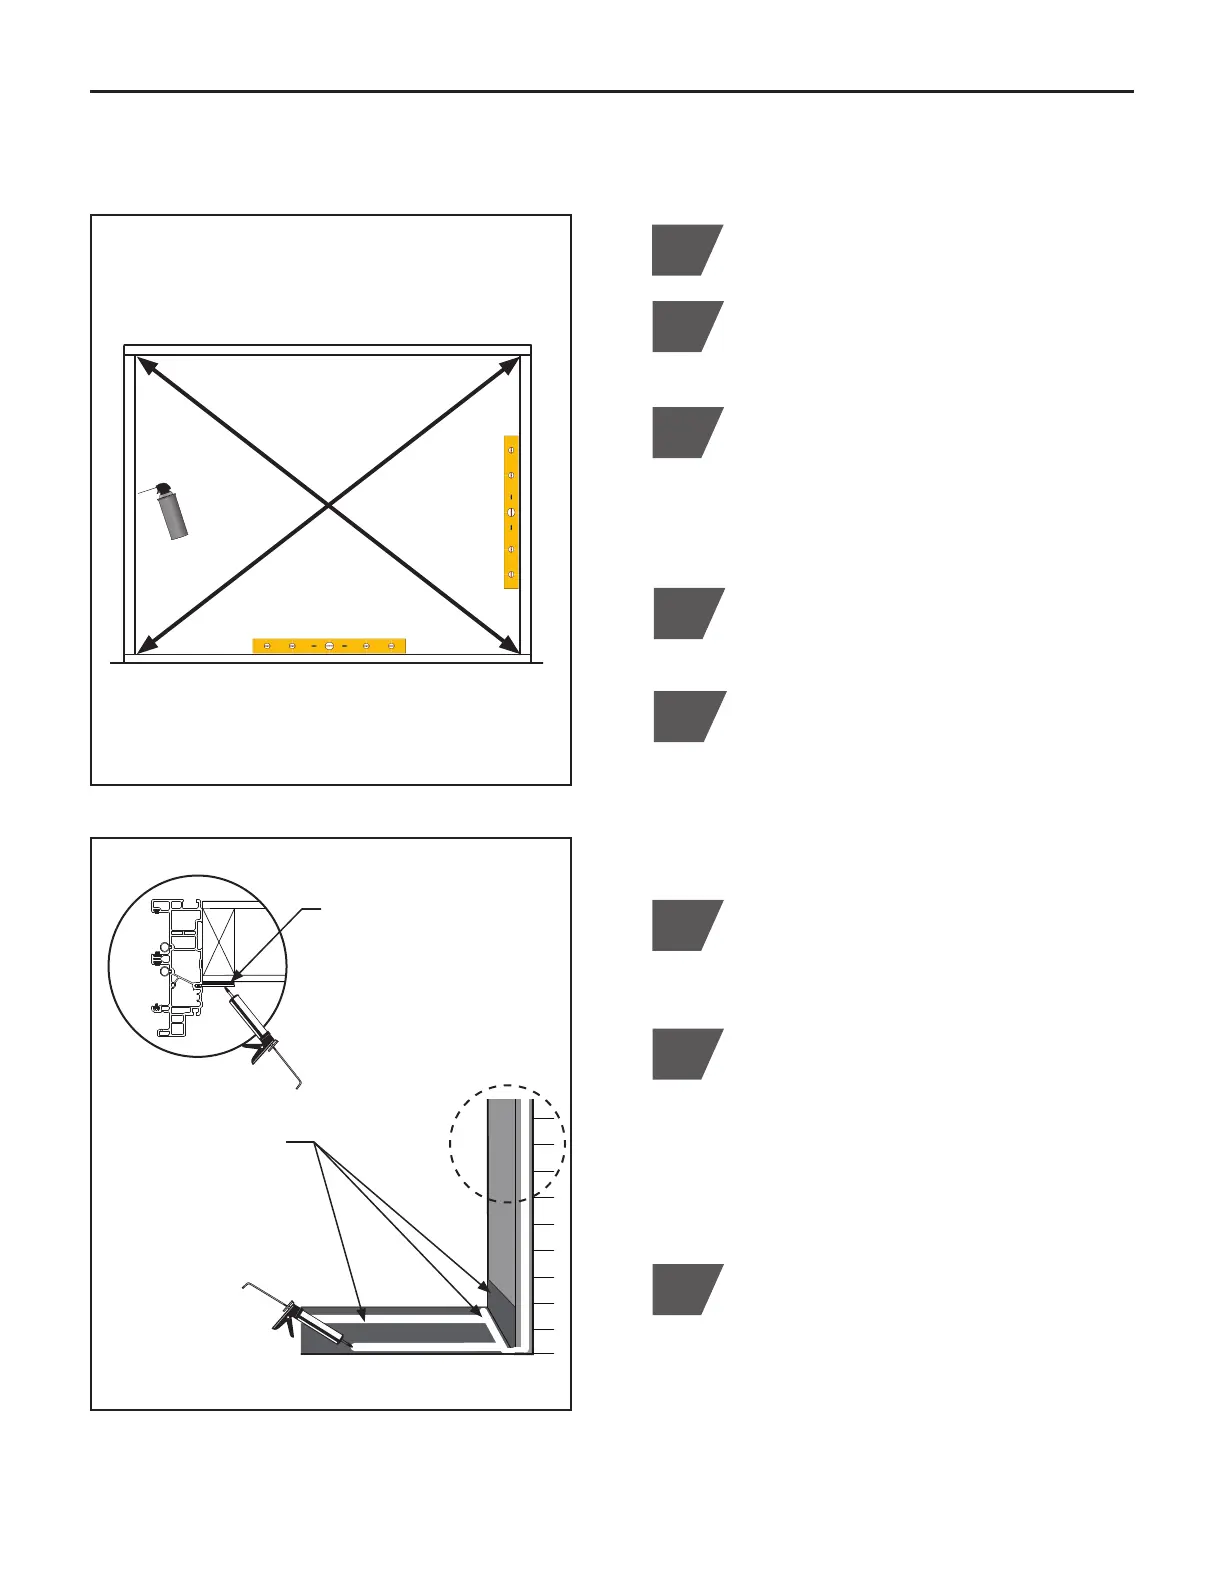
Clean rough opening of all dirt, debris, and
obstructions.
B. PREPARE OPENING
5
Verify opening width and height. Opening
should be large enough to accommodate
patio door with shims and insulation. The
recommended opening size is
1
⁄4" -
1
⁄2"
greater per side (or
1
⁄2" - 1" greater than in
total width) and
1
⁄4" -
1
⁄2" greater than in total
height.
6
(Figure B.1)
(Figure B.2)
Fill all voids found with AAMA approved
low-expanding window insulation foam that
complies with ASTM C 1620. (Figure B.1)
2
Check for level and flat sill. Verify the
structural integrity of the opening to ensure
a proper installation. If sill is not straight
and level, place wood shims between sub-
floor and sill to correct minor leveling and
margin adjustments. (Figure B.1)
3
Opening
7
Exterior View
Fill any and all voids in opening with low
expanding foam
Check sill for level, flat and for proper
structural support
Exterior View
Apply flashing to sill
then apply (2) straight
beads of caulking
along length of sill and
to each corner of sill
as shown
ONLY if frame assembly
is ordered nail fin or
brickmold, apply a bead of
caulking to face of exterior
sheathing to seal against
Apply (2) generous beads of premium
caulking compound in a STRAIGHT LINE,
on top of flashing and along entire length
of rough opening sill. Place first bead of
caulking to the exterior leading edge of sill.
Place second bead towards interior (to bed
flat surface of threshold). Apply caulking in
each corner of sill as shown. (Figure B.2)
Install flashing/pan system to sill area
in accordance with local building codes
and best practices. Replace drip cap if
necessary. (Figure B.2)
If nail fin or brickmold option is used, apply
a bead of caulking to each vertical and
header face of exterior sheathing to seal. To
complete seal, apply bead of caulk from sill
to exterior sheathing, as shown. (Figure B.2)
8
Check opening for square. Measure
diagonally from corner to corner each side
to determine. (Figure B.1)
4