12
5
9
Slide top and bottom caps closed on each
fixed sash.
Ea. side of fixed center sash,
insert (1) foam plug into bottom
cavity of stile
8
On each side of the fixed center sash, insert
(1) foam plug (Pack #3) into the open TOP
cavity of stile. (Figure D.5)
Caulk ea. side of sill adapter up to
sash and all sides of plug up to sash
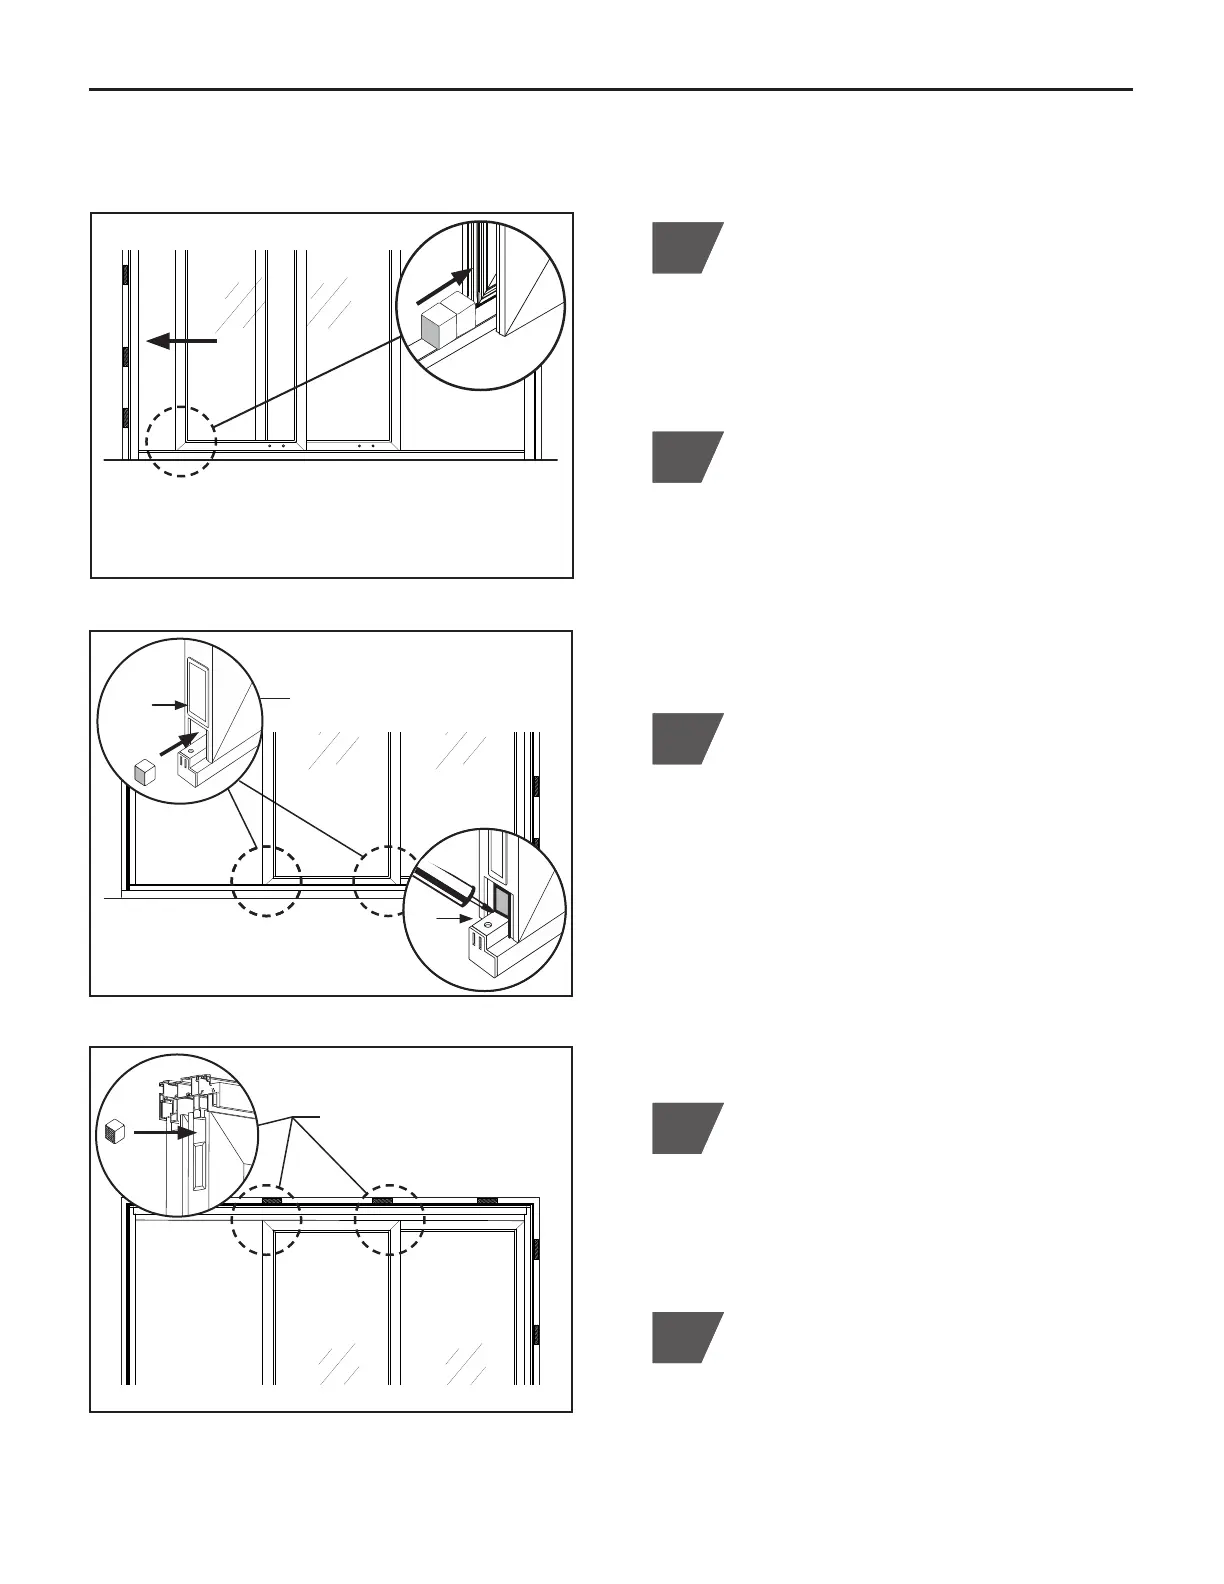
On the jamb side of the fixed end sash,
insert (2) foam plugs (Pack #3), side-by-side,
into the open BOTTOM cavity. (Figure D.3)
6
Slide fixed end sash tight into jamb pocket,
engaging the fixed center sash interlock.
Check square of frame to sash.
REMINDER: Check to be sure the weather
strip on interlocks have remained in place.
D. INSTALL FIXED SASHES (CONTINUED)
Interior View
(Figure D.3)
On the jamb side of the fixed end sash,
insert (2) foam plugs into bottom open cavity
Slide sash tight into jamb pocket
Exterior View
Exterior View
(Figure D.4)
(Figure D.5)
Bottom
cap
Sill
adapt.
On each side of the fixed center sash,
insert (1) foam plug (Pack #3) into the open
BOTTOM cavity of stile. For each inserted
plug, apply caulking to each side of the sill
adapter up to sash and all sides of the foam
plug up to sash to form a complete seal, as
shown in Detail. (Figure D.4)
NOTE: Check to be sure sash has remained
aligned and flush with end of sill adapter.
7
Ea. side of fixed center sash,
insert (1) foam plug into top
cavity of stile