13
1
Check the active sash and fixed center
sash interlock rails to be sure weather strip,
on exterior side, has not slid up or down.
Properly re-seat if needed.
3
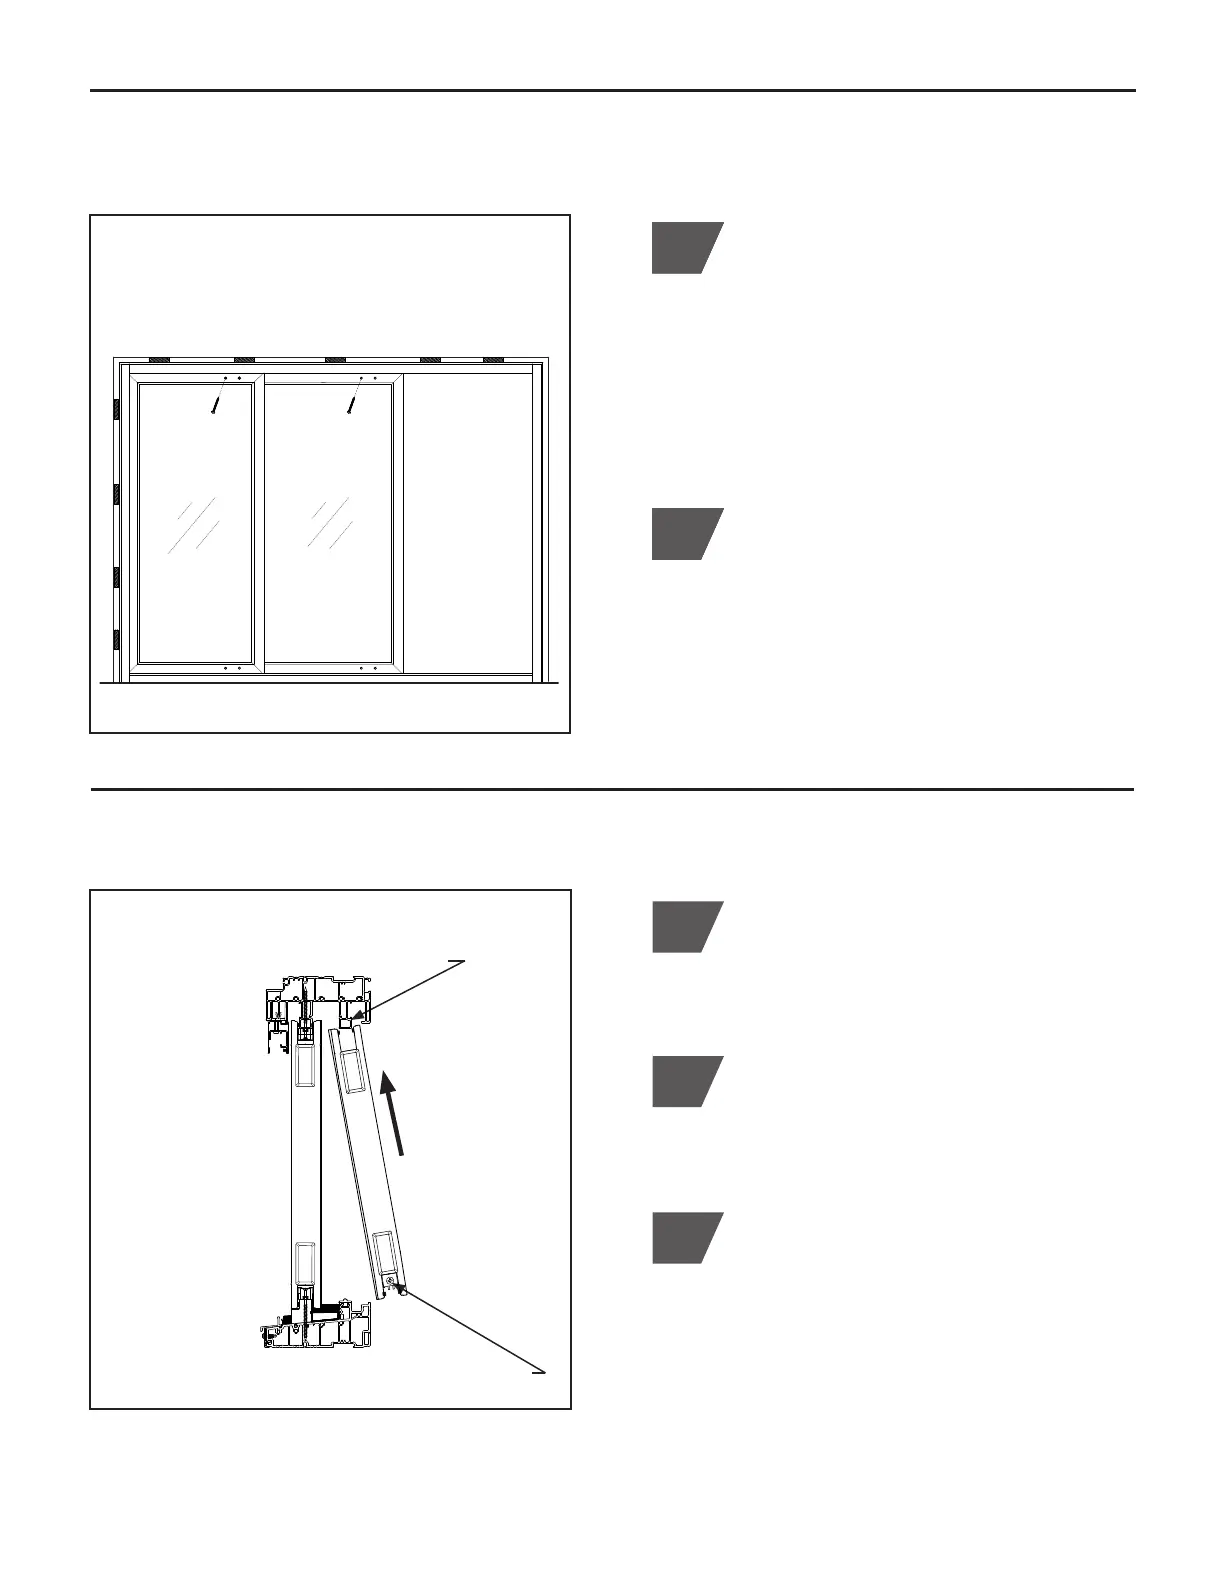
Note the location of the adjustment screws
located on bottom sash rollers to adjust each
side of active sash as necessary for equal
height, squareness, and margin. Active
sash should fully and evenly enter jamb
pocket. Turn adjustment screw clockwise to
raise sash and counter-clockwise to lower
sash. Unweight sash to assist with upward
adjustment. (Figure E.1)
From interior of home, insert top of the
active sash into the interior header track.
Lift and lower sash onto the sill rolling rail.
(Figure E.1)
2
E. INSTALL END ACTIVE SASH
Section View
Exterior Interior
(Figure E.1)
Insert top of active sash into header track,
lift and lower onto sill rail
Use adjustment screw on bottom sash roller
for height adjustment
D. INSTALL FIXED SASHES (CONTINUED)
Interior View
Install (1) #8 x 1" screw into (1) factory prepped
screw hole at top of each fixed sash
*DO NOT install the remaining (3) screws
in each fixed sash
(Figure D.6)
For each fixed sash, install ONLY (1) #8 x 1"
Phillips pan head screw (Pack #3) into (1)
factory prepped screw hole located at the top
of the fixed sash. This will secure door to top
anchor block. (Figure D.6)
NOTE: DO NOT install the (3) remaining
screws in each fixed sash factory prepped
screw hole locations. This will allow for
adjustment with active sash once installed.
14111
Verify frame opening height in (4) locations,
each side and center sash interlocks, as
previously performed in Section C, Step 10.
Adjust frame header as necessary for equal
measurements. Frame header may need
to be pushed up or pulled down to achieve
equal measurements.
NOTE: THIS STEP IS CRITICAL for the
AccuVent
™
and screen to operate properly.
14110