8
C. INSTALL FRAME
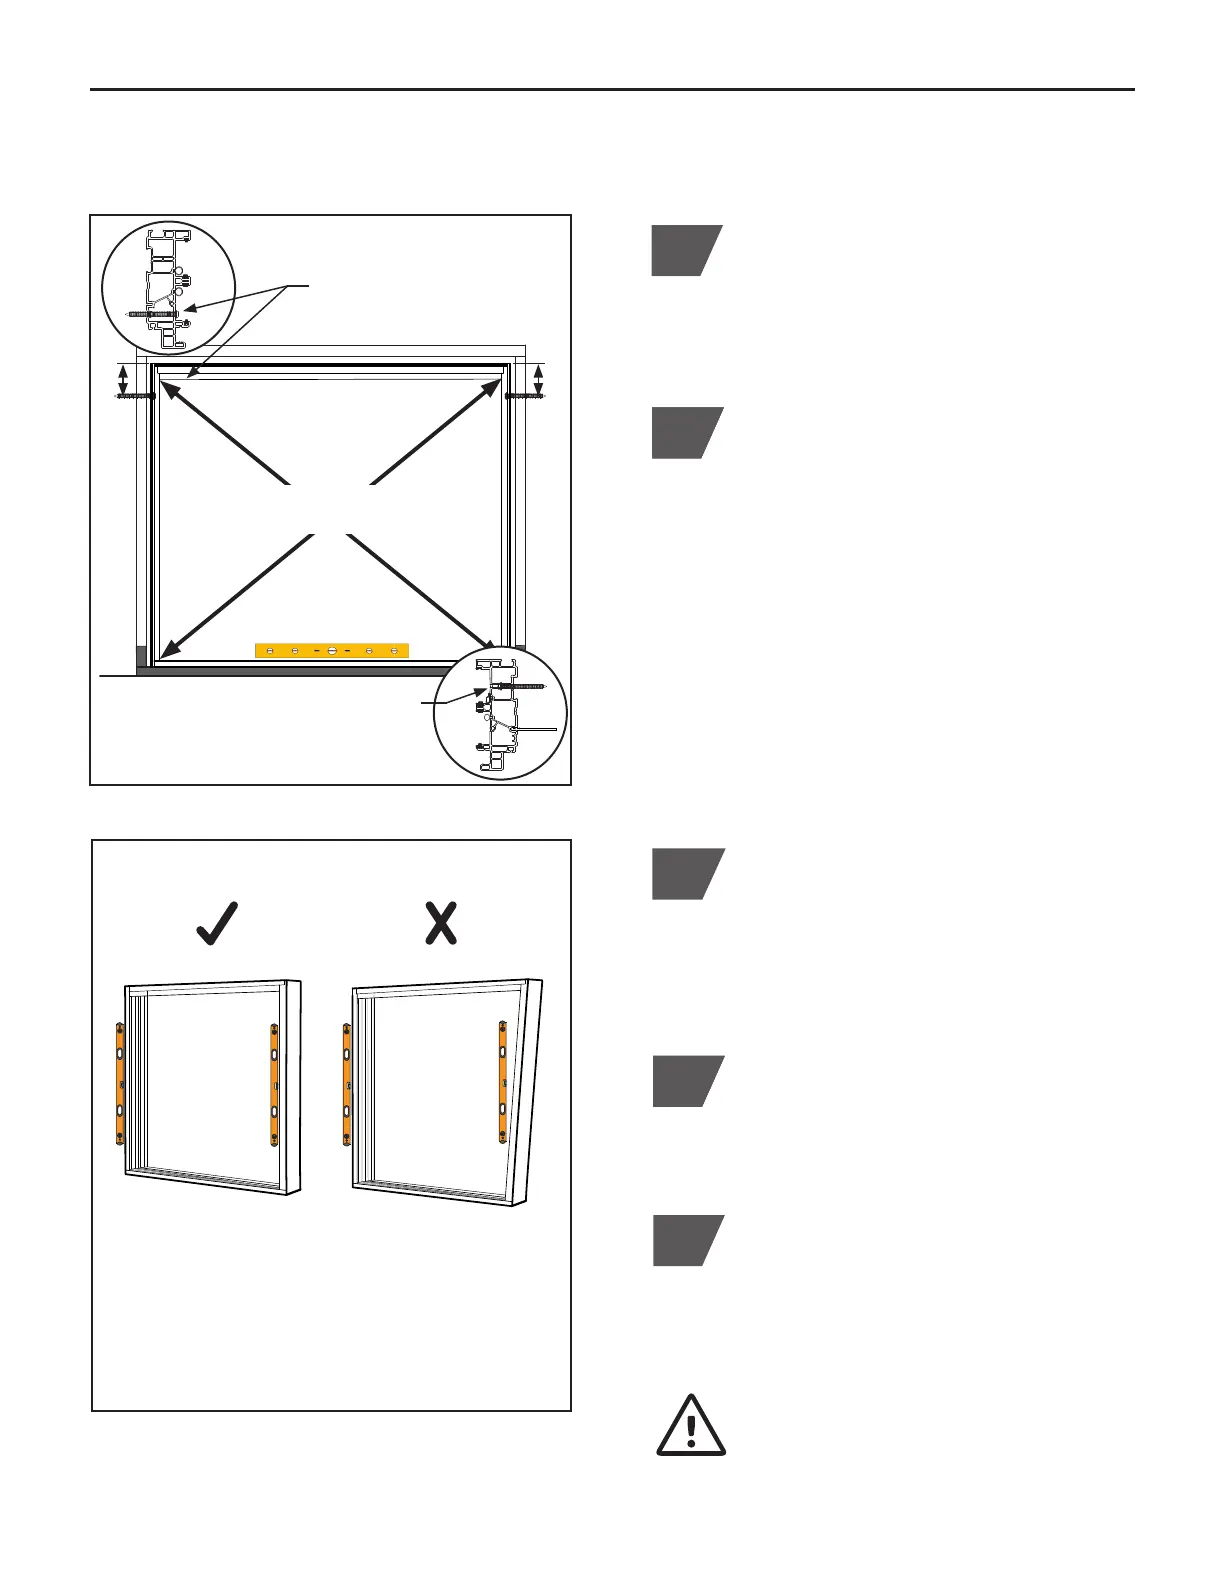
(Figure C.1)
Exterior View
122
1
Place assembled patio frame into the
opening, sill first. Center and square frame
in opening. Leave enough space for proper
shimming and insulation.
Install (1) #8 x 3" screw
into top of EXTERIOR jamb
pocket, each side
Install (1) #8" x 3" installation screw (Pack #2)
into the top EXTERIOR jamb pocket of each
fixed sash side, minimum 4" to 6" down from
top corner. Locate screw on score line. DO
NOT over tighten screw causing frame to
pull! (Figure C.1)
NOTE: If using vinyl installation accessory
5940, 5945, or 5956 nail fin, each jamb side
must be secured through the INTERIOR
jamb pocket. Pre-drill a
3
⁄8" hole and install
screw into the top of the interior jamb pocket,
minimum 6" down from top corner. Secure to
second vinyl wall of frame. (Figure C.1)
(Figure C.2)
3
Check for overall square of patio frame by
measuring diagonally from corner to corner,
each side. Recommended tolerance for the
diagonal measurement is
1
⁄8". Adjust top
jamb screws as needed. (Figure C.1)
Level sill if needed. If sill is not straight
and level, it must be shimmed for proper
operation of the patio door.
1214
ONLY if nail fin 5940, 5945, or 5956
is used, install screw into INTERIOR
jamb pocket, second vinyl wall, ea. side
Check sill for level
4"
to
6"
Check frame
for square
CORRECT
Equal vertical
plane alignment
NOT CORRECT
Unequal vertical
plane alignment
Frame Alignment
If frame is bowed, it may be necessary to
shim frame at various locations before
adding installation screws.
5
Check plane of the patio frame. Each
vertical jamb side frame should be equal
and parallel to the other. See illustration for
equal and unequal plane. (Figure C.2)
4"
to
6"