9
C. INSTALL FRAME (CONTINUED)
(Figure C.3)
6
Exterior View
8
Check each jamb side frame for straight
and parallel to each other. Adjust jamb side
installation screws as necessary for parallel.
Be sure installation screws do not pull vinyl
frame causing frame to bow. Re-check for
overall square and correct plane alignment.
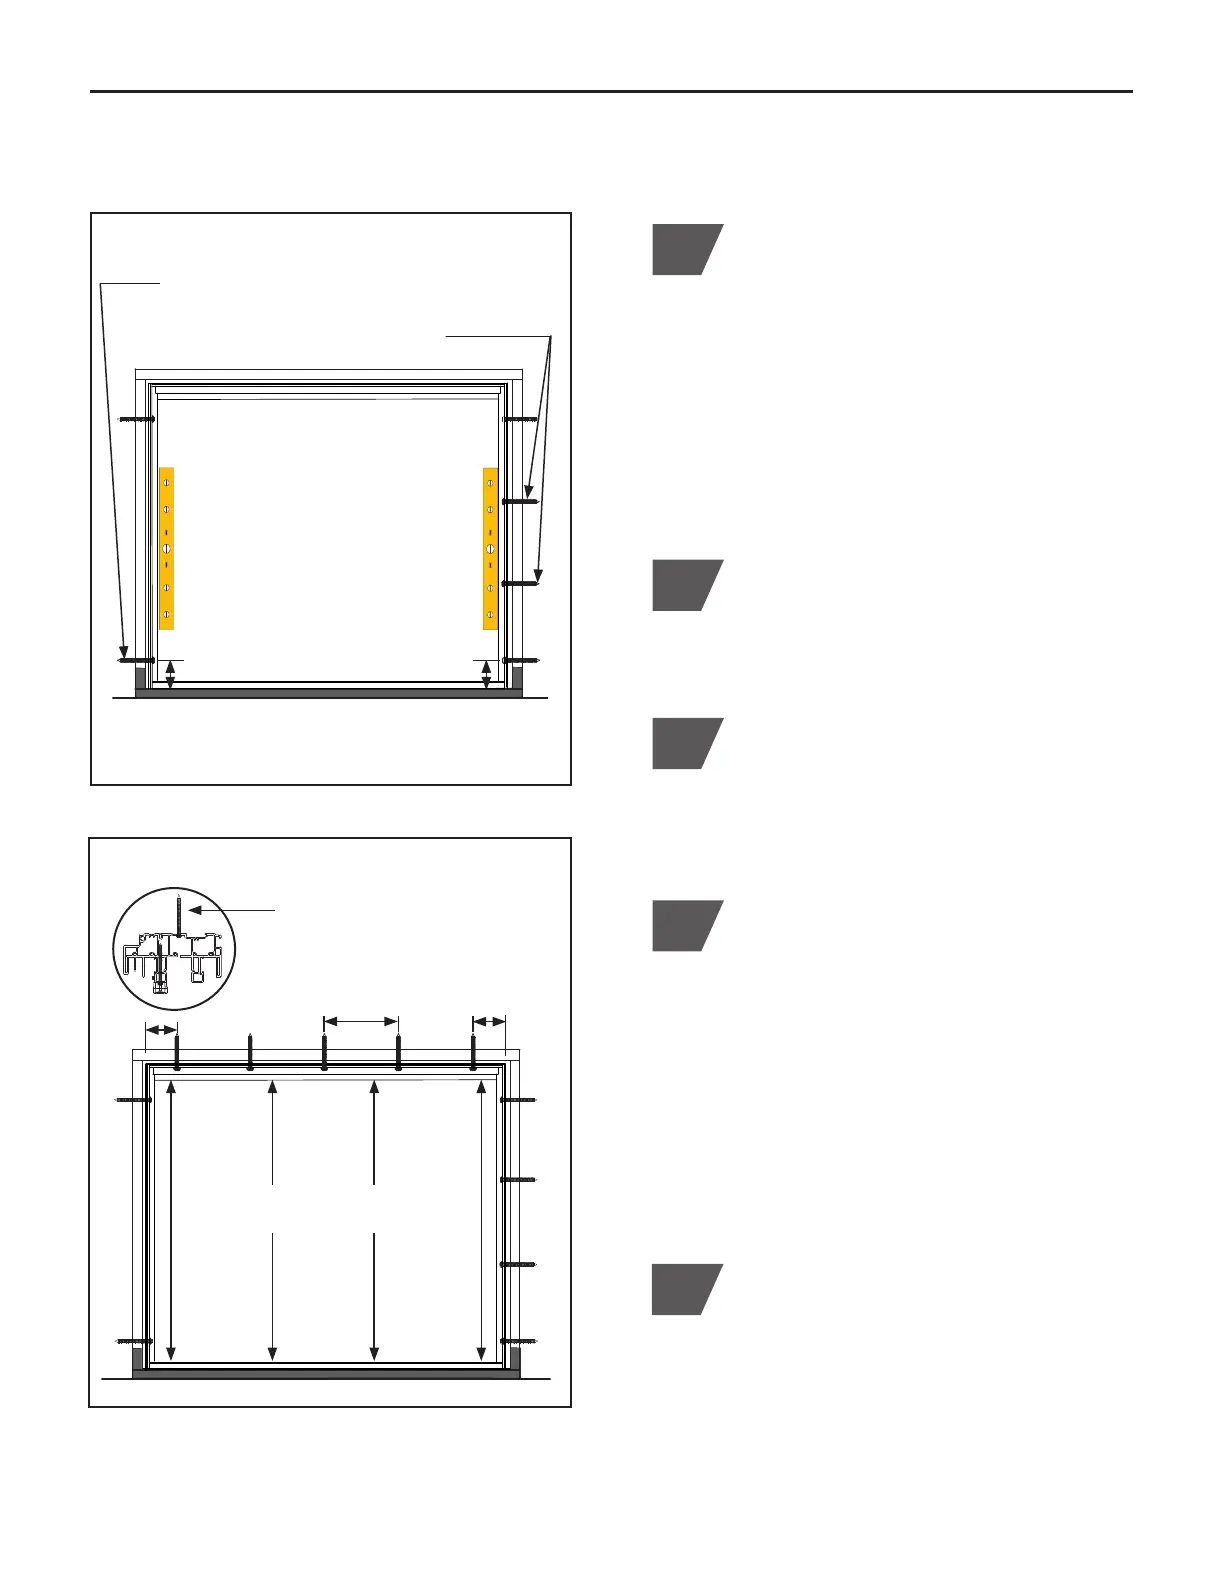
Install (1) #8 x 3" screw into EXTERIOR jamb
pocket 6" from bottom, each side
Install (2) #8 x 3" screws into EXTERIOR fixed
sash jamb side ONLY
Check each jamb side for straight and parallel
9
For header frame, drill a minimum of (5)
3
⁄8"
holes equally spaced at 24" maximum through
the first vinyl wall. Wider units will require
more than 5 screws. Place each end screw
hole a minimum of 4" to 6" in from corner.
Install (1) #8 x 3" screw (Pack #2) into each
pre-drilled header screw hole location. DO
NOT over tighten screws causing frame to
pull. (Figure C.4)
NOTE: DO NOT install screw hole plugs at this
time. Plugs will be installed after installation is
fully completed.
Exterior View
(Figure C.4)
Header
Drill and install #8 x 3" screws
in header, 6" in from each
corner and equally spaced
10
Check frame opening height in (4) locations,
each jamb side and center. All (4)
measurements to be equal. Adjust header
installation screws as necessary to achieve
equal measurements. Be sure installation
screws do not pull vinyl frame causing frame
to bow. Header and sill must be parallel for
proper operation of active sash and screen.
(Figure C.4)
Install (1) #8 x 3" installation screw (Pack #2)
into the bottom EXTERIOR jamb pocket of
each jamb side, minimum 4" to 6" up from
the bottom corner. Locate screw on vinyl
score line. DO NOT over tighten screws.
(Figure C.3)
NOTE: If installation accessory 5940,
5945, or 5956 nail fin, secure through the
INTERIOR jamb pocket. Pre-drill a
3
⁄8" hole
and install screws as noted above. Secure to
second vinyl wall of frame.
4" to 6"
4" to 6"24" max.
4" to 6"4" to 6"
7
Install (2) #8 x 3" installation screws (Pack #2)
into the EXTERIOR jamb pocket of fixed jamb
side ONLY, equally centered between top and
bottom screws. Locate screw on vinyl score
line. DO NOT over tighten screws. (Fig. C.3)
Frame Only in
Opening
Check frame opening height
in (4) locations for equal
 Loading...