10
Confirm frame is square on the same plane
and not rolled.
12112
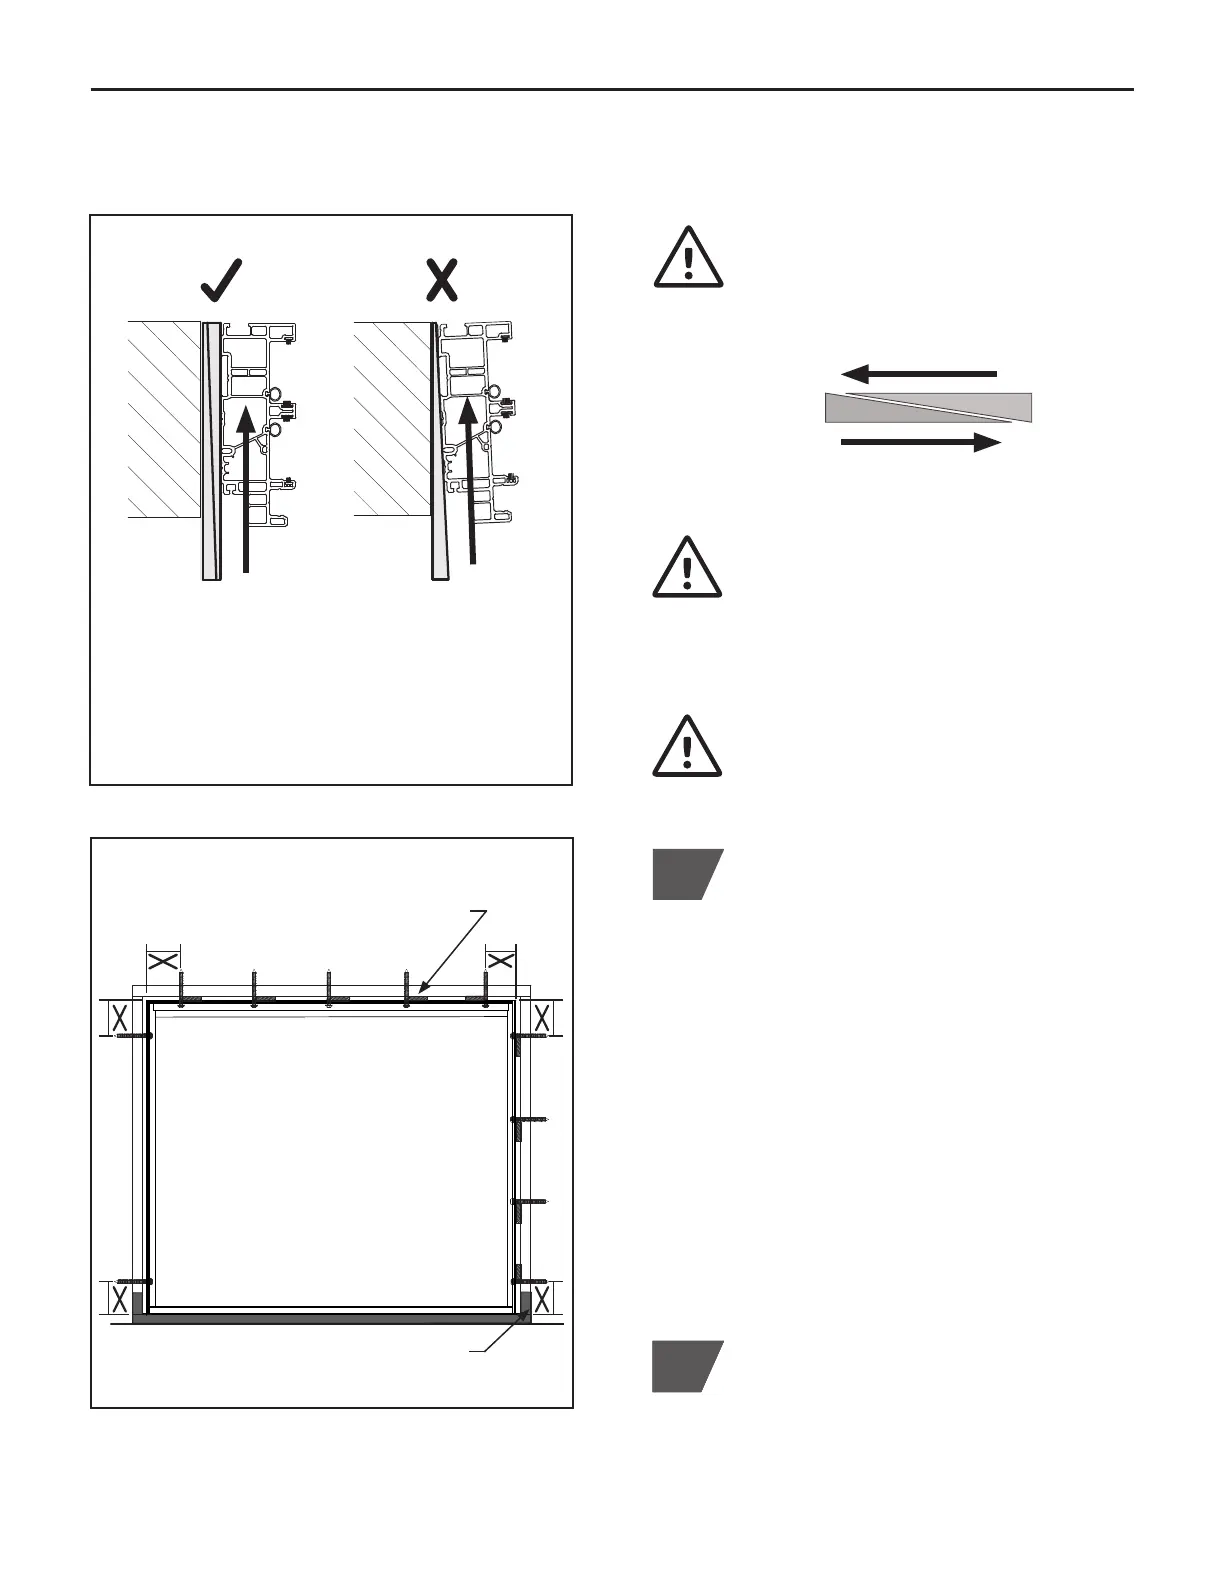
C. INSTALL FRAME (CONTINUED)
(Figure C.6)
11
Place shims next to each installation screw
location, each jamb side and header. Be
sure top jamb shims are located 4" to 6"
from top of frame and bottom shims are 4"
to 6" from bottom of frame. Be sure header
shims are located 4" to 6" from each corner. If
spacing between side jamb or header shims
is greater than 12" to 18", additional shims
may be needed to maintain margins and
stabilize frame. Use shims to adjust straight
and parallel as needed. (Figure C.6)
NOTE: To allow for vinyl expansion, DO NOT
place shims at top header, bottom sill, or
header corner locations as shown. Shimming
in these locations will cause frame distortion.
IMPORTANT! CORRECT shimming
application; stack wedge shaped shims
contrasting and plane to plane. See diagram
below. DO NOT use single wedge shims.
This will cause the frame to roll. (Figure C.5)
IMPORTANT! Be careful to NOT over
shim. Improper shimming may roll,
bow, and change margins, jeopardizing
operational performance.
Exterior View
(Figure C.5)
CORRECT
Flat shims or wedge
shims stacked to
create a flat plane will
result straight frame
NOT CORRECT
A wedge shim will
cause frame to roll
resulting in rolled and
bowed frame
SHIMMING APPLICATIONS
Place stacked shims next to each header and
fixed jamb side screw locations
DO NOT place shims at top
and bottom jamb locations, each side
To prevent water infiltration, DO NOT
install screws through sill.
4" to 6" 4" to 6"