11
D. INSTALL FIXED SASHES
4
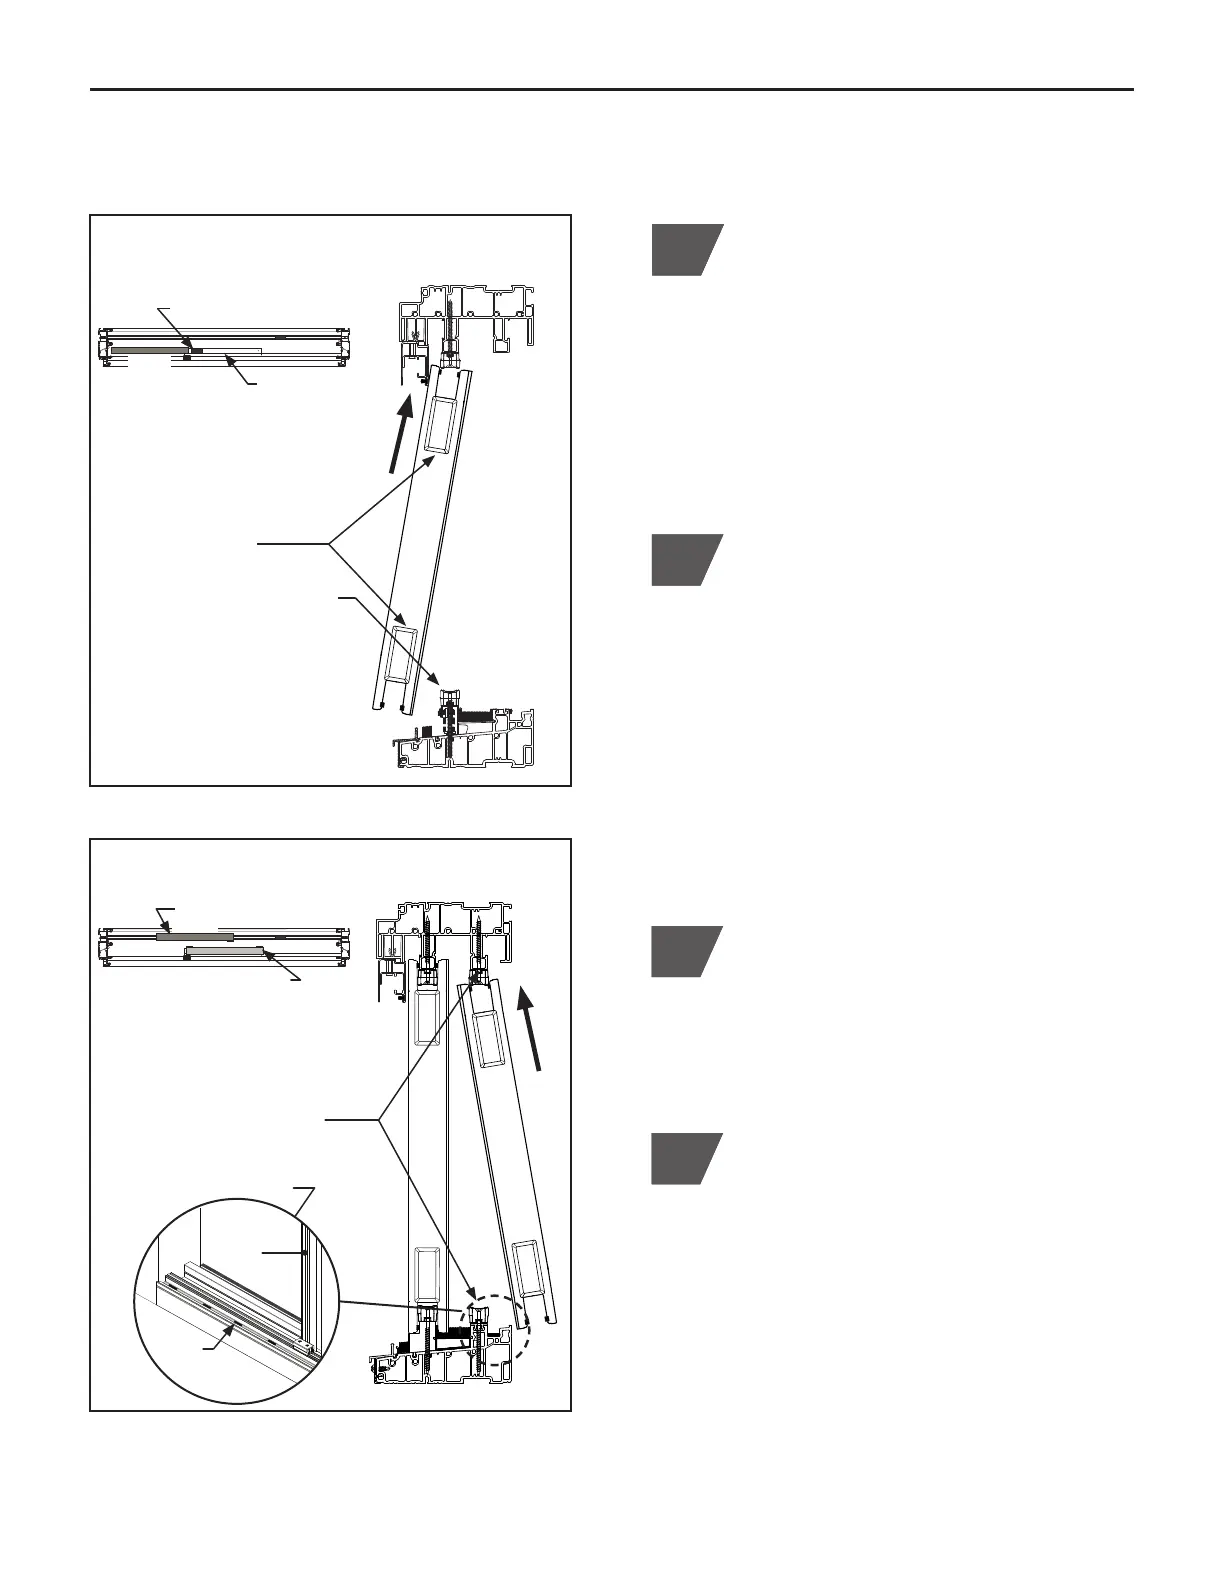
Section View
(Figure D.1)
Locate the fixed center sash (sash with an
interlock on each stile). Orient sash with
interlocks facing the interior and weep holes
located to the bottom exterior. From the
exterior active sash side, insert top of center
sash into the outside header track and away
from the anchor blocks. Align bottom of
sash with the sill adapter. Slide sash onto
adapter and over top and bottom anchor
block. Align fixed center sash flush with end
of sill adapter. (Figure D.1)
12
1411
The slide caps located at the top and
bottom of each fixed sash stile is shipped
in the open position. Check to be sure
caps have remained open. In addition,
check to be sure the weather strip within
each interlock has remained in place and
continues to remain in place throughout the
installation.
Interior
Side
Sill Plan View
Active End Side
Insert
Fixed Center Sash
anchor block
From the exterior active
end, insert fixed center
sash before anchor blocks
Open slide caps
Slide sash onto sill adapter
and engage top and bottom
anchor blocks
Section View
(Figure D.2)
Sill Plan View
Fixed End Sash
Insert
Fixed Center Sash
Sill adapter
Insert fixed end sash into inside
header track and before anchor
blocks
Slide sash over top and bottom
anchor blocks to engage
Place (4) shims into bottom of
interior track (Step 3)
Interior
Fixed
Center
Sash
Shims
3
Insert (4) self-adhesive shims (Pack #14)
into inside bottom sill track of the fixed end
sash side, evenly spaced and width of the
sash. Refer to detail located in Figure D.2.
Locate the fixed end sash (sash with a
single interlock and no lock prep). From the
interior, orient the fixed end sash with the
single interlock facing outward, positioned
between the center fixed sash interlocks,
and away from anchor blocks. Lift to insert
top of sash into the inside header track then
lowering onto bottom sill roller rail. Slide
sash over top and bottom anchor blocks and
self-adhesives shims, leaving sash open to
complete the following step. (Figure D.2)
Fixed Center Sash
Fixed End Sash