6
A. ASSEMBLE FRAME
ProVia
®
understands there are various methods and conditions affecting the installation of a patio
unit. We feel the most critical steps to follow are securing and shimming as instructed in this
document.
FIELD MULLED PATIO UNIT:
Refer to Section R, Field Mulling, page 22. Units must be mulled together before setting into the
opening. For units requiring heavy reinforcement, refer to included instruction.
INSTALLATION ACCESSORY:
If the patio unit is ordered with an installation accessory, refer to the included document,
'Installation Instruction Vinyl Patio Door Installation Accessories and New Construction Flashing'.
The QR code for this instruction can also be found at the end of this instruction document. Nail fin
or installation accessory must be installed on patio unit before installing into the opening.
IMPORTANT INFORMATION
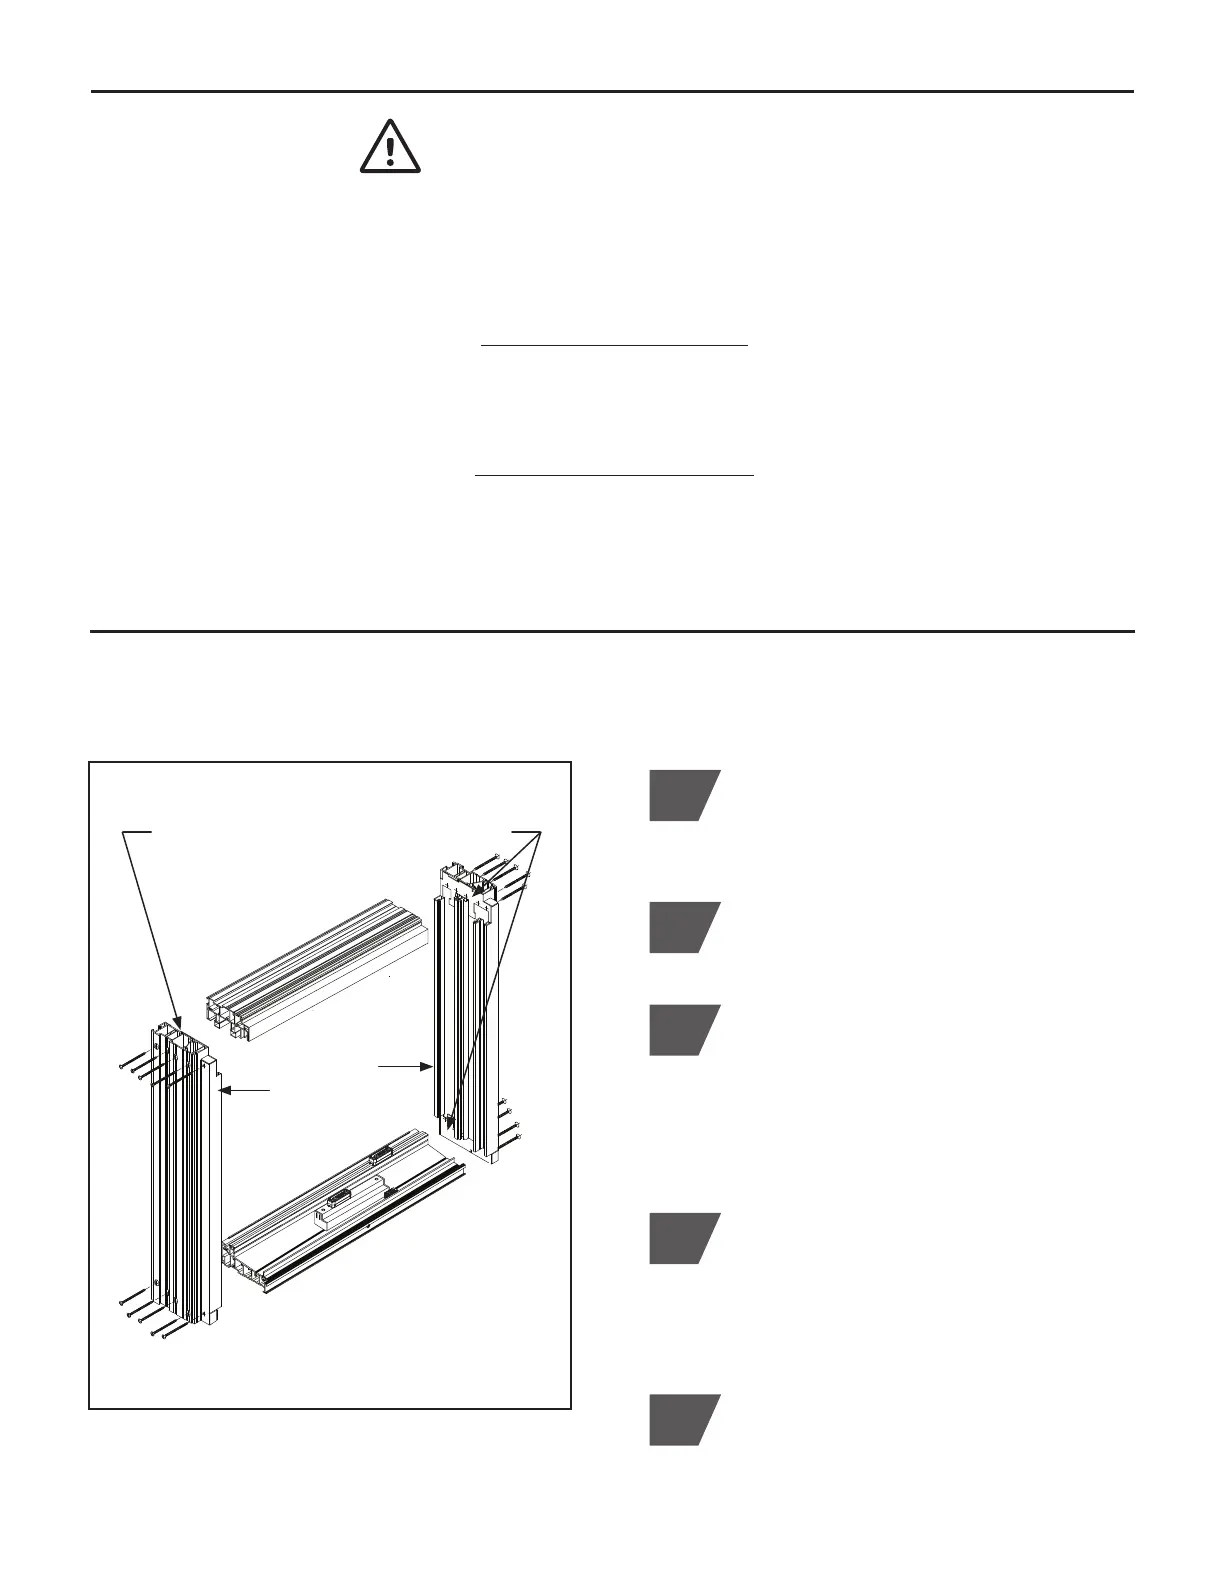
Check to be sure each top and bottom factory
mounted jamb-side gasket is in place.
(Figure A.1)
2
Carefully lay (4) main frame assembly pieces
on a level and well supported area with the
exterior side up. Be sure the interior side is
fully protected from damage. Align each jamb
side with header and sill. Check to be sure
the jamb side screen bumpers are located at
top and facing to the exterior.
3
Secure each jamb side frame to the frame
header and sill using (5) #8 x 2” Phillips head
screws in each top and bottom location
(Pack #1). Make sure the top and bottom
factory mounted jamb gaskets are well
compressed. (Figure A.1)
4
(Figure A.1)
Frame Assembly Isometric
(Assemble with Exterior Side facing up)
Sill
Assembly
Secure each jamb to header and sill
using (5) #8 x 2" screws, each corner
Check each top and bottom jamb gasket
Header
Assembly
Jamb-Side
Assembly
Unpack and inspect all new patio door
assembly components for any material
damages. Check glass, screen, and all
operational hardware.
1
If unit was ordered with a sidelite, transom, or
optional installation accessory, field install at
this time.
5