14
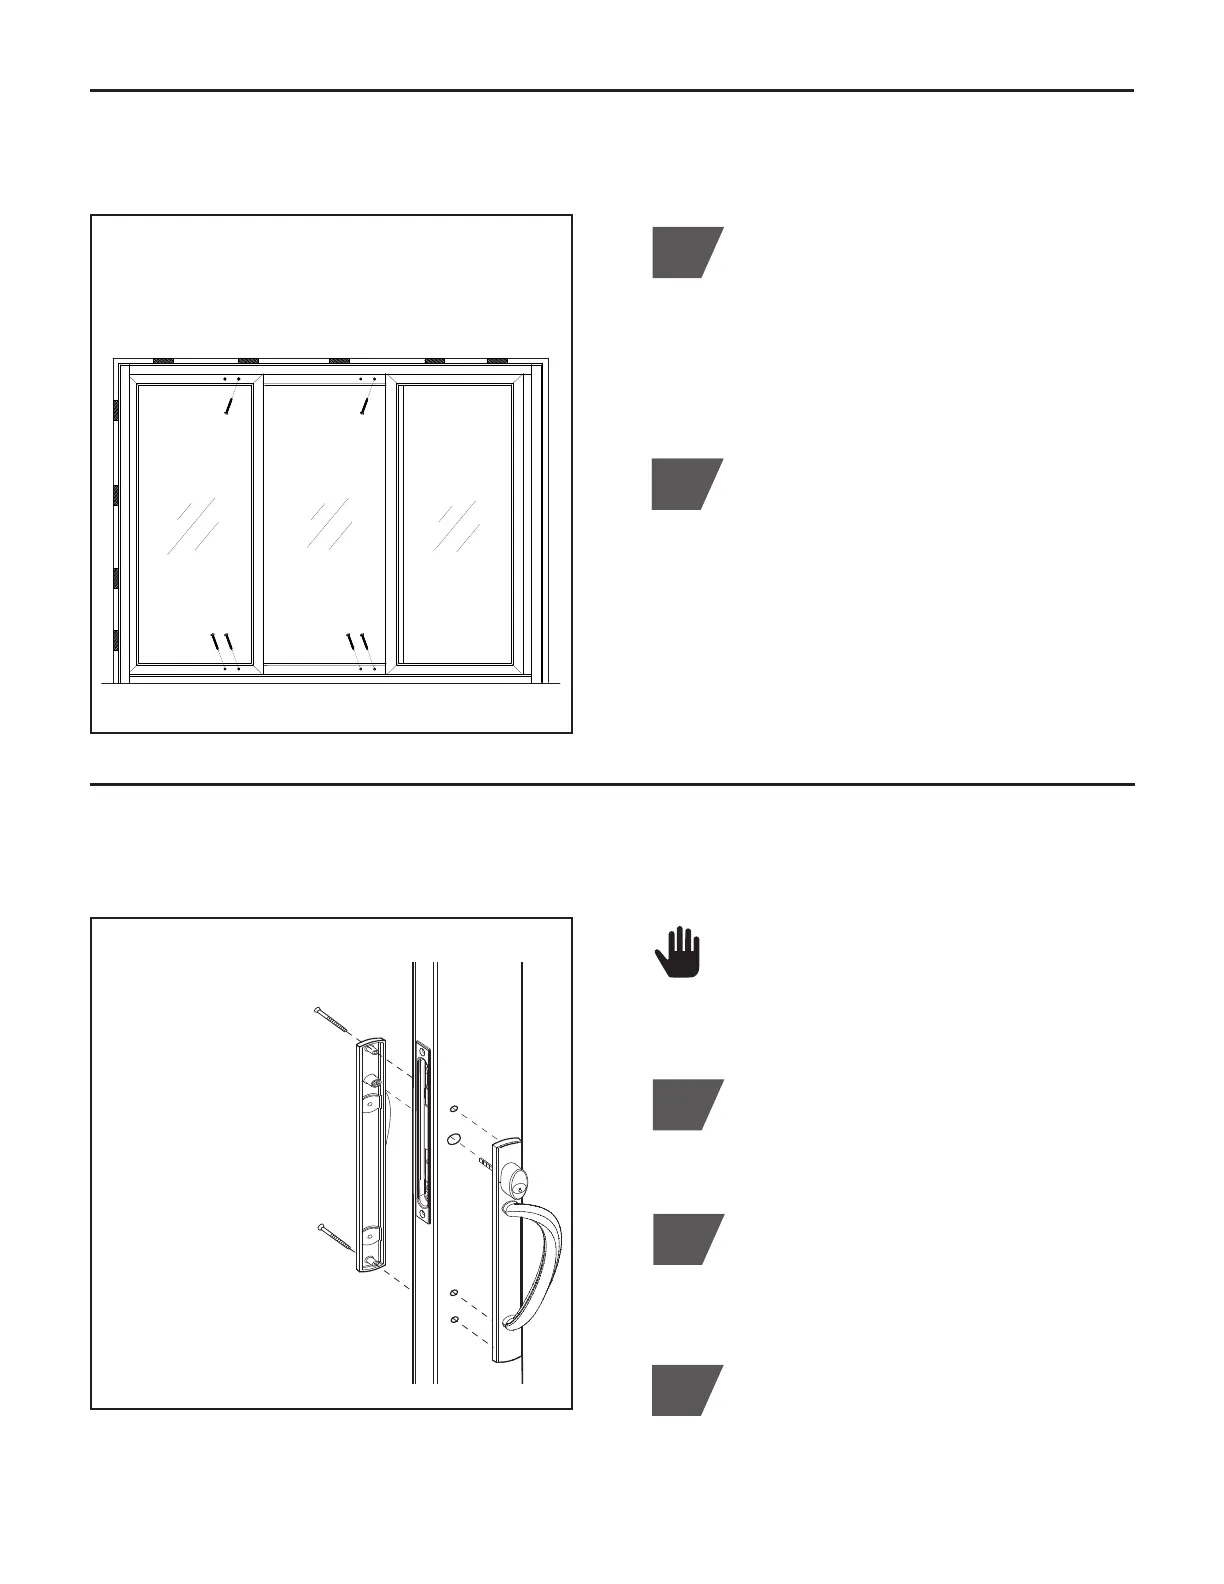
F. INSTALL REMAINING FIXED SASH SCREWS
12
Interior View
(Figure F.1)
Install (1) #8 x 1" Phillips pan head screw
(Pack #3) into (3) remaining factory prepped
top and bottom screw hole locations of each
fixed sash. (Figure F.1)
Install (1) #8 x 1" Phillips pan head screw into (3)
remaining factory prepped top and bottom screw
hole locations of each fixed sash
1
Re-check for equal height measurements
and alignment with active sash. Check for
equal spacing of fixed sashes and closed
active sash. If fixed center sash requires
adjustment, remove screw from Section D,
Step 11.
G. INSTALL MULTI-POINT HANDLE SET
2
Position handle set into factory prepped
holes. Align spindle with lock knob on inside
handle. Confirm hand grip curves towards
the glass. (Figure G.1)
3
Use (2) #8-32 (included) to install the
exterior and interior handle set assemblies
to the active sash. (Figure G.1)
Install exterior and interior
handle set using
(2) #8-32 Phillips
mounting screws,
included
DO NOT USE a power
screwdriver to install
the handle set kit,
doing so will cause
damage and VOID THE
WARRANTY *DO NOT
OVER TIGHTEN screws
1
Fasten handles to each plate using (2)
#10-32 mounting screws provided. Place
gasket in base of exterior plate. (Figure G.1)
(Figure G.1)
Active Sash
The primary handle set installation
instructions is located inside hardware
box. Refer to included instructions for
the complete hardware installation.