15
H. INSTALL ACTIVE SASH JAMB SIDE SCREWS AND SHIMS
Slide active sash to almost closed, check
alignment and margin of the sash strike edge
to frame. Shim active sash side frame at
each installation screw to adjust frame as
needed. Be sure top and bottom shims are
4" to 6" away from corners. Additional shims
maybe needed for proper frame alignment.
(Figure H.2) FLAT SHIMS MUST BE
USED. Be careful to NOT over shim
causing frame to roll or bow. (Figure H.3)
2
Re-check sash operation. Sash must slide in
and out of jamb pocket smoothly for proper
operation and lock function. If not, continue
to adjust shims, screws, and the adjustment
screw located on bottom sash rollers to
further align as needed.
3
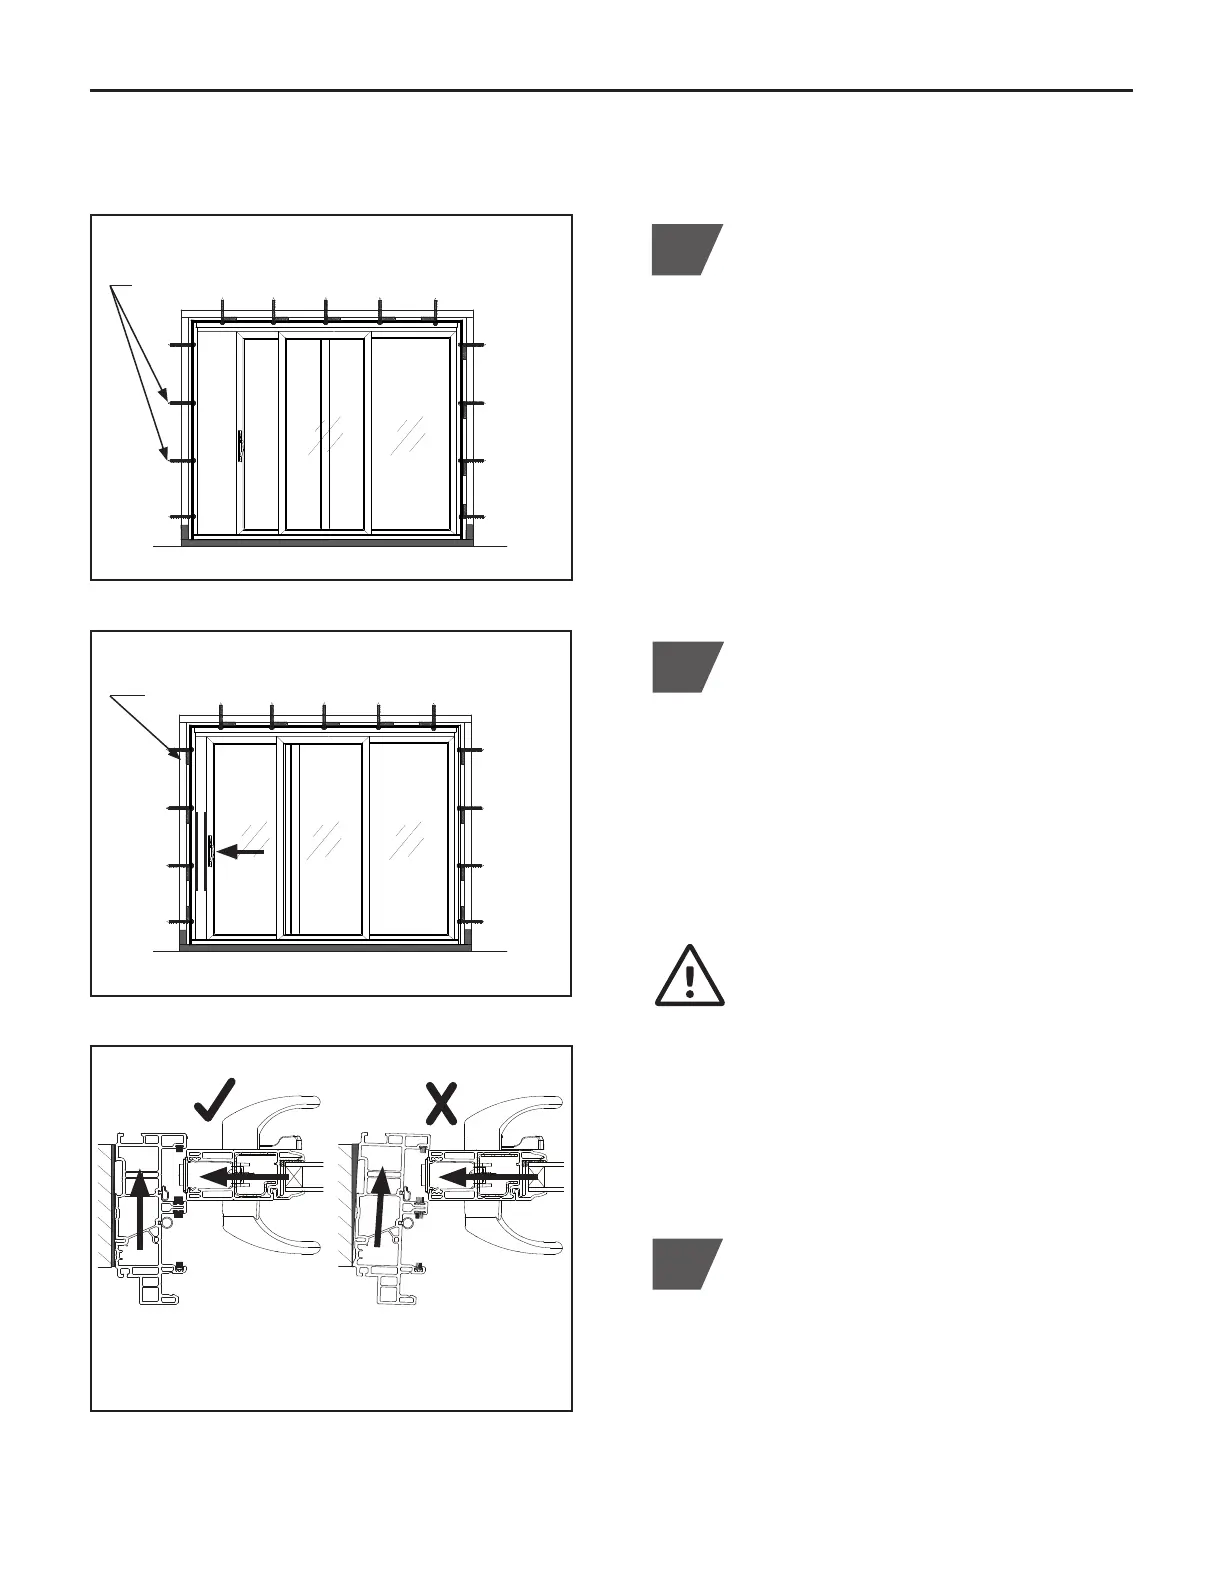
IMPORTANT! CORRECT sash operation.
If jamb side frame becomes rolled
during installation, the active sash will
conflict with the frame resulting in poor
operation. The jamb side frame must
be straight and parallel to active sash.
Refer to Figure H.3 for an illustration of
proper frame to sash alignment.
(Figure H.3)
1
Install (2) #8" x 3" installation screws (Pack
#2) into the EXTERIOR jamb pocket of
the active sash side, locate (2) screws
in center and evenly spaced. DO NOT
tighten screws. Screws can be used for
frame alignment and adjustment in Step 2.
(Figure H.1)
NOTE: If using installation accessory 5940,
5945, or 5956 nail fin, secure through
the INTERIOR jamb pocket. Pre-drill a
3
⁄8" hole and install screws into the interior
jamb pocket.
Secure to second vinyl wall of
frame.
CORRECT
Sash slides in and out
of pocket with ease
NOT CORRECT
Sash is difficult to operate,
requires adjustments
Exterior View
Slide sash almost closed to check alignment/margin
Shim to each active sash side screw, use shims to
adjust frame alignment, margin to frame
(Figure H.2)
(Figure H.1)
Exterior View
Install (2) remaining installation screws into active
sash side jamb, centered and evenly spaced
SASH OPERATION
(Figure H.3)