Page 27 of 52
Continue to hold the valve down until the oil is clear of bubbles.
11. If oil fails to flow out of the diagnostics port, then additional oil is required: repeat steps 7-9.
12. The pump is fully primed and ready to put into service.
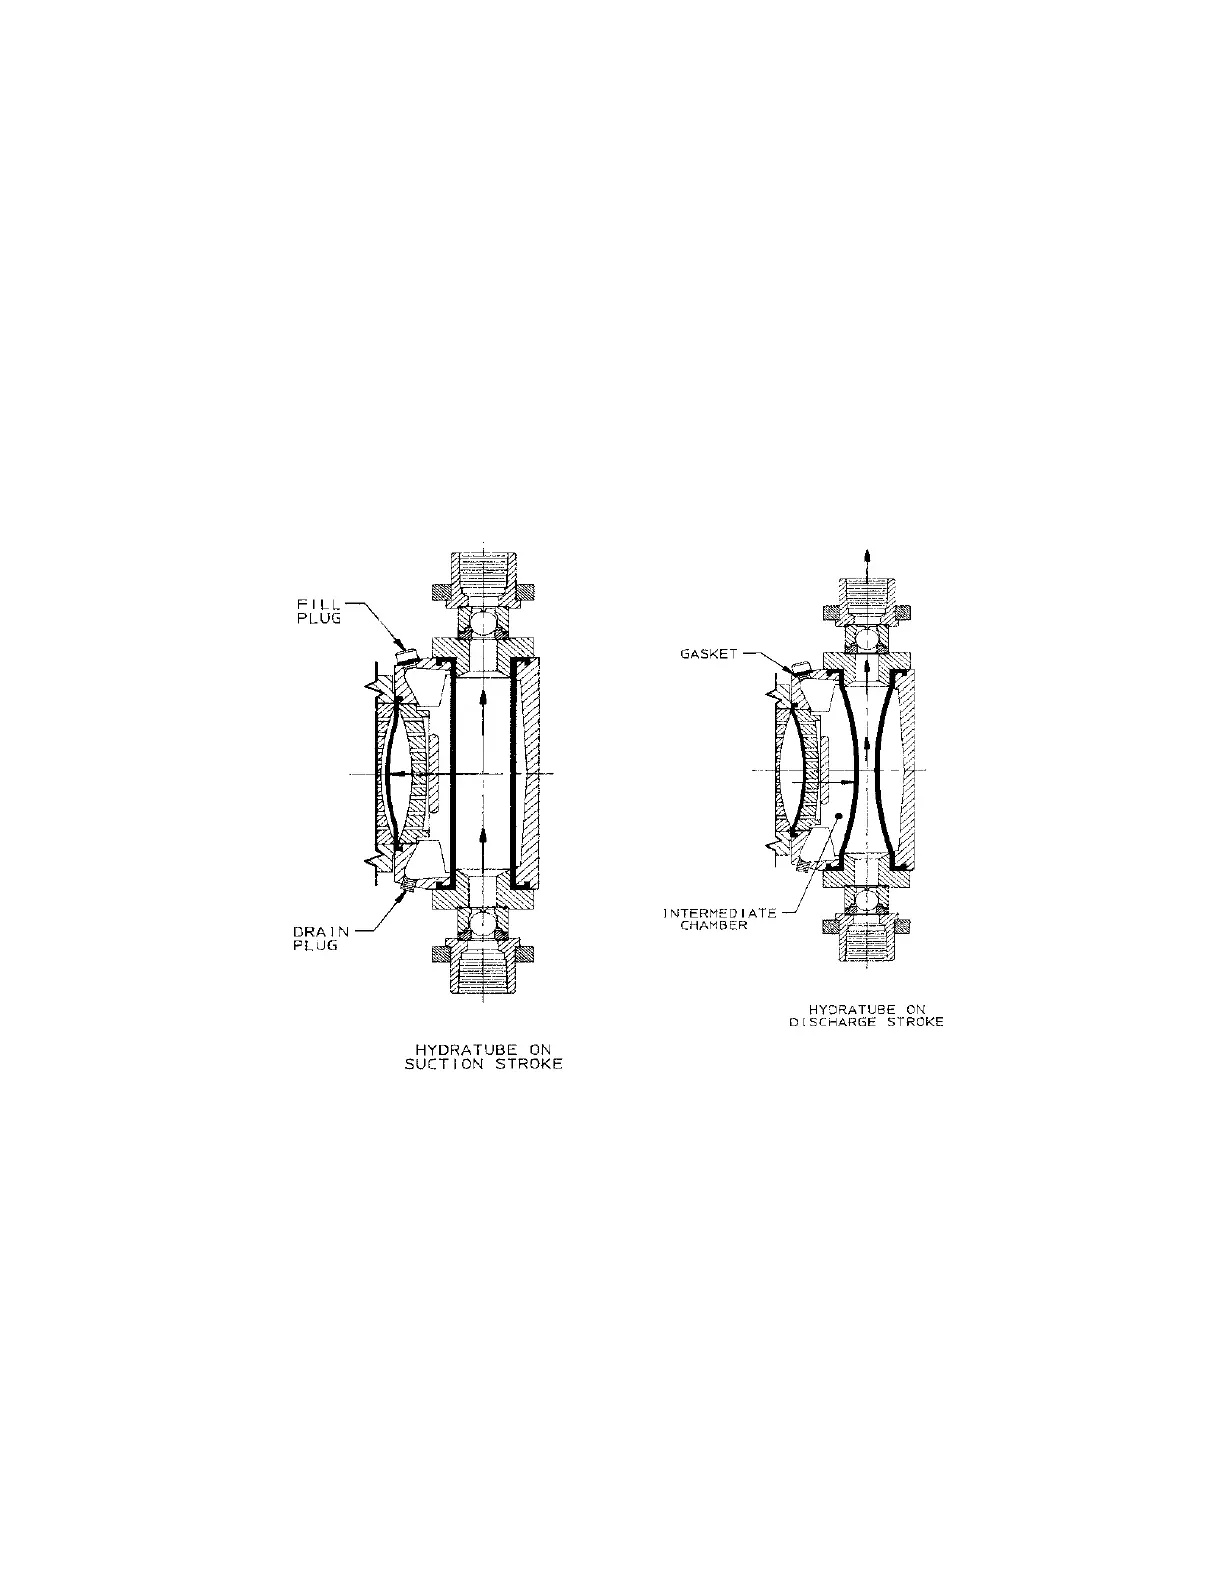
HYDRAtube
Before filling the HYDRAtube chamber you must first have performed the hydraulic priming of the
flat diaphragm. If this has not been done, follow the instructions above for priming of a flat
diaphragm. You must have the flat diaphragm and the HYDRAtube diaphragm in sync for proper
operation. This process will place the flat diaphragm back with the tube diaphragm in a fully
relaxed and open state.
The HYDRAtube, when properly primed, should be in its neutral position (fully round) when the
diaphragm is in its rearmost position (as dictated by the piston, figure 33), and should begin to
close as the diaphragm moves forward (figure 34). Priming in this way assures stable
performance and protects the HYDRAtube from damage during system upsets. The priming
procedures is the same for elastomer and PFA HYDRAtubes.
Figure 33 Figure 34
• With the intermediate chamber fill plug removed, manually rotate the motor coupling
until the pump piston assembly is in the full rearward position.
• Fill the intermediate chamber using a mixture of water and 1/3 propylene glycol by
volume or other liquid selected for the application.
• Check the seal on the fill plug and replace if necessary. Reinstall and tighten the fill
plug to the intermediate chamber.
• Reinstall the coupling guard and front reservoir cover. Allow the pump to run for 5 to
10 minutes. Observe the action of the HYDRAtube through the discharge port. It
may be helpful to shine a light up through the suction port. It should go from a
complete round form at the end of the suction stroke to an elliptical shape at full
discharge stroke, but not closing off at the middle. The pump now has a correct
intermediate prime and is ready for service.
• Reinstall the suction and discharge valve assemblies.