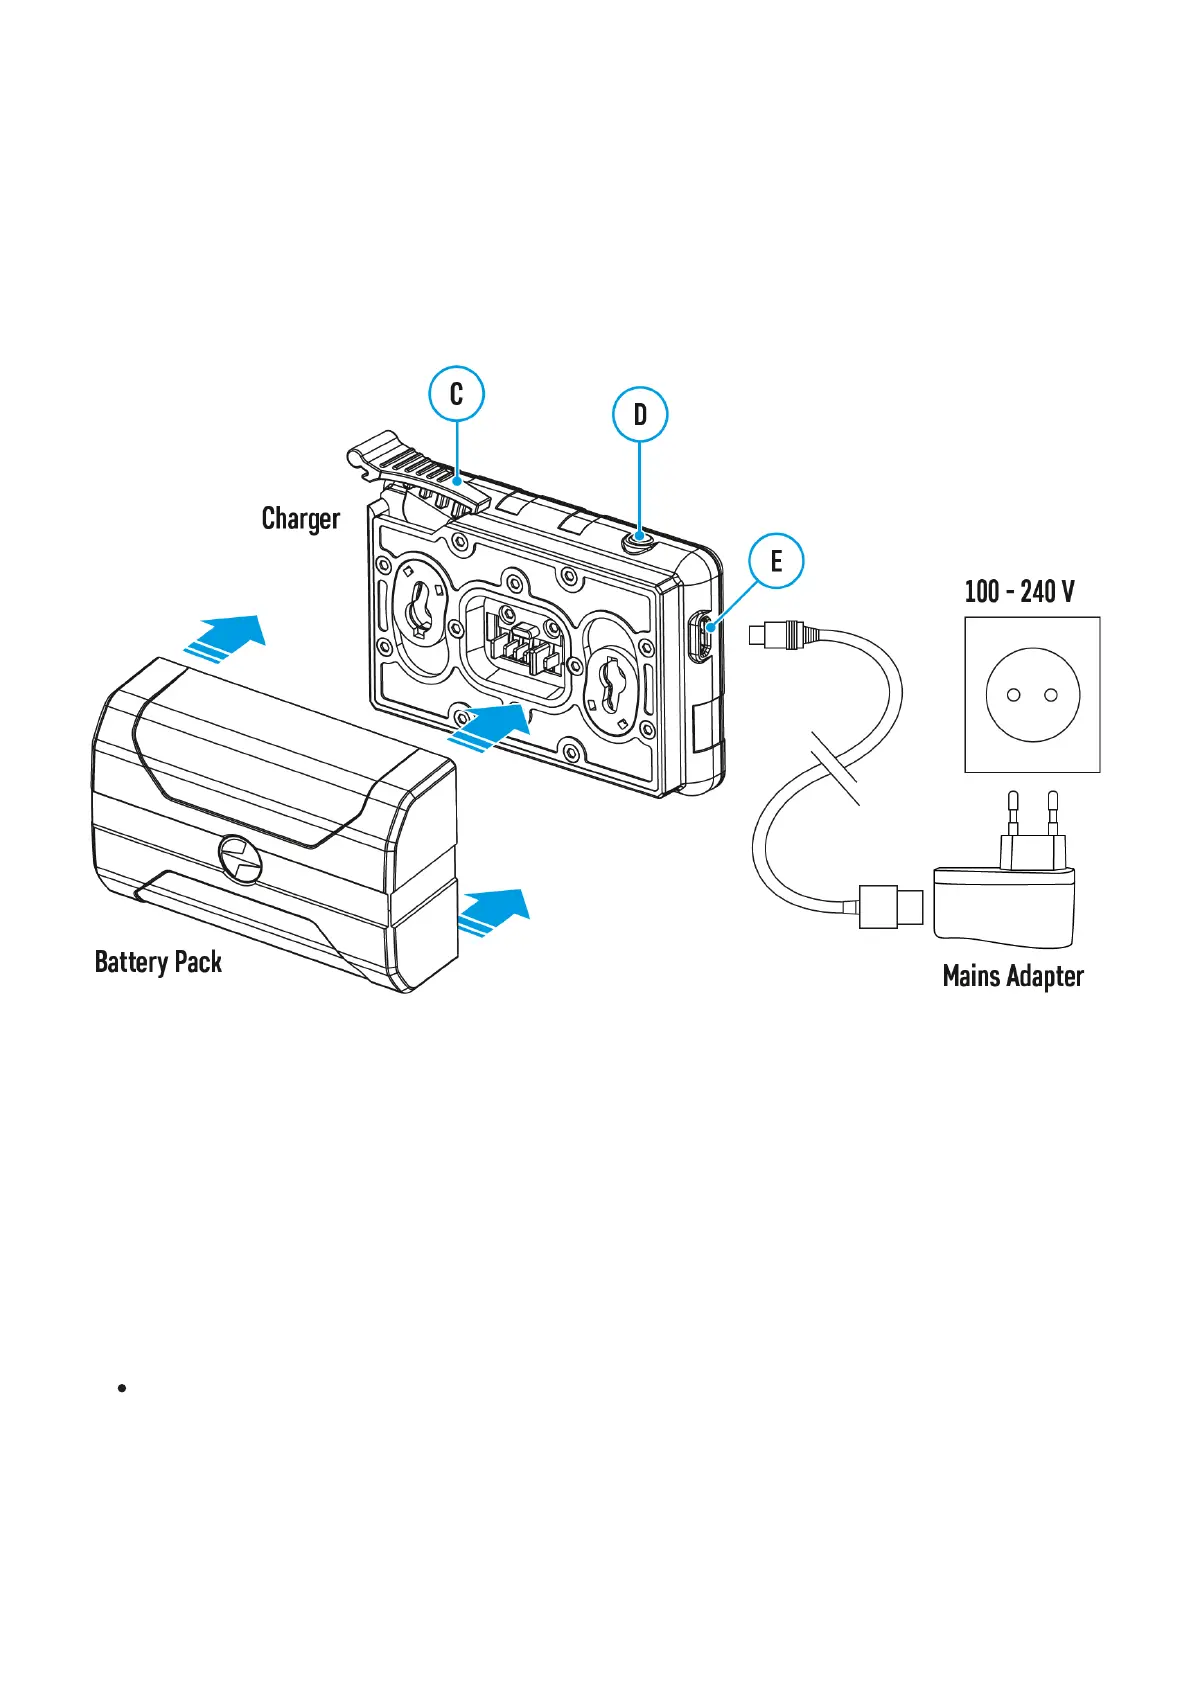
Battery Charging
Helion 2 Prothermal imaging scopes are supplied with a rechargeable Li-Ion Battery Pack
IPS7 which allows operation for up to 8 hours. Please remember to charge the Battery Pack
before first use.
Charging
Step 1. Install the battery into the charger
1.
Lift the lever (C) of the charger.
2.
Remove the protective cover from the Battery Pack.
3.
Insert the battery into the charger until it stops.
4.
Lower the lever (C).
Step 2. ?heck the current battery level
Upon installation, a green indicator (D) on the charger will start to glow and begin flashing:
- once if the battery charge level is from 0% to 50%;
- twice if the battery charge level is from 51 to 75%;
- three times if the battery charge level is from 76% to 99%.