EasyManua.ls Logo

Pulsar SLUDGE FINDER 2 - User Manual

Pulsar SLUDGE FINDER 2
140 pages
Print Icon
To Next Page IconTo Next Page
Loading...
SLUDGE FINDER 2
INSTRUCTION MANUAL

Table of Contents

Other manuals for Pulsar SLUDGE FINDER 2

Questions and Answers

  • M
    Michael JohnsonAug 1, 2025
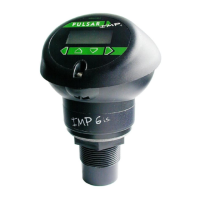
    What to do if my Pulsar Measuring Instruments display shows 'Wiper Fault'?
    • L
      Lisa CarlsonAug 1, 2025
      If the main display of your Pulsar Measuring Instruments shows 'Wiper Fault', it indicates a problem with the wiper. First, check the transducer wiring, including the motor terminal. Use the F5 hotkey to start a manual wiper sweep. If the message persists, the issue lies with the wiper or motor. Remove the transducer, clear any obstructions, and try another manual sweep. If the fault continues, further consultation with Pulsar is required.
  • E
    etoddAug 6, 2025
    What to do if the status shows “Xdr Fault” on Pulsar SLUDGE FINDER 2?
    • F
      ffrazierAug 7, 2025
      If the status on your Pulsar Measuring Instruments shows “Xdr Fault”, it means there is a fault with the transducer wiring. To resolve this, check the wiring to the transducer.
  • P
    Paul WalkerAug 11, 2025
    Why aren't the relays changing state on my Pulsar SLUDGE FINDER 2 even though the LEDs change color?
    • K
      Keith DavisAug 11, 2025
      If the LEDs on your Pulsar Measuring Instruments change color at the relevant relay switch points but the relays do not change state, check the power supply to the unit and ensure the voltage selector is set to the correct position.
  • S
    Sabrina MclaughlinAug 16, 2025
    How to fix a blank display and non-firing transducer on Pulsar SLUDGE FINDER 2?
    • T
      Tamara CarrollAug 16, 2025
      If your Pulsar Measuring Instruments display is blank and the transducer is not firing, check the power supply, voltage selector switch, and fuse.
  • W
    William MartinezAug 21, 2025
    What to do if my Pulsar Measuring Instruments display an incorrect reading for the current level on a dB transducer?
    • V
      Valerie RodgersAug 21, 2025
      If your Pulsar Measuring Instruments consistently displays an incorrect reading for the current level on a dB transducer, check the trace screen for the relevant transducer. If there is an obstruction in front of the true echo, enter Program Mode and directly access P21 (Set Distance) for xdr1 or P1021 for xdr2. Type in the distance of the true echo and press ENTER. Press ENTER again when prompted, wait until ‘Operation successful’ is displayed and return to Run Mode, the display should now update to correct reading.
  • J
    Jacqueline GarrettAug 27, 2025
    Why is the material level consistently incorrect on my Pulsar Measuring Instruments?
    • L
      Lauren YoungAug 27, 2025
      If the material level displayed by your Pulsar Measuring Instruments is consistently incorrect by the same amount, check the empty level (P105), display offset (P802), and measurement offset (P851).

Summary

Chapter 1 Start Here

Functional Description

Explains how the Sludge Finder 2 operates and its core functions.

Product Specification

Details the physical, environmental, and performance specifications of the unit.

Chapter 2 Installation

Power Supply Requirements

Outlines the AC and DC power requirements for the unit.

Location

Guides on selecting a suitable installation location, considering hazardous areas.

Terminal Connection Details

Provides terminal connection diagrams for the unit and transducers.

Important Information

Includes crucial safety and installation guidelines.

Transducer (Sensor)

Locating the Sludge Transducer

Guides on optimal placement of the transducer within the tank.

Installing the Transducer

Details the procedure for installing the transducer and its cable.

Maintenance

Transceiver Mounting

Pulsar Radio Telemetry System

Installation Tips

Chapter 3 How to Use Your Sludge Finder 2

Operating the Controls

Explains how to navigate and use the unit's interface and buttons.

Run Mode

Details the primary operating mode and its behavior after power failure.

Program Mode

Explains how to enter and use the programming mode for setup.

How to Access Program Mode

Step-by-step guide to entering program mode using the passcode.

Using the Menu System

Explains the hierarchical menu structure and navigation.

Test Mode

Explains how to use test mode for simulating application and confirming settings.

Using the RS232 Serial Interface

Details how to communicate with the unit via a PC using RS232.

Chapter 4 Programming Guide

Example 1: Primary Settlement Sludge Interface monitoring

Provides a step-by-step guide for a specific programming example.

Example 2: Level Monitoring with High and Low Alarms on Point 2

Details programming for level monitoring with alarms.

Example 3: Using a Single Viper Transducer to Measure 2 Different Interface Levels

Explains how to use one transducer for multiple interface measurements.

Example 4: Setting the Unit to Alarm on Hi-Floc Levels

Guides on configuring the unit for high floc level alarms.

Chapter 5 Menu System and Parameter Guide

Chapter 6 Parameter Listing and Descriptions

Application Parameters

Lists and describes application-specific parameters like Mode and Transducer type.

Failsafe

Explains fail-safe modes and timers for the unit.

Chapter 7 Troubleshooting

Troubleshooting

Provides solutions for common symptoms and issues.

Pulsar SLUDGE FINDER 2 Specifications

General IconGeneral
TechnologyUltrasonic
Enclosure RatingIP68
Resolution1 mm
Output4-20 mA
Process Connection2" NPT
Battery LifeN/A (powered device)

Related product manuals