18 19
STEP 9. Follow the on-screen
instructions. The next two
screens will provide instructions
on making sure that the camera is
ready to be connected. Click Next
to proceed.
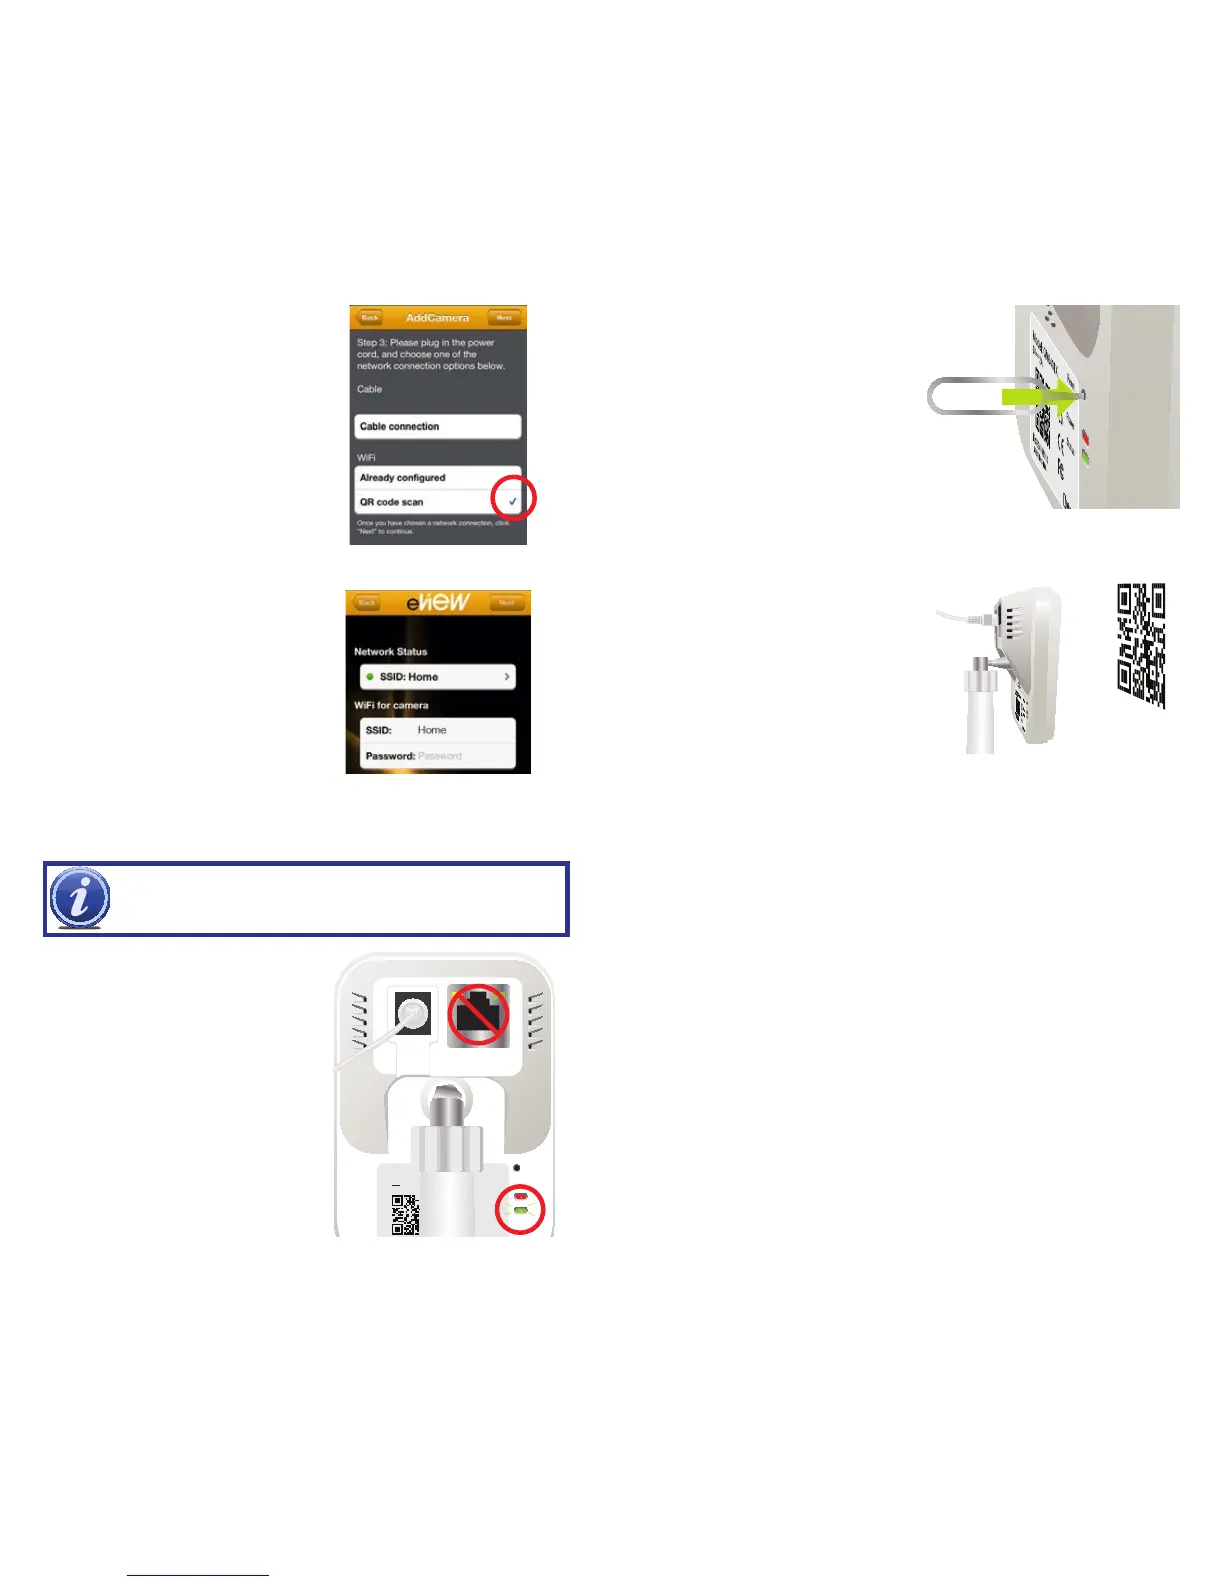
You must make sure that there
are no cables connected to the
EasyView other than the power
cable and that the green Status
light below the red Power light is
flashing rapidly (about 5 times a
second).
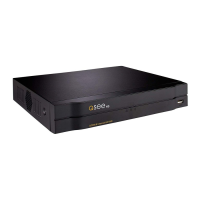
STEP 7. Select your connection
option. Choose the third option,
QR code scan to proceed with
wireless setup.
In the future, if you are recon-
necting the camera to your net-
work after removing it from your
account, you may use the Already
Configured option to complete
the process.
STEP 8. Select your wireless
network and enter its
password. The Network Status
section will show the wireless
network your mobile device
is currently using. By default,
eView will use this network for
the camera. If you wish to use a
different network, you should use
your device’s Settings menu to
switch networks. Enter the network
password and tap on Next.
PICTURE 4-10
PICTURE 4-11
PICTURE 4-12
PICTURE 4-13
IMPORTANT! Both your mobile device and your EasyView camera
must be on the same network during setup, otherwise the camera
status will show “Unknown” or “Offline.”
If the green LED is flashing slowly or is
glowing steadily, you will need to use
the included reset tool (or the end of
a paperclip) to CAREFULLY push the
Reset button. Push the button until you
hear a click. Hold it down for a second
and then release. The Status LED and
the blue internal LED will turn off and
then re-light after up to 30 seconds.
The green Status LED should come on
last and should be flashing quickly. You
can then proceed with the next step.
PICTURE 4-14
STEP 9. Use the on-screen QR code.
You will hear a six-note chime and the internal blue LED and green Status
LED will both turn off momentarily. The blue LED will come back on first
followed by the green LED which will begin flashing slowly (about once a
second). This may take up to a minute. If the green LED stays off for longer
than a minute, you can take the following actions:
∙ Go back to Step 8 and re-enter the WiFi network password.
∙ Reset the camera using the tool and show the camera the QR code again.
∙ You may also wish to recheck the signal strength from your router at this
location to ensure that the camera is using the correct network with a strong
enough connection.
When your camera has been added, you will be returned to the Connection Option
screen seen in Step 7. Tap Next to continue to the Camera Status window.
Your device’s screen will display a
QR code that your camera will use
to connect to your router. Hold your
mobile device 6 to 12 inches (15
to 30cm) away from the camera
so that your Easy View can see the
entire image. Again, the process will
be faster if both devices are steady.
 Loading...