16 17
4.2 CONNECTING THE CAMERA
You will have a choice about how you wish to configure your camera to connect
with your network. If you are using a mobile device with a built-in camera, this
setup process can done wirelessly using only the mobile device and the camera. If
you will be operating the camera using the network cable, or if you will be setting
up the camera using a computer or a mobile device - such as as tablet - without a
camera, then you should use an Ethernet cable. Keep in mind, that the camera will
still require a power connection regardless of which method you use.
WIRELESS CONNECTION METHOD
This is the simplest and quickest method to get your camera up and running. It
requires using a mobile device - one preferably with a built-in camera.
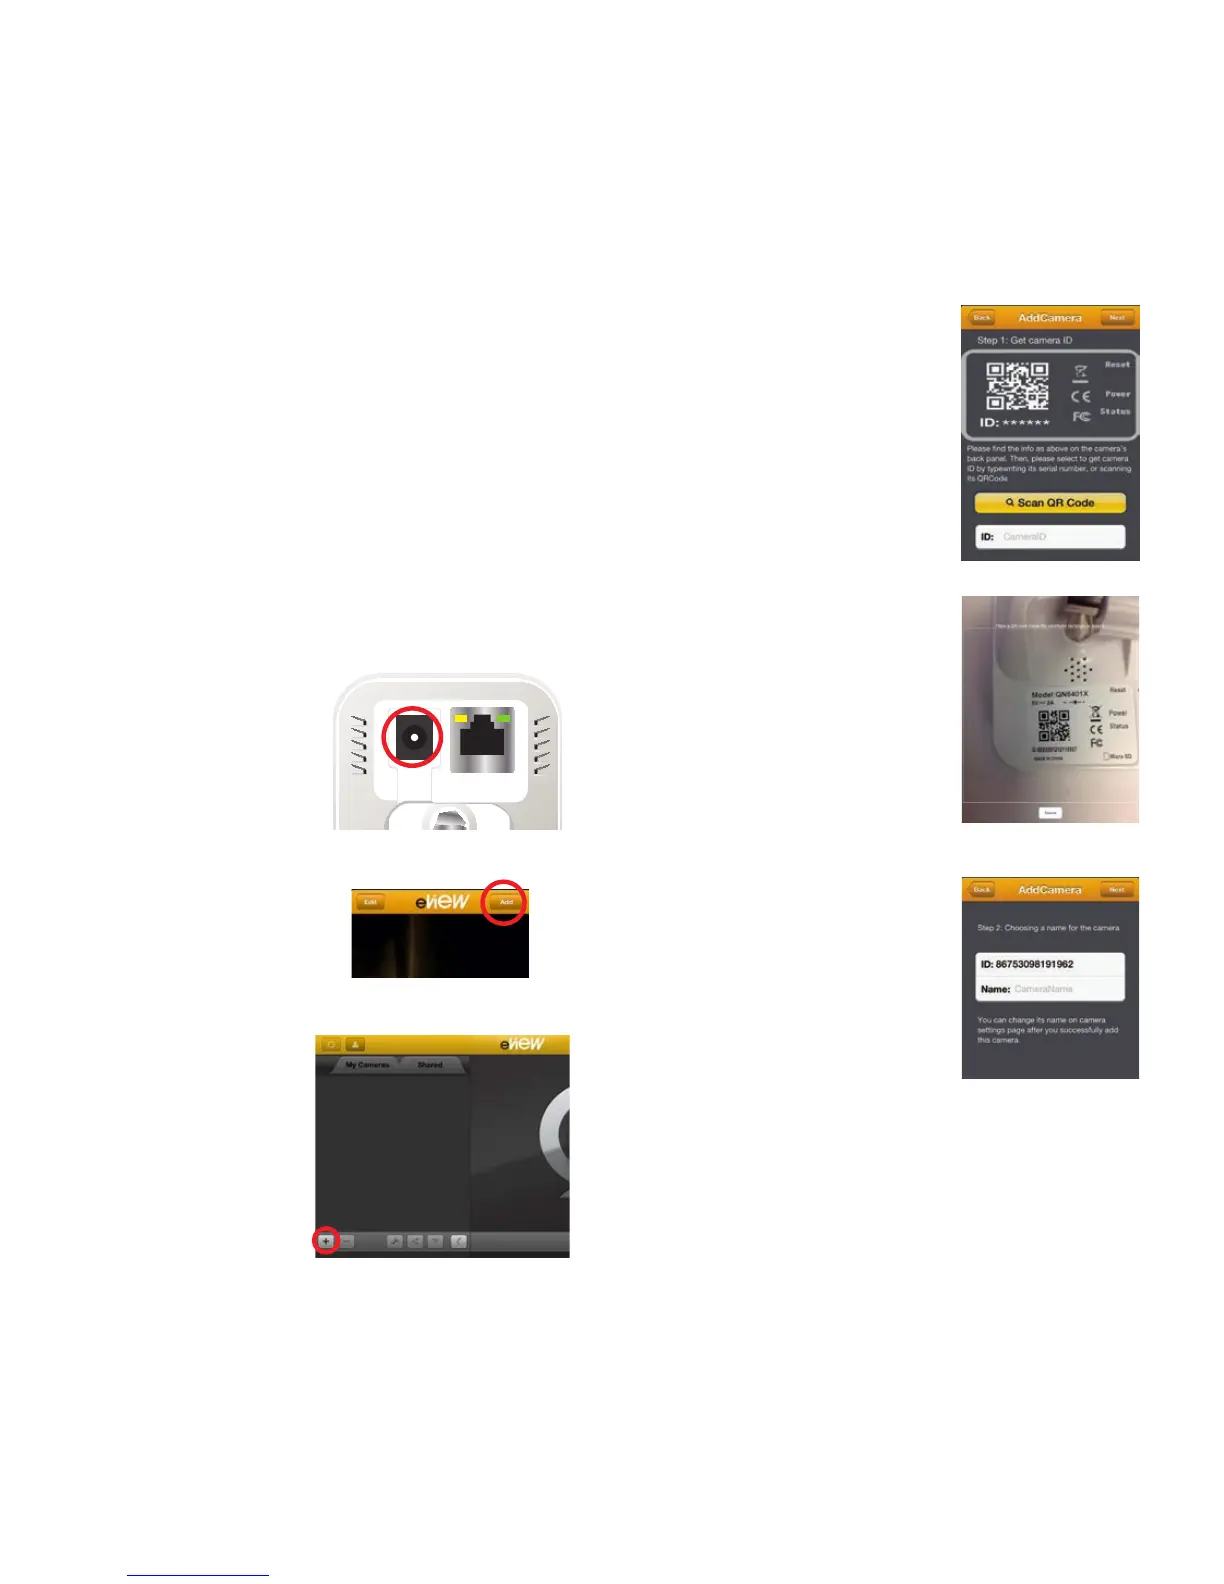
STEP 1. Place the camera where you plan to use it. You will need to keep the
camera easily accessible during the setup process, so you should not mount it
to a wall or other surface at this time.
Step 5. Enter the camera’s ID
number. You can either use the
keypad or click on the Scan QR
Code button to use your device’s
camera to enter the number
automatically.
If your device doesn’t have a
camera, the app will display an
error message if you attempt to
use the QR scanning function.
When scanning the QR code,
both the camera and your mobile
device will need to be relatively
steady. Laying the camera face
down on a surface can help. The
QR code does not need to fill the
white box on the screen. Your
device’s camera will automatically
adjust focus and the ideal distance
between your EasyView and your
mobile device is between 3 to 6
inches (7.5 to 15.5cm).
STEP 6. Name your Camera. Once
your mobile device reads the QR
Code, it will show the ID number
below the Scan QR Code button.
Tap next to proceed.
The next screen will display the
camera’s ID number and allow
you to name it. While you can pick
STEP 2. Plug the camera into
a power outlet. Only use the
included power adapter and cable.
The camera’s power port is on the
upper left rear of the camera. You
cannot power your camera from a
USB port.
STEP 3. Launch the eView app on
your mobile device. Log into
the app. This will take you to the
Management Window.
STEP 4. Tap the Add button. This is
located in the upper right corner of
the phone app. (Picture 4-5)
On tablets, this is the Plus (“+”)
button located in the bar under the
My Cameras tab. This is normally
hidden. To reveal, tap the arrow
(“>”) in the bar. (Picture 4-6)
 Loading...