20 21
PICTURE 4-15
PICTURE 4-16
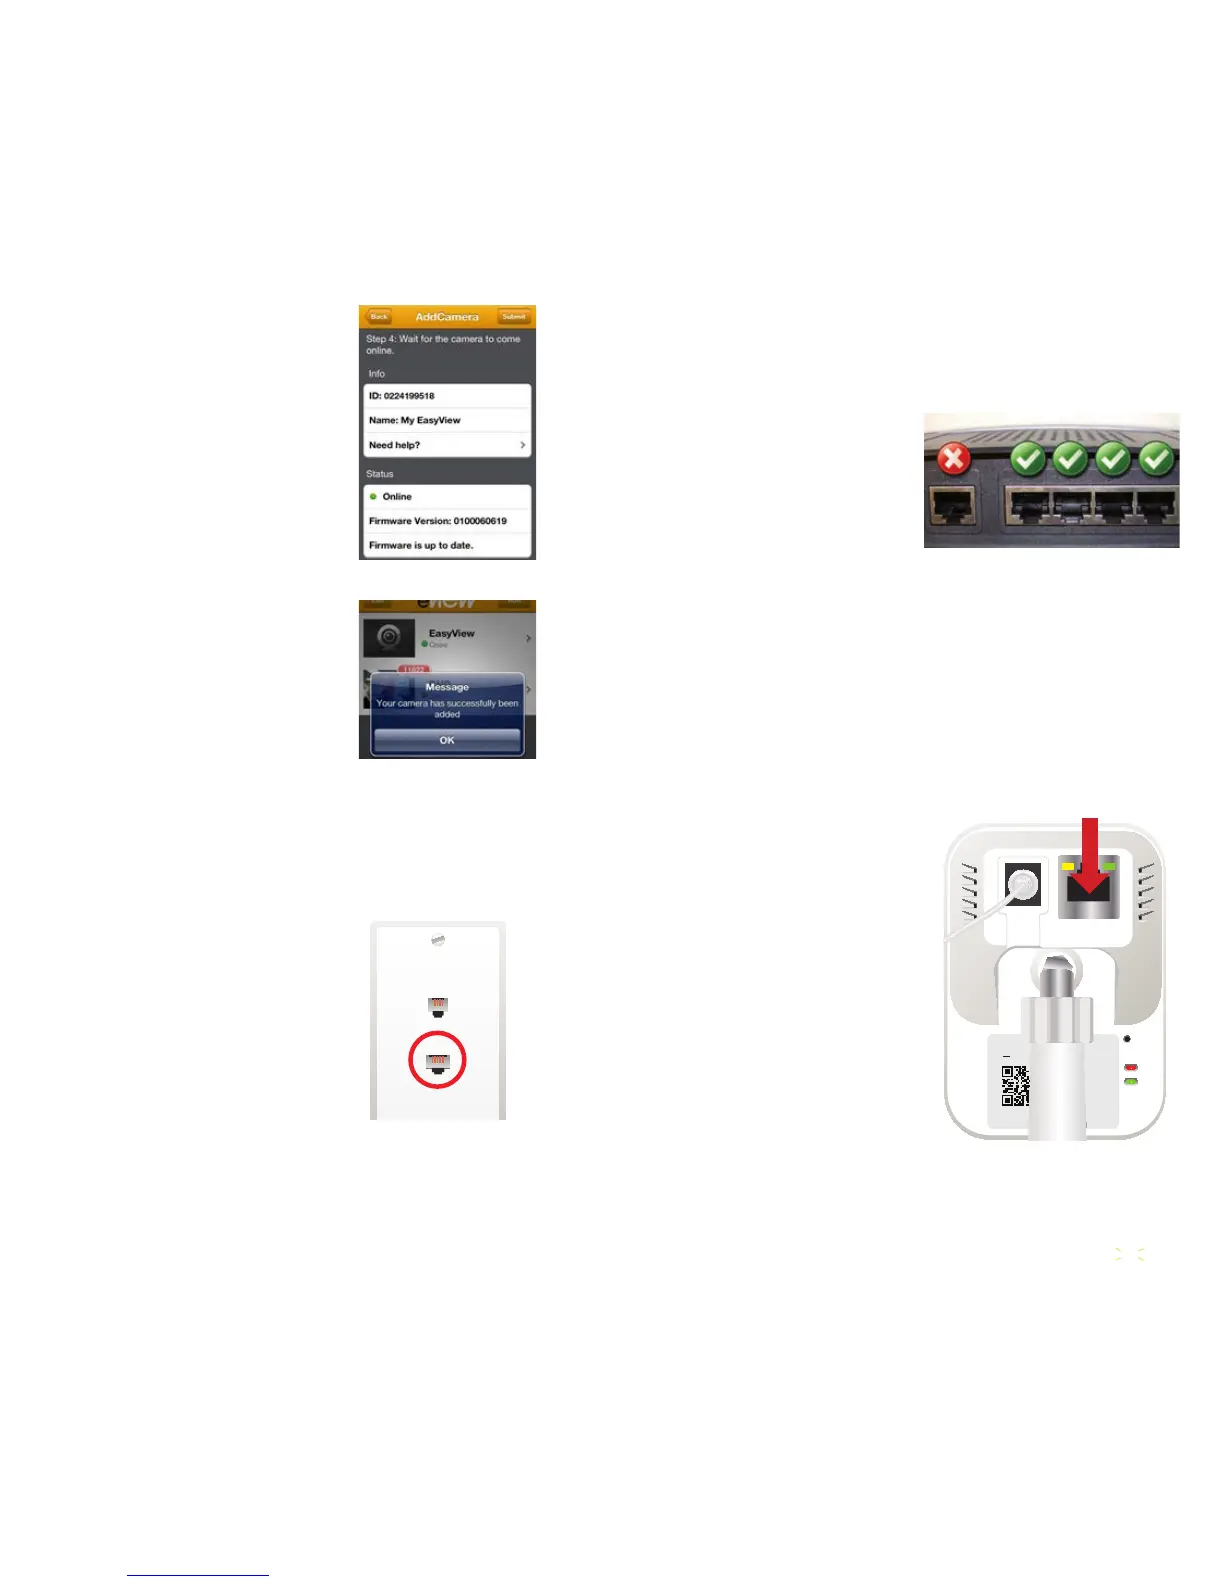
This window will show the status of
your camera along with its name, ID
number and information about its
firmware (the internal software it uses
to operate). Right after connecting to
your network, the Status section may
show as “Offline” or “Unknown” as
your app communicates through your
network with the camera. The app will
check to update the status every five
seconds. The status should change to
“Online” within 10 seconds.
Tap Submit in the upper right
corner and you will return to the
Management Window. You will also
receive a message indicating that your
camera has been successfully added.
Please see the next chapter for how to
get the most out of eView.
CONNECTING USING THE NETWORK CABLE
If you plan on using your camera in a wired mode, if your mobile device does not
include a built-in camera, or if you plan on adding your camera to your eView
account using a computer, you will need to first connect your camera to your
router using a network cable - also called an Ethernet cable. You can make this
connection directly to the router, or
to the router through a network port
which looks like a phone jack and is
usually mounted on a wall. You will also
need your mobile device or a computer
with Internet access to complete the
registration and setup process.
Instructions on adding a camera to your
account using only a computer will be
covered in Chapter
6
.
Phone
Network
PICTURE 4-17
Lastly, if you will be operating the camera wirelessly, you will also need to have
the password (also referred to as the network key by some brands) available when
making the wireless connection later. Therefore, if you will be making this first
connection in another room away from the router, you should have that password
handy before you begin.
STEP 2. Connect the camera to
your router with the included
network cable. If you will be
operating your camera in the
wireless mode, this connection will
only be temporary.
PICTURE 4-18
If there are no available ports on the back of your router, you will need to unplug
one of the cables currently connected to the router. Use only the LAN ports, which
are generally grouped together. These ports are marked in green in Picture
4-18. The actual position and configuration will vary by router model. Do not
disconnect the cable from the port marked “Internet”, “WAN” or “Network” (shown
in red) as this will disconnect the router - and all attached devices - from the
Internet. This is an especially bad idea if one of those devices is currently being
used in an intense online gaming session or downloading critically important files,
so choose your port wisely.
STEP 1. Connect the power. Use only the included power adapter and cord. Plug
the power adapter cord into the socket on the back of the camera leaving the
network cable connected. Plug the other end into a power outlet. You cannot
power your camera using a USB port on a computer
PICTURE 4-19
MADE IN CHINA
Model: QN6401X
5V--- 2A
Reset
Power
Status
Micro SD
ID:0224199518
Plug the other end of the cable to
the network port on the back of the
camera (red arrow in Picture
4-19).
When the camera is first powered
up, the red Power LED on the
lower part of the camera will
illuminate. After you connect the
Network cable, the LEDs above
the network port will light up.
The yellow light will glow steadily
if you have a good connection
while the green light will flash to
show that the router and camera
are communicating. The green Status LED, below the Power light, will also
come on. It may flash slowly for a brief period, but it will glow steadily once a
connection has been established.
 Loading...