32 33
REPLAY
This area lets you play back video that is recorded on a Micro SD card inserted
into the camera. If you have not put a card into your camera, attempting to use
this feature will result in a message stating that an error has occurred. While the
message will ask you to try again shortly, if you do not have a memory card in the
camera, you will still not be able to access any video records as they don’t exist.
PICTURE 5-12
PICTURE 5-13
PICTURE 5-14
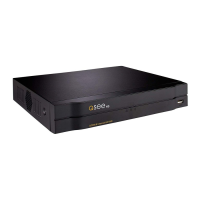
While you can use the Motion Alerts
to narrow down the time you wish to
search, remember that the camera is
recording all of the time, so you are
not limited to just the times that event
notifications occurred.
Use the scroll wheels to locate a date
and time. How far back you can search
is based on how large your SD card
is. A 32GB card is the maximum sup-
ported by your camera and it can hold
approximately 7 days’ worth of video.
Dates and times that do not have video
are grayed out and not accessbile.
Once you have selected your start time, press OK and eView will start access-
ing and playing back the video. Once the video starts playing, you will be able to
record or take snapshots just as with live video. To exit Replay, simply tap on Live
to return to the camera’s live view.
SHARING VIDEO AND IMAGES
Some times, you just need to share. Whether you caught baby’s first step,
captured video of your pet doing something spectacular, or just saw something
Screenshot Record
awesome on the camera, you’ll want
to share that moment. By clicking
on either the Screenshot or Record
button, you can capture the image or
video, respectively. After you’ve tapped
Screenshot, or after you tap Record a
second time to end the video clip, the
Share window will open up. You can
choose to send the file directly to Face-
book, Twitter, Instagram (image only) or
Weibo. Tapping Share will allow you to
save the file to your phone, or send it in
a text or mail message. Once it’s been
saved, you can use any other social
media app on your phone to share it to
that service.
5.3 EVIEW ON A TABLET
This set of instructions will cover how to use eView on a tablet computer. Your
tablet does not have to have 3G/4G capability, but it must be able to connect to
your network via WiFi.
Creating an account and logging into it were covered in
Chapter 3
, while the
process of adding a camera to your account was covered in
Chapter 4
. There-
fore, we will start at the Main Screen.
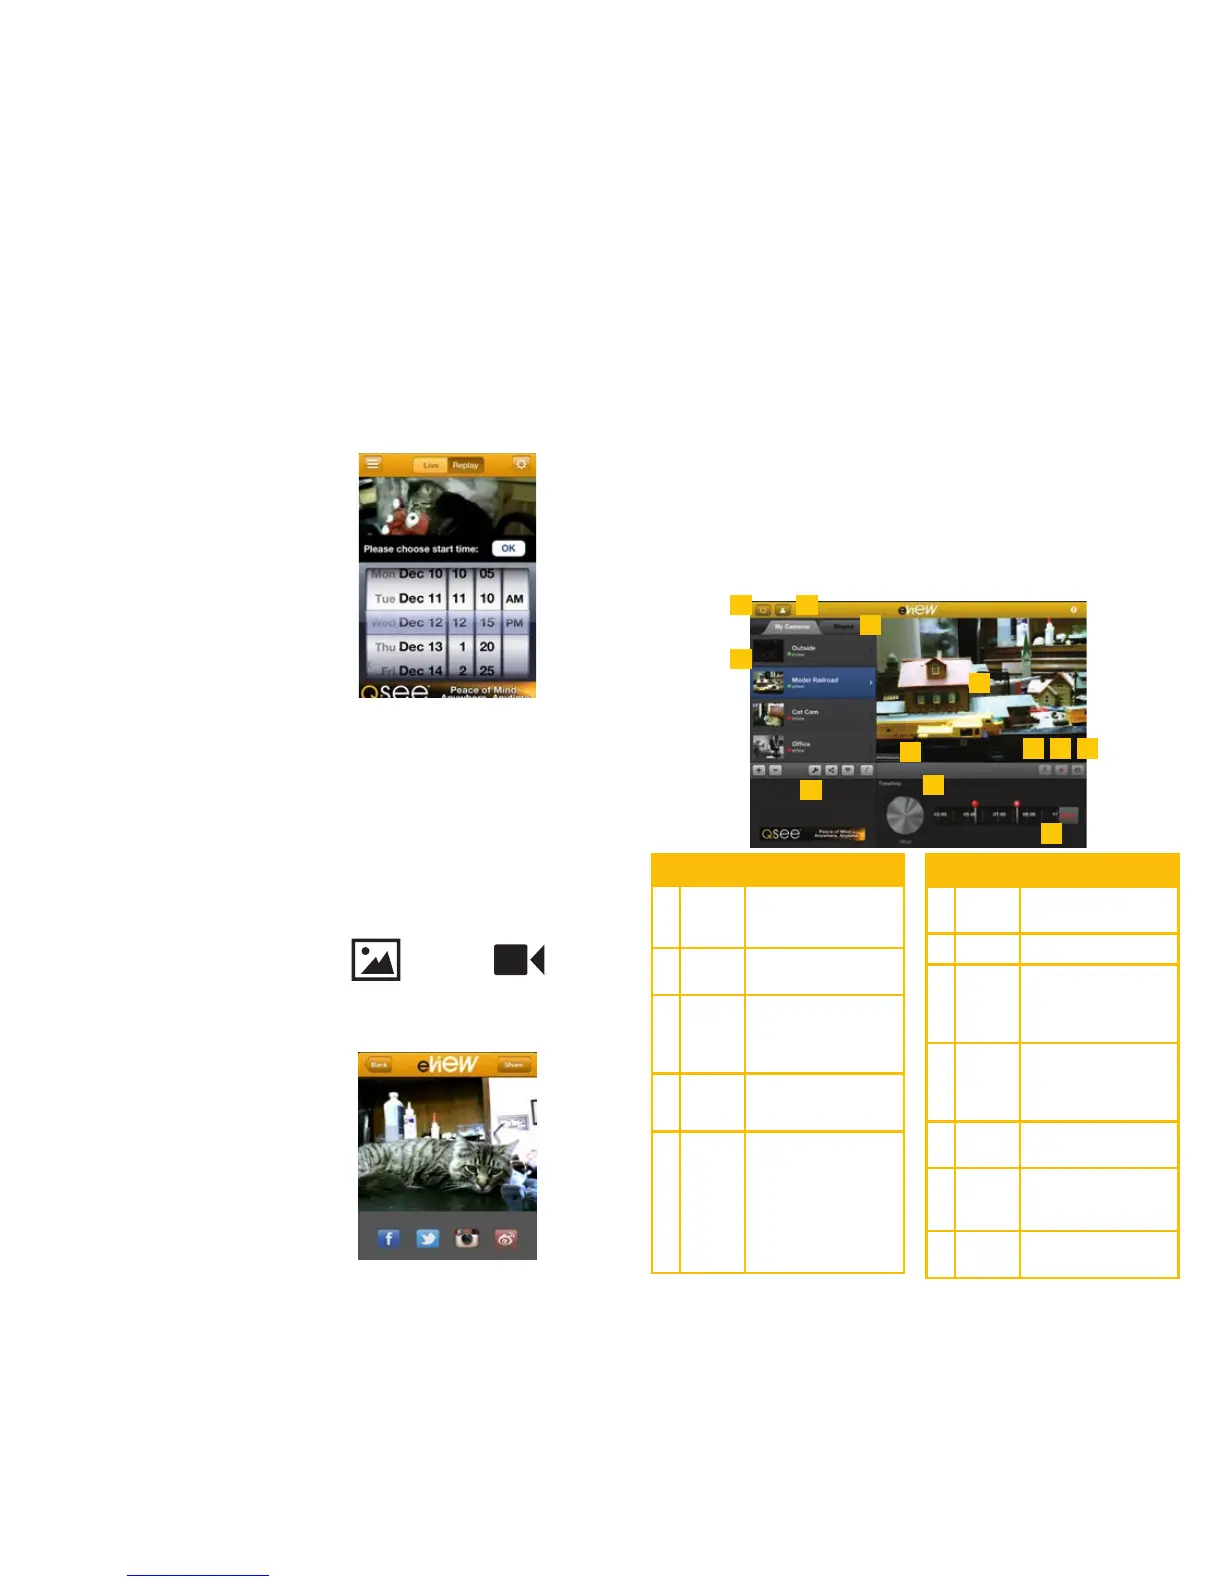
MAIN SCREEN
This is the screen that eView will open up to whenever you log in. Unlike the mo-
bile phone version of the app, you’ll be able to check on your cameras; add, delete
or share cameras; adjust settings and look for recorded video. You can also switch
to viewing cameras that have been shared with you in the Shared tab.
# Name Function
1 Settings
Change your password,
check terms of service
and app version.
2
Log In/
Out
Tap here to log in or out
of your account.
3
Camera
List
This is the list of cam-
eras you own. Select
one to view in the view-
ing window (item 6)
4
Shared
Tab
Cameras shared by oth-
ers are listed here.
5 Tools
Tap the arrow (>) to
reveal. Add or delete
cameras. Turn motion
detection, audio and
notifications on or off.
Share your camera.
Adjust the camera’s WiFi
settings.
1 2
3
4
5
6
8
7
9 10
11
12
PICTURE
5-15
# Name Function
6
Viewing
Window
Watch your cameras
here.
7 Status Shows camera status
8 Talk
Tap to speak through
the camera. The icon
will turn red. Deselect to
hear audio from camera.
9 Record
Tap to record video. The
icon will turn red while
recording to your device.
Tap again to stop.
Screen
Shot
Tap to capture still
image
Scale
Knob
Adjusts the Timeline’s
scale between minutes,
hours & days.
Timeline
Shows motion events.
10
11
12
 Loading...