28
1. Camera No: Switch quickly between cameras.
2. Call Preset: Moves the camera to a preset point.
3. Call Patrol: Initiates a patrol of your choice.
4. Preset: Defines a preset point.
5. Patrol: Initiates or stops a patrol.
6. PTZ Menu: Toggles the appearance of the PTZ Control Menu onscreen. While the PTZ Control Menu is hidden,
the NVR will still be in PTZ mode. The context menu can still be opened via right-clicking the interface.
7. PTZ Settings: Opens the PTZ Settings menu where you can adjust the control method for the camera.
4.6 Main Menu Definitions
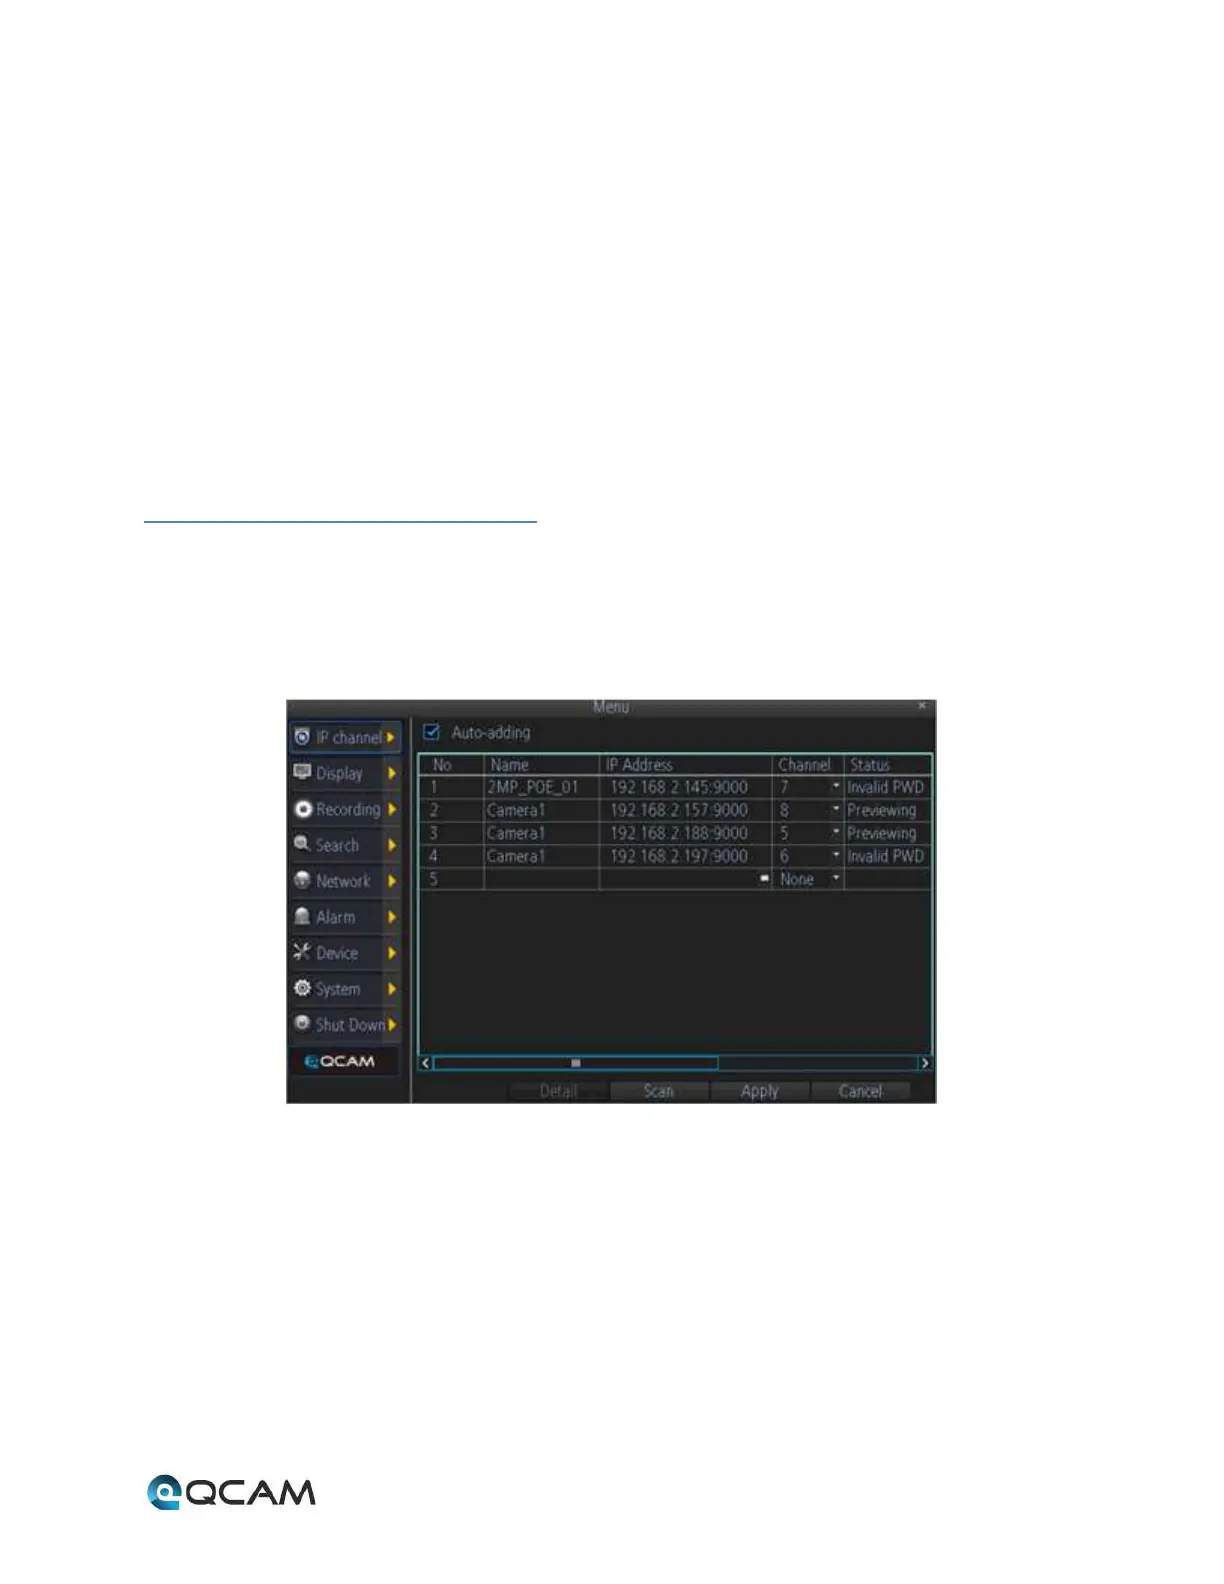
4.6.1 IP Channel
The IP Channel menu enables the user to view specific information about cameras that are currently connected to
your NVR such as channel number, IP address, and status. Below is a screenshot of the IP Channel Menu:
Below is an explanation of the fields on this menu:
• Auto-Adding: This checkbox enables the user to cause the NVR to automatically display video from cameras it
has detected in the local area network. This option is disabled by default, so cameras must initially be
manually added to the NVR.
• IP Camera List: This table shows all IP cameras on the local area network. Cameras are automatically added to
this list when the scan button is clicked.
o To add an IP camera to the NVR, please select an available channel to assign a camera to from the
channel drop-down list, and then input the user name and password. Also IP camera can be manually
added by inputting the IP address/port or RTSP URL, user name, and password into the list. When
finished, click the Apply button to save the new configuration.