74
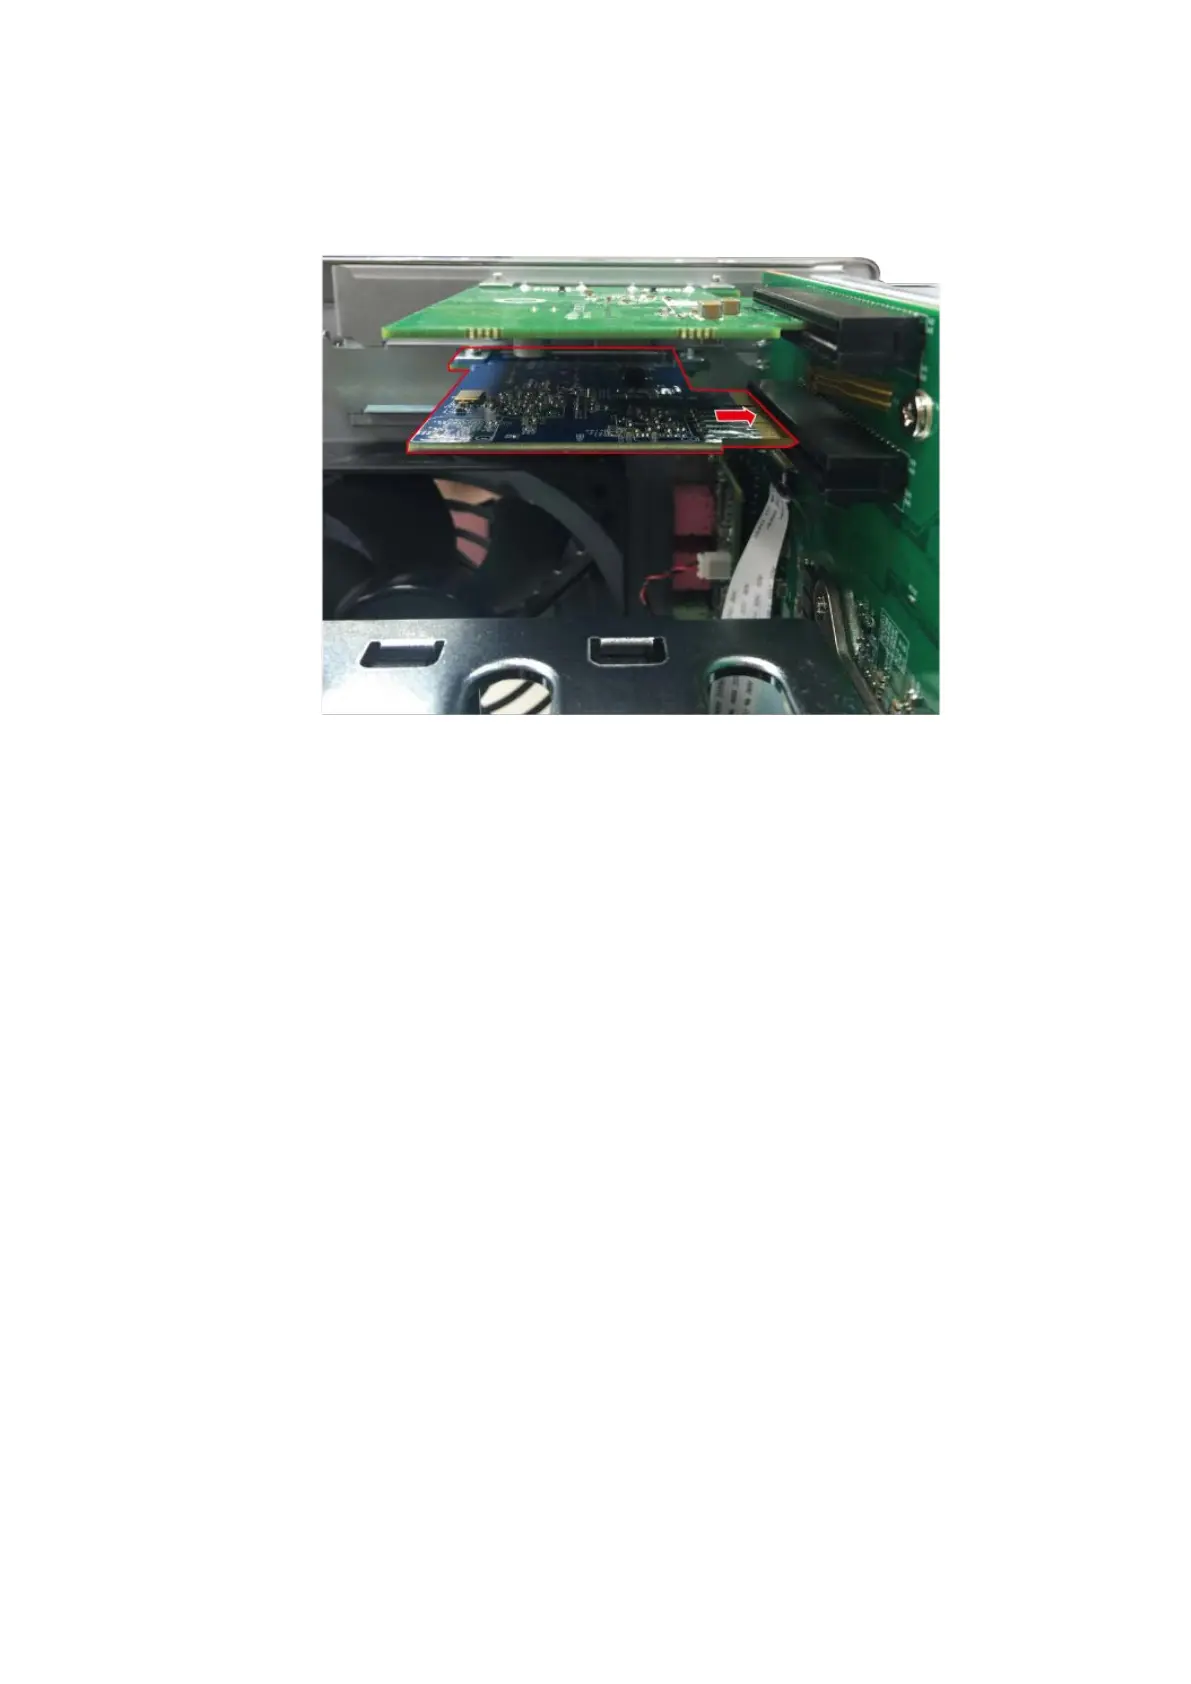
network expansion card to the break in the PCIe slot. Fully insert the network
expansion card to the expansion slot.
10. Fasten screw to lock in card.
11. Place PSU back to its original position and fasten the 5 screws that were removed in
steps 6 and 7.
12. Close the case cover and fasten the screws. Connect the power adaptor and cables
to the NAS.
13. To verify that the network expansion card has been installed correctly and is being
recognized by the operating system, log into QTS as administrator and go to
“Control Panel” > “System Settings” > “System Status” > “Network Status” and
check for the total number of network interfaces.
6.4 TS-431XU, TS-463U, TS-463U-RP, TVS-471 Series
1. Turn off the NAS. Disconnect the power adaptor, network cable(s), and any other
connectors or cables from the NAS.
2. Before installing the network expansion card, put on an antistatic wrist strap to
prevent electrostatic discharge. The crocodile clip should be connected to the ground.
 Loading...