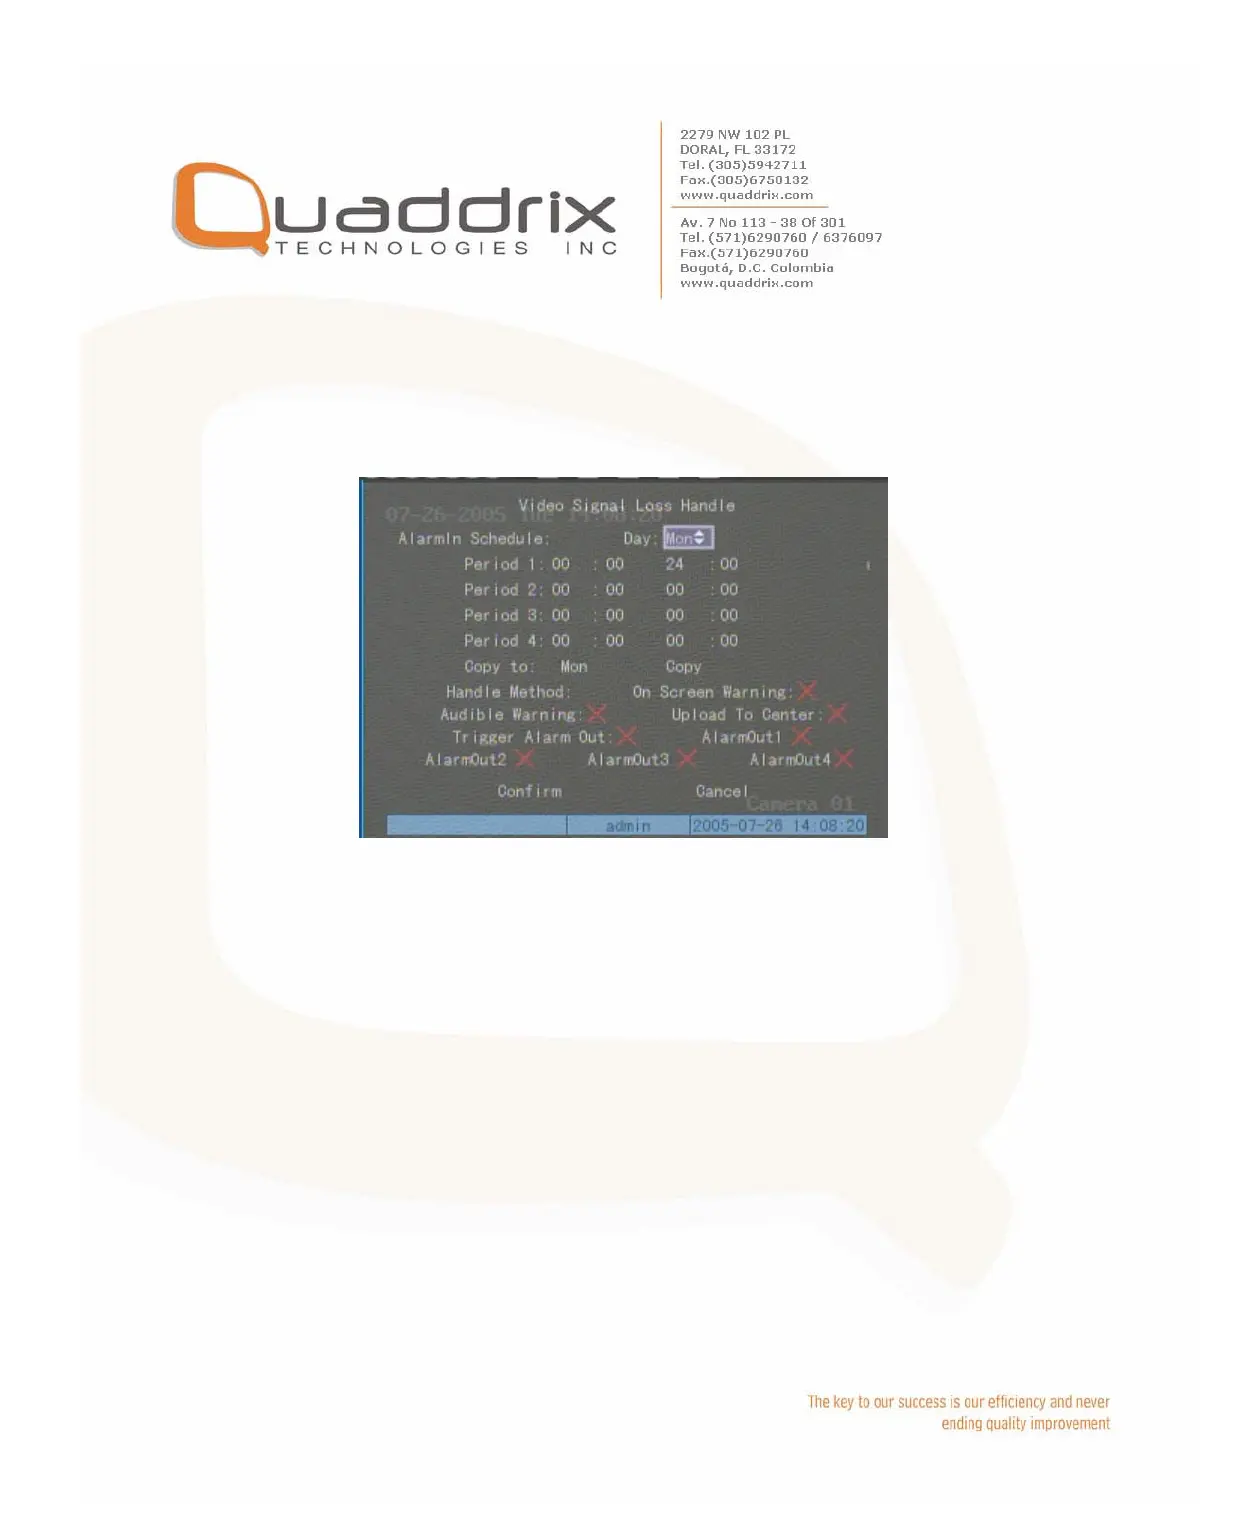
Step 3: Enter into “Video Signal Loss Handle” interface: Move
“Active Frame” to the list box on the right side of “Video Loss” item,
use [Ç] key to select “Handle” option and move “Active Frame” to the
“Policy” button on right side. Press [ENTER] to enter into “Video Signal
Loss Handle” interface:
Step 4: Setup alarm schedule: You can setup working schedule.
Only when the video loss is happened in the schedule, DVR will
response.
Note: The 4 time periods can not be repeated. Please reboot DVR to
make parameters into effective.
Step 5: Setup alarm policy: You can select one or more response
solutions, including “On Screen Warning”, “Audible Warning”, “Upload
to Center” and “Trigger Alarm Output”. You can use [Å] [Æ] and
[EDIT] key to enable or disable them. “×” is disable and “9” is enable.
Step 6: Save alarm setup: After your setup, press “Confirm” button
and return “Image Setup” interface. In “Image Setup” menu, press
“Confirm” button to save current camera parameters and return main
menu.
 Loading...