EasyManua.ls Logo

QualGear QG-PM-FT1-WHT User Manual

Default Icon
6 pages
To Next Page IconTo Next Page
Page #1 background imageLoading...
Page #1 background image
Maintenance
11
Please check that the projector mount is secure and safe to use at regular intervals. If you have any
questions regarding any of the instructions or warnings, please contact your local distributor (OR)
contact QualGear technical support via email at support@qualgear.com.
5 Year Limited Warranty
Version September 2015
5 Year Limited Warranty
Version September 2015
QG-PM-FT1-WHT
www.qualgear.com
ADJUSTABLES: Vertical Tilt, Horizontal Roll, and
Horizontal Rotation: +/- 5 degrees
Horizontal Slide (Forward/Backward): 358 – 658mm,
from the center of the wall plate
Horizontal Slide (Left/Right): 90mm
CAUTION!
Do not exceed the maximum rated weight
specified. Otherwise, serious injury or
property damage may occur.
PROJECTOR WALL MOUNT
INSTALLATION MANUAL
Installing the Wall Plate Covers and the Decorative Cover
7
Adjusting the Forward/Backward Slide
Locking Screws
W-D
-5°
-5°
[Projector not included][Projector not included]
(33lbs)
RATED
15kg
(33lbs)
RATED
15kg
Wall Plate Cover
Connect the cables to the projector, and install
the wall plate covers and the decorative cover.
Decorative Cover
Question and Answer IconNeed help?

Do you have a question about the QualGear QG-PM-FT1-WHT and is the answer not in the manual?

QualGear QG-PM-FT1-WHT Specifications

General IconGeneral
ColorWhite
MaterialSteel
Weight Capacity30 lbs
Mounting PatternUniversal
Adjustable TiltYes
Maximum Load Capacity30 lbs
VESA CompatibleYes
Product TypeWall Mount
VESA Hole Pattern200x100 mm, 200x200 mm, 300x200 mm, 400x200 mm, 400x400 mm
TypeWall Mount

Summary

Installation Steps and Maintenance

Adjusting the Forward/Backward Slide

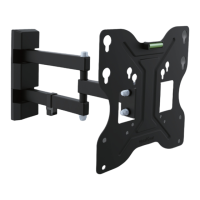
Adjusts the projector's position forward or backward on the mount arm.

Installing Wall Plate Covers and Decorative Cover

Covers the process of attaching wall plate covers and the decorative cover for a finished look.

Maintenance Guidelines

Provides guidelines for checking mount security and contacting support for assistance.

Safety and Parts Information

Important Warnings and Precautions

Details critical safety precautions for installation and use, including weight limits and mounting advice.

Parts Checklist

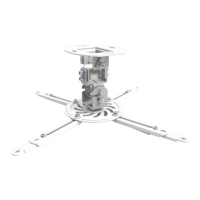
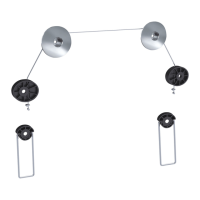
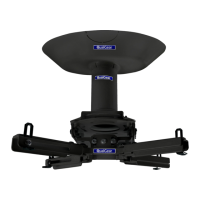
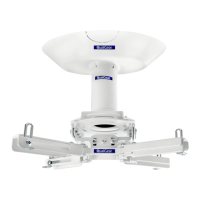
Lists all components included in the hardware package for verification before installation.

Installation Procedures

Cable Management

Guides on routing projector cables through the mounting bracket for a neat installation.

Checking the Installation Position

Verifies projector placement and distances relative to the screen for optimal projection.

Mounting to a Wooden Stud Wall

Step-by-step instructions for securely attaching the mount to wooden studs.

Mounting to Concrete or Brick Walls

Mounting to a Concrete or Brick Wall

Instructions for attaching the mount to concrete or brick surfaces using specific hardware.

Mounting Bracket and Projector Installation

Installing the Mounting Bracket onto the Wall Plate

Attaches the main mounting bracket to the wall plate using screws and an allen key.

Installing the Projector onto the Projector Wall Mount

Secures the projector to the installed wall mount assembly, potentially using extension arms.

Projector Adjustments

Adjusting the Vertical Tilt

Modifies the projector's up/down angle for precise screen alignment.

Adjusting the Horizontal Roll

Corrects the projector's side-to-side tilt for image leveling.

Adjusting the Horizontal Rotation

Controls the projector's left/right swivel for centering the image.

Adjusting the Leftward/Rightward Slide

Moves the projector horizontally to fine-tune its position on the mount.

Related product manuals