Installing the DXi4700 System in the Rack
Quantum DXi4700 Installation Guide 42
Installing the DXi4700 System in the Rack
Installing the DXi4700 in a rack consists of the following steps:
l Determining the Order of the Components in the Rack below
l Locating the Mounting Position on the next page
l Installing the DXi4700 Expansion Module on the next page
l Installing the DXi4700 Node on page 45
l Cabling the DXi4700 on page 48
Determining the Order of the Components in the Rack
Component Installation Recommendations
To make it easier to correctly cable the system, and for safety reasons, follow these recommendations
when installing the DXi4700 system in the rack:
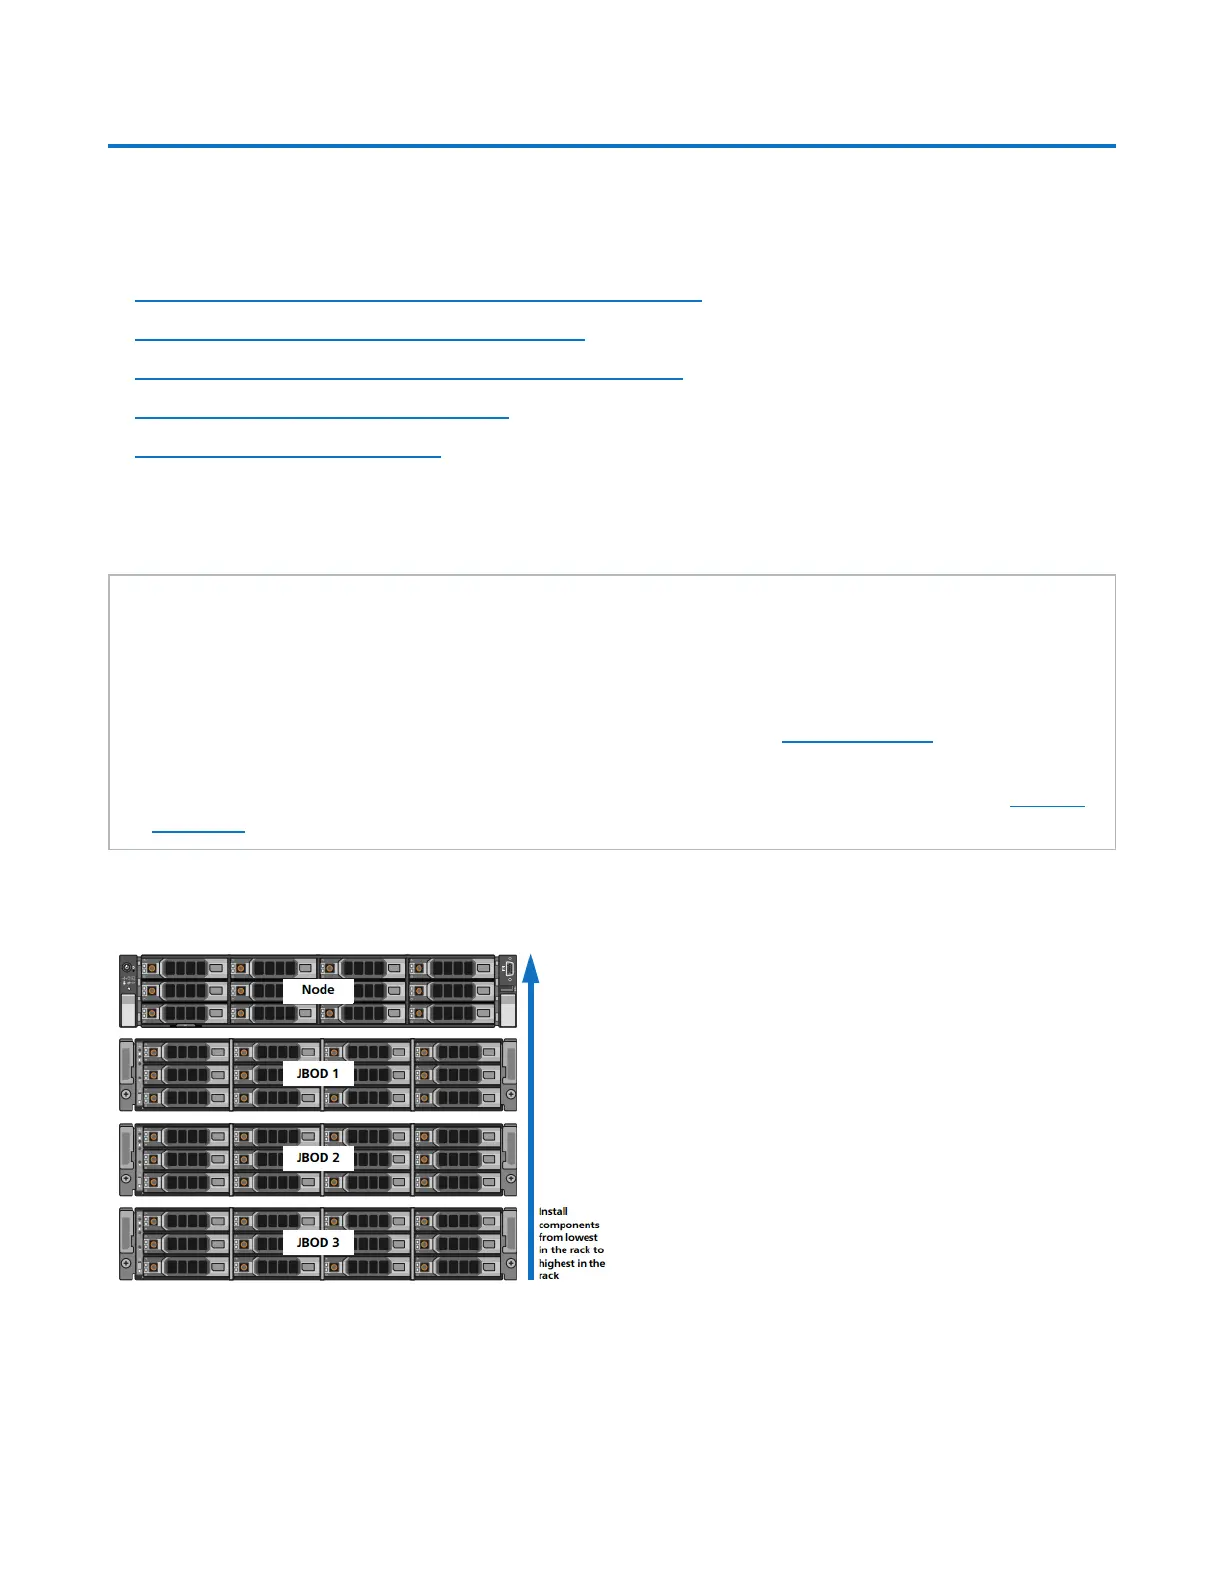
l When installing components, start with the lowest Expansion module in the configuration, and then
proceed upward in the rack as you add additional components (see Figure 30 below).
l Make sure to leave enough space below the lowest installed component for future system expansion.
The DXi4700 can be expanded to a maximum configuration requiring 8U of rack space (see Table 1
on page 2).
Figure 30: Recommended Component Rack Order (Maximum Configuration)

 Loading...


