23
SEAT
10. Click on the Save icon at the top of the Seat Configuration
Screen.
11. Take out of Programming Mode.
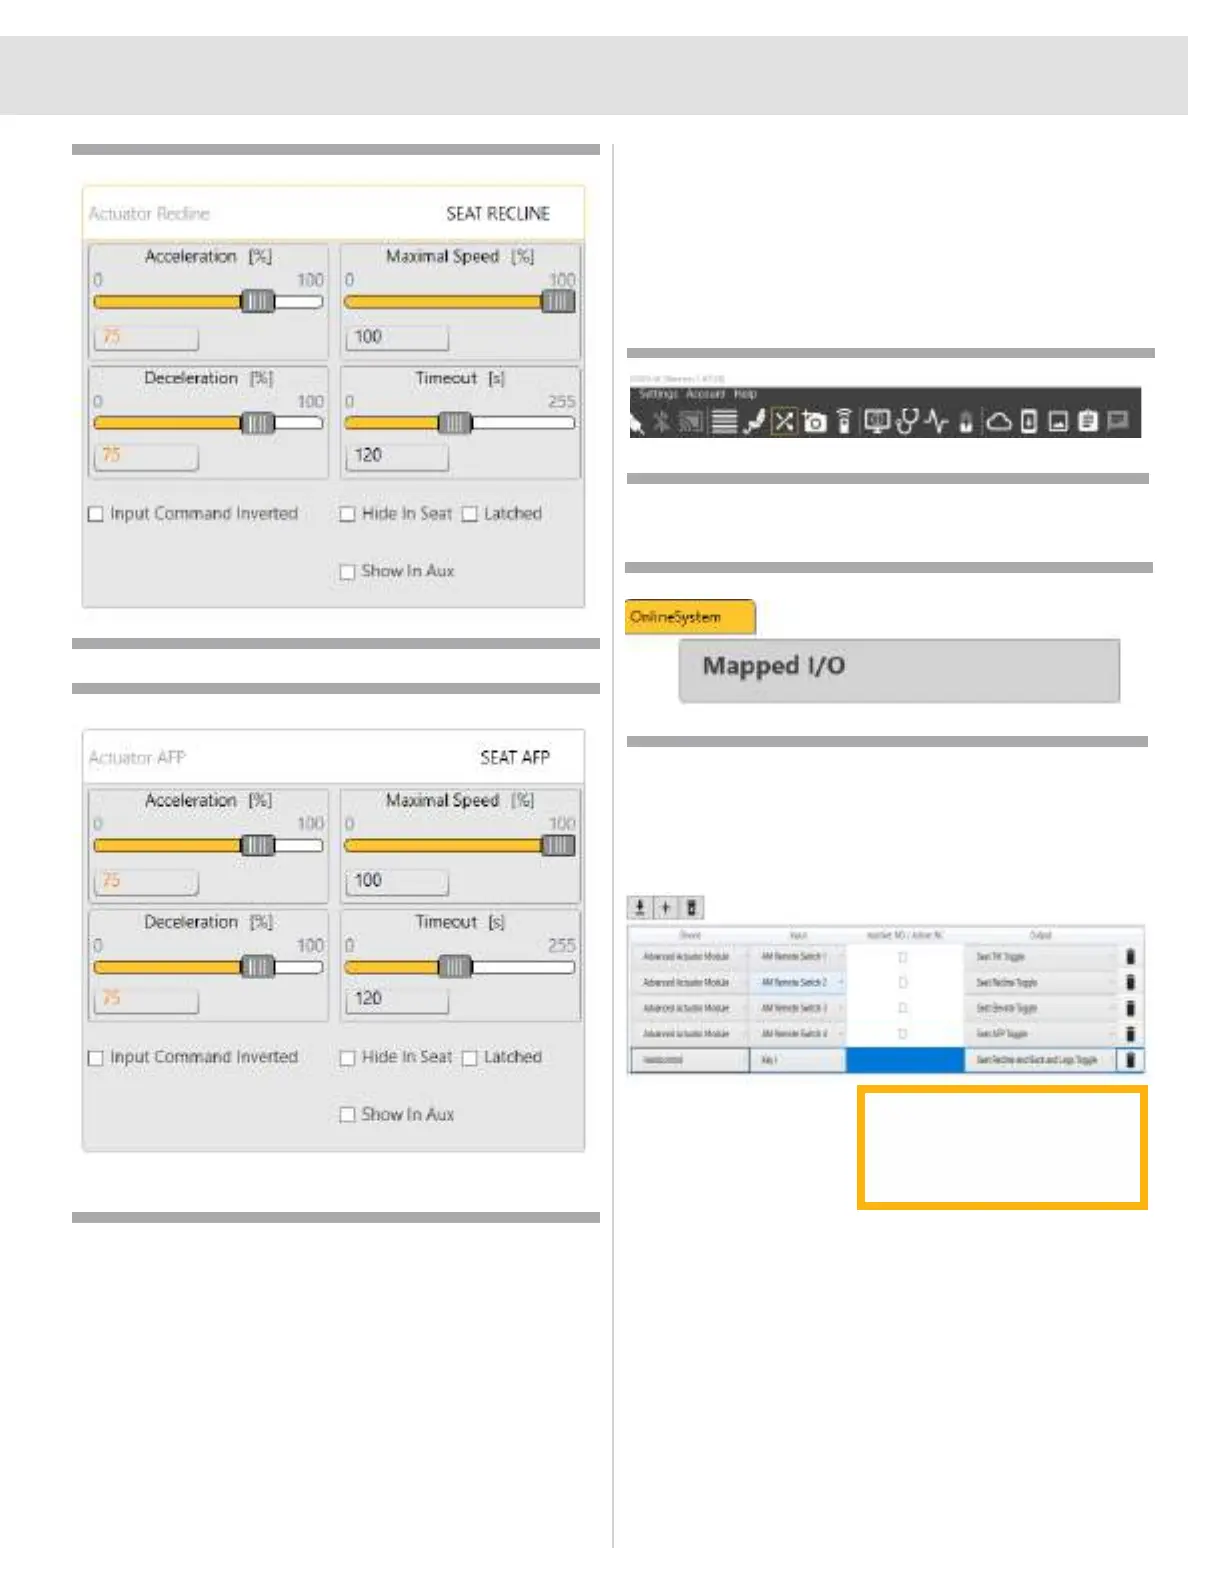
Mapping that Combined Latched Actuator
Function to a Switch
Now that the Combined Latched Actuator is programmed,
you can now program a Mapped I/O to that combined
function so it works through a press of a switch.
1. Once connected to the power chair, click on the Mapped
I/O icon on the top tool bar.
2. Next click on the Mapped I/O
3. Program the Mapped I/O like normal.
4. Make sure to Save and change the configuration of
either the Key or Mode Jack to Custom MIO.
Program the output to the
Combined Latched Actuator
function programmed earlier in
this document.
 Loading...