Install the 12-Drive and 24-Drive Chassis Rails
QX and QXS 12- and 24-Drive Rackmount Install Guide 11
Step 3: Install the Rails
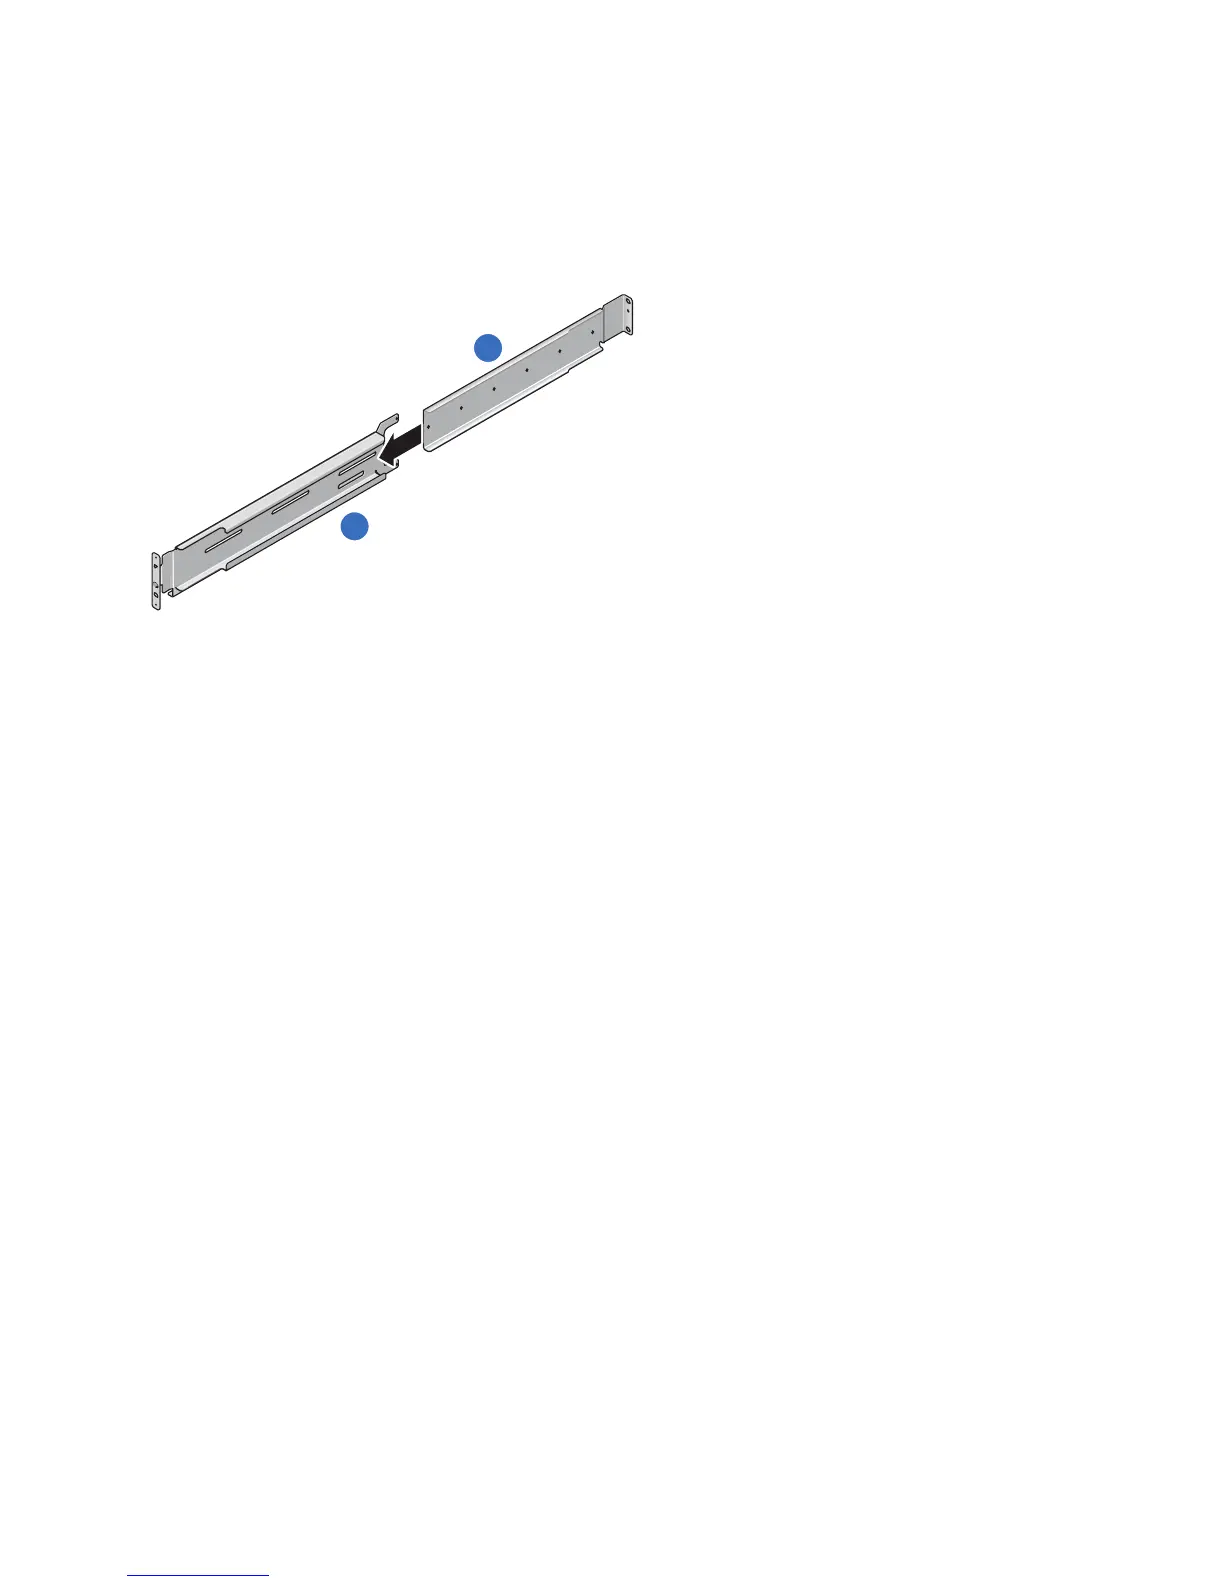
1. Slide the rear rail insert into the front rail sleeve.
Figure 9: Rail components
1. Front rail sleeve
2. Rear rail insert
2. Determine the chassis depth required by the rails.
l Fit the rail assembly to the rack and note the tapped holes in the rear rails that align with the slotted
holes in the front rails.
l If cage nuts are pre-installed, remove them from the locations where hanger screws are inserted.
3. Select two or three #8-32 x 3/8 flathead Phillips screws, depending on your chassis depth, to loosely
attach the rear rail to the front rail.
You will tighten the screws later.

 Loading...