Chapter 3: Connecting Hosts
Obtaining IP Values
QX and QXS Setup Guide 119
Once new IP addresses are set, you can change them as needed using the Disk Storage Management
Utility. Be sure to change the IP address via the Disk Storage Management Utility before changing the
network configuration. See Disk Storage Management Utility on page 123 for more information concerning
the Disk Storage Management Utility.
1. From your network administrator, obtain an IP address, subnet mask, and gateway address for
controller A and another for controller B.
Record these IP addresses so you can specify them whenever you manage the controllers using the
Disk Storage Management Utility or the CLI.
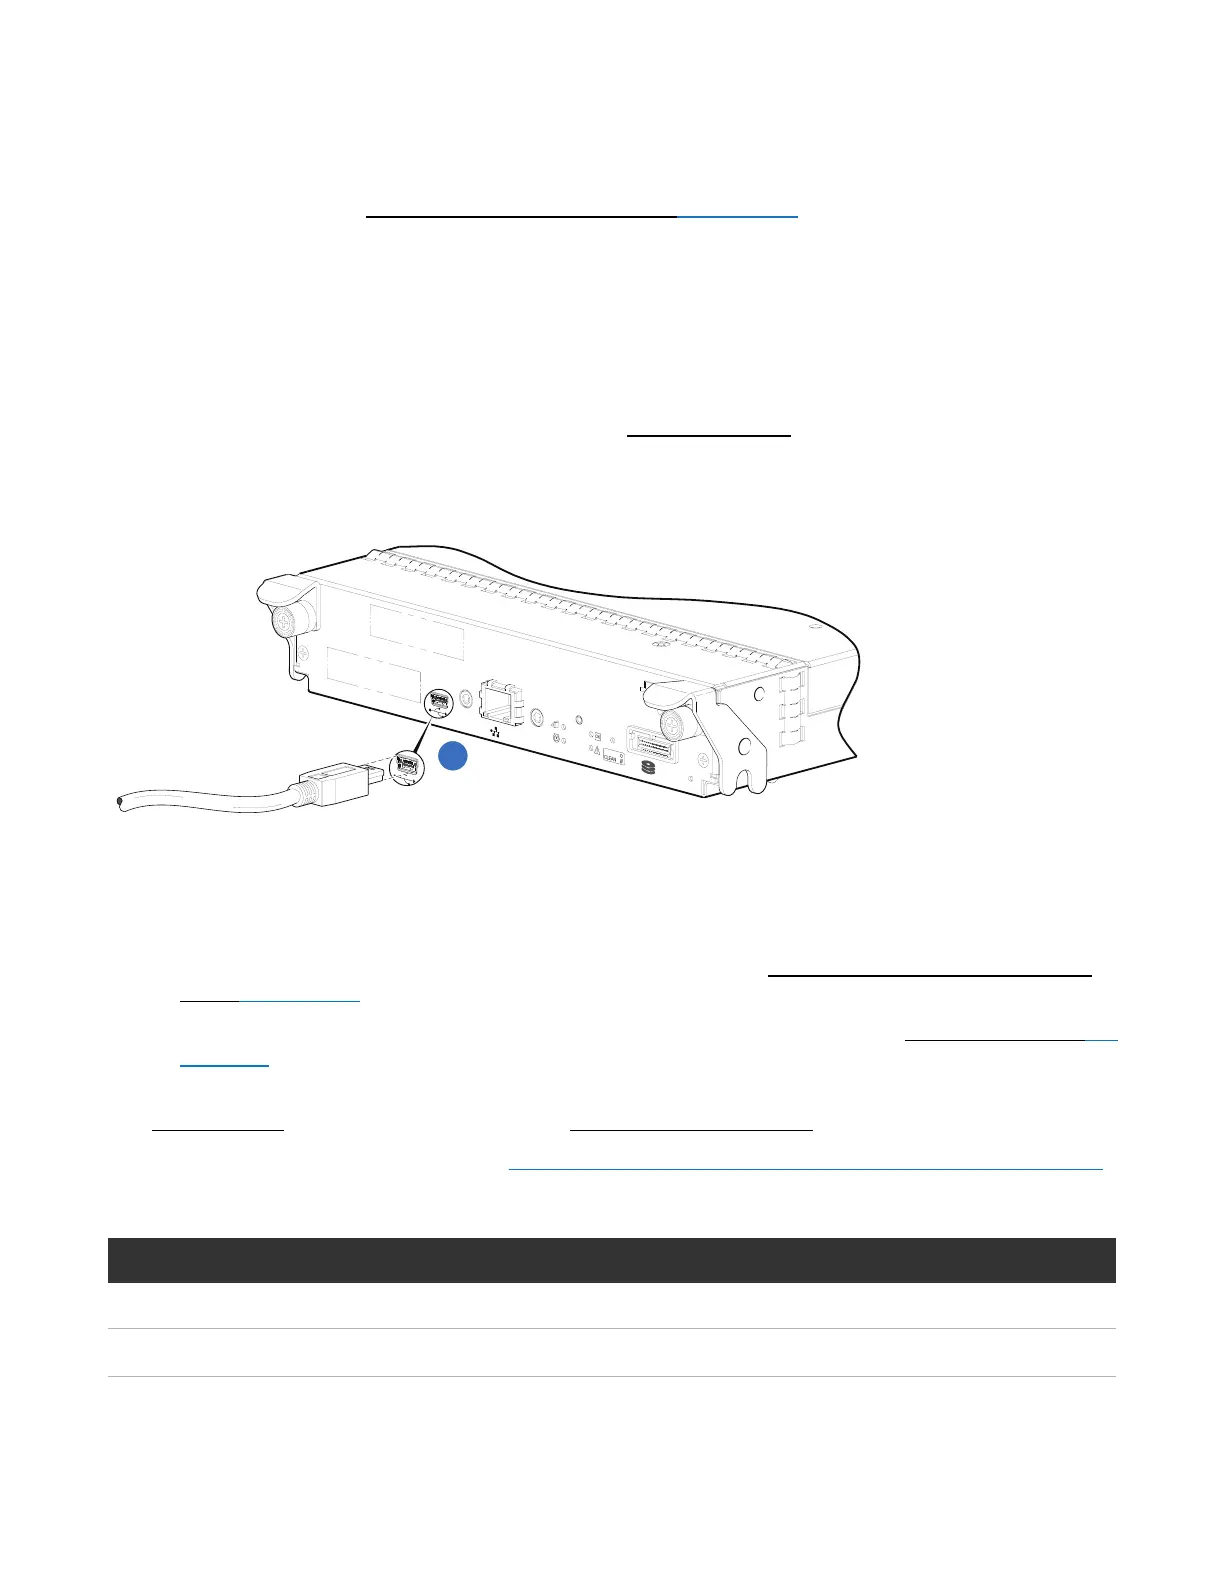
2. Use the provided USB cable to connect controller A to a USB port on a host computer. The USB mini 5
male connector plugs into the CLI port as shown in Figure 110 below (generic QXS Storage controller
module shown).
Figure110:Connecting a USB cable to the CLI port
C
A
C
H
E
L
IN
K
D
I
R
TY
H
o
s
t In
te
rfa
c
e
N
o
t Sho
w
n
L
INK
ACT
C
LI
CLI
S
ERVICE
H
o
s
t In
te
r
fa
c
e
N
o
t S
ho
wn
1
1. ConnectUSBcabletoCLIportoncontrollerfaceplate
3. Enable the CLI port for subsequent communication:
l Linux customers should enter the command syntax provided in Setting Parameters for the Device
Driver on page 201.
l Windows customers should locate the downloaded device driver described in Microsoft Windows on
page 200.
4. Start and configure a terminal emulator, such as HyperTerminal or VT-100, using the display settings in
Table 9 below and the connection settings in Table 10 on the next page.
For more information, see the note on Using HyperTerminal with the CLI on a Microsoft Windows host.
Parameter Value
Terminal emulation mode VT-100 or ANSI (for color support)
Font Terminal
Table9:Terminal emulator display settings
 Loading...


