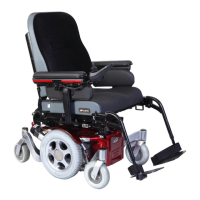
13.15 Recommended maintenance routines
(Fig13.35)
Tools required:
Battery charger, Tyre pump, Stiff brush, Petroleum jelly
Cleaning cloth and dilute disinfectant.
WARNING!
If in any doubt about performing any maintenance on
your wheelchair, contact your Sunrise Medical authorised
dealer.
Daily checks:
With the control system switched off, check that the joystick
is not bent or damaged and that it returns to the centre
when you push and release it.
Weekly checks:
CAUTION!
Parking brake:
This test should be carried out on a level floor with at least
one metre clearance around the chair.
• Switch on the control system.
• Check that the battery gauge remains on, or flashes
slowly, after one second.
• Push the joystick slowly forwards until you hear the
parking brakes operate. The chair may start to move.
• Immediately release the joystick.
• You must be able to hear each parking brake operate
within a few seconds.
• Repeat the test a further 3 times, pushing the joystick
slowly backwards, left and right.
Connectors:
Make sure that all connectors are securely mated.
Cables:
Check the condition of the cables and connectors for
damage, ensuring that no cables can snag or foul any
moving parts.
Joystick gaiter:
Check the thin rubber gaiter or boot around the base of the
joystick shaft for damage or splitting. Check visually only,
do not handle the gaiter.
Mounting:
Make sure that all components of the control system are
securely mounted. Do not over-tighten any securing
screws.
CAUTION!
Please refer to the table below, (Fig.13.34), for any
information about Torques.
Fastener Matrix Torque Setting (Nm)
M3 Bolt / Stud 1
M4 Bolt / Stud 2.5 - 3
M5 Bolt / Stud 5 - 6
M6 Bolt / Stud 9 - 10
M8 Bolt / Stud
19 - 20 (15 Nm for all
backrest screws)
M10 Bolt / Stud
30 Nm (5Nm on manual
& electric backrest recline
actuator)
M12 Bolt / Stud 47.5
M16 Bolt / Stud 54
No6 Screw 1.5
Castor fork nut & bolt 25
Castor wheel axle studs 19
Drive wheel hub studs 25
The table shown in Fig.13.34 contains generic, (and some
specific), torque values set out as an industry standard.
There will be specific torque setting required for some tasks.
If specific torques are required, the value in each instance
will be contained within the text description, title or clearly
labelled within the photo.
NOTE: It will be necessary to use a torque wrench.
WARNINGS!
• It is higly recommended that all specific instruction
manuals and safety recommendations supplied with the
torque wrench, should be read and understood before
such equioments is used.
• It is recommended that all mandatory safety procedures
are strictly adhered to.
• No responsibility is accepted by Sunrise Medical for
any consequence, directly or indirectly, resulting from
incorrect use of tools / equipment during any service
procedure pertaining to this or other Technical /
Workshop Manuals issued by Sunrise Medical.
Fig.13.34