EasyManuals Logo

Radio Shack Telephone Interface II Operation Guide

Radio Shack Telephone Interface II
54 pages
To Next Page IconTo Next Page
To Previous Page IconTo Previous Page
Page #21 background imageLoading...
Page #21 background image
OPERATING
THE
NETWORK 3
Equipment Requirements
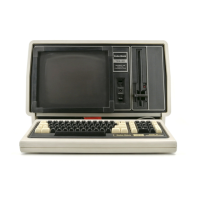
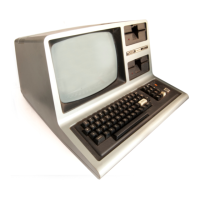
The TRS-80
Network
3 Controller
connects
up
to
16 TRS-80 Model
III
micro-
com
puter
s
to
a cent
ral
disk-e
quipped
TRS-80 Model
III
to
share
the
disk
storage
and printer.
The
minimum
Host
computer
is a TRS-80 Model
III
with
32K
of
memory, one
disk
drive,
and
an
RS
-232C interface. A
Student
Station
needs
16K
of
memory, Model
III
BASIC,
and
an
RS-232C interface.
The
Network
3 Controller
requires 1 cable
(10
to
100 feet) for each
Student
Station
and
1 cable for
the
Host
system.
Using the Network 3
System
Before doing
anything
else,
you
should
make
a
backup
copy of
the
"
Network
3
Operating
System
and
NBASIC"
diskette
(hereafter referred
to
as
the
Network
3
software diskette) supplied
with
this
package,
following
the
directions
on
page
33 of
this
manual.
You
should also
make
a
backup
of
the
Student
Station
System
Software
cassette,
following
the
instructions
on
page
36.
Use
these
backup
copies
when
operating
the
Network,
and
store
the
original
diskette
and
cassette
in
a safe
place
to
protect
them
from damage.
Once you
have
made
a
backup
copy of
the
Network
3
software
diskette
and
the
Student
Station
System
Software
cassette,
follow
the
directions in
the
Network
3
Operation Guide which
came
with
the
Controller
to
connect
the
Network
3
to
the
Host
system
and
Student
Stations.
Then
turn
on all equipment.
To load a
program
from
the
Host
computer
into
one
or
more
Student
Stations,
follow
the
steps
below.
At
the Network 3 Controller:
1.
Make
sure
the
Network
3 Controller is ON (the Power
button
on
the
front
of
the
Controller
should
be
illuminated).
2.
The
Mode
button
should
NOT
be
illuminated; if
it
is,
press
the
Mode
button
once
and
the
light
will go off.
At
each Student Station:
3.
Make
sure
each
computer
is
ON
(the
ON
/
OFF
switch
is
under
the
right
side
of
the
keyboard).
If
the
Student
Station
is
equipped
with
the
special ROM-based loader, follow
the
initialization
procedure
described
in
the
literature
accompanying
the
loader;
then
skip to
Step
10 below.
If
the
Student
Station
is
not
equipped
with
the
ROM-based loader,
continue
with
3

Other manuals for Radio Shack Telephone Interface II

Questions and Answers:

Question and Answer IconNeed help?

Do you have a question about the Radio Shack Telephone Interface II and is the answer not in the manual?

Radio Shack Telephone Interface II Specifications

General IconGeneral
BrandRadio Shack
ModelTelephone Interface II
CategoryDesktop
LanguageEnglish

Related product manuals