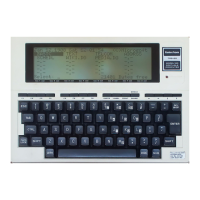
Answer
Mode
1.
Answer the telephone (call from remote terminal). Assure that the
phone connection is a clear, noise-free one. Obtain
or
deliver
appropriate voice instructions.
2. Set
O/OFFI
A to A and
F/TEST/H
as required.
Note: In Answer mode, you'll hear a tone at all times, with
or
without
READY
LED
being lit.
3. Press the telephone handset firmly into the acoustic coupler cushions,
with the.
cord
positioned as labeled (PHONE
CORD
~
).
4. When READY
LED
comes
on,
proceed with normal data exchange.
To
terminate a call, set
O/OFFI
A to
OFF
and hang up the telephone.
Test
Mode
The Test mode is designed to verify that the
TELEPHONE
INTERFACE
II is functioning correctly. It does this by switching the transmitter
channel frequencies to match the receiver frequencies. All data into the
modem is looped back into the Computer for verification.
It
requires a
telephone handset to provide an isolated acoustic path between earpiece
(transmitter) and mouthpiece (receiver).
Originate
In this sequence, the Computer should be set up for full duplex
operation.
Set
TELEPHONE INTERFACE II to Originate and use
TEST
position
of
F/TEST/H
switch. You will hear a tone from the earpiece
cushion;
if
no tone is present, the unit is defective
or
the setup is
incorrect.
Dial a single digit
on
the phone to silence the line; immediately place
the handset into the rubber cushions.
Note: A quiet line is required for this test sequence. Some phone
company exchanges will not maintain a quiet line situation long enough
to complete the test;
in such a situation, you must dial an extension
or
other number which can
be
controlled (cover the mouth-piece
of
this
second phone to prevent background noise pickup).
6
 Loading...