POWER
ON Indicator (green LED):
When illuminated,
this lamp
indicates that
power
is ON.
ALERT Indicator (redLED):
When illuminated, this lamp indicates that
a
"Paper Empty,"
"Ribbon
end," or"Cover
Open"
condition
has
occurred.
It also
illuminates
if
there is an electrical malfunction.
The
Printer will
automatically stop when it
"
runs out" of ribbon.
When
this
occurs,
set the
LINE
ON/OFF Switch
to
OFF, install a new ribbon, and set the
switch
back
to
ON.
PITCH SELECT Switch: To print
1 characters
per inch,
set this
switch to 1
0;
to
print
1 2
characters per inch,
set the
switch
to
12;
to print
Proportionally
Spaced
text, set it to
PS.
LINE
ON/OFF Switch: Set this switch to
ON to start printing, If
you have
pro-
blems
during printing,
set to OFF. The Printer
stops printing
immediately, and
sends a BUSY signal to the CPU. The
data already received
will
be printed after
the switch is set to
ON.
5
.
DIP Switch Access
Cover:
Slide
this cover toward the rear of the Printer
to
expose the
DIP switch.
This switch
determines the initial
status of the
printer.
Its
use is explained in the next
section, "Setting UP the
DWP-210."
6.
Platen Pressure Lever:
Move this
lever toward
you to release the paper.
7.
Platen
8. Front Cover: The
Cover
must be closed
before printing will occur.
Use both
hands to open
or close the Cover.
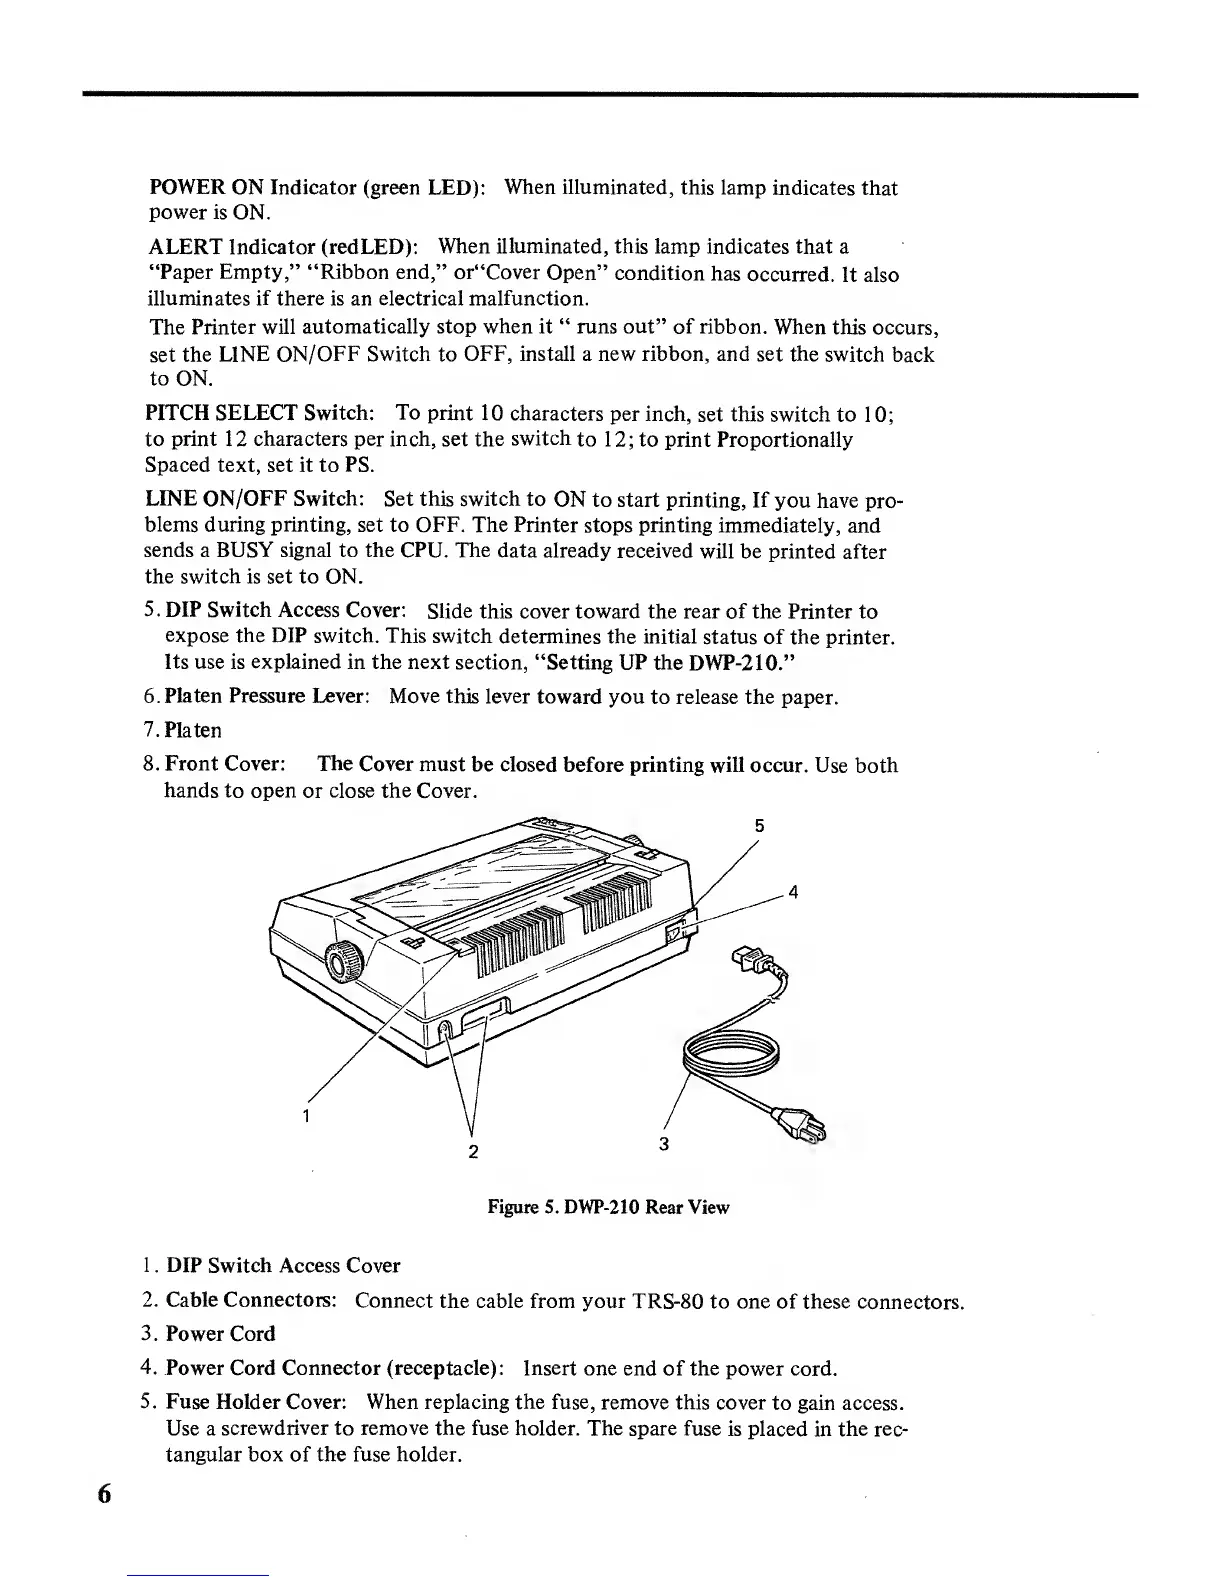
Figure 5. DWP-210
Rear View
1
.
DIP
Switch Access Cover
2. Cable Connectors:
Connect
the cable from your
TRS-80 to one of these
connectors.
3.
Power Cord
4.
Power Cord Connector (receptacle): Insert
one end of the
power cord.
5.
Fuse Holder Cover: When replacing the fuse,
remove this cover
to gain access.
Use a
screwdriver to remove the fuse
holder. The spare fuse
is placed
in
the rec-
tangular box of the fuse holder.
 Loading...