EasyManuals Logo

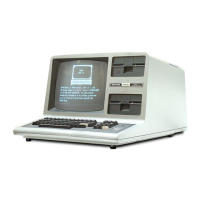
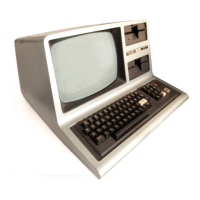
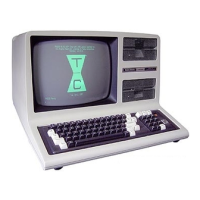
Radio Shack TRS-80 III User Manual

Radio Shack TRS-80 III
134 pages
To Next Page IconTo Next Page
To Previous Page IconTo Previous Page
Page #15 background imageLoading...
Page #15 background image
CASE:
DISASSEMBLY
RS-232
BOARD
(optional):
1.
Remove all cables
from
the
bottom
and
rear
of
the
Com-
puter.
Position
the
Computer
on
its rear panel
to
provide
easy access
to
the
case
bottom.
Remove
the
ten
screws
from
the
case
bottom.
Notice
the
different
types
and
lengths
of
screws
and
note
their
positions.
Set
them
aside
in
groups.
2. Position
the
Computer
upright
and
remove
the
#6 screw
and
washer
from
the
top
of
the
back panel
of
the
case.
3.
Very carefully remove case
top,
lifting striaght
up
and
setting
it aside
to
the
left (if facing video screen).
Be
careful
not
to
exceed
the
length
of
the
video cable.
4.
Remove screws
from
the
chassis shield and
the
ground
connectors
and
remove
the
sh ield. **
CPU BOARD:
1. Remove all cables
connecting
the
CPU Board (power
supply
cable,
video,
keyboard,
and
cassette cables, and
if applicable,
the
RS-232
and
FDC
inter-eonnect
cables).
2. Remove
the
five screws
fastening
the
PC
Board
(two
in
upper
right
corner,
three
on
bottom).
3.
Remove
the
small PCB
Mount
Bracket
and
its
two
screws
from
atop
the
metal
chassis
bracket.
**
4.
Make sure all cables
to
the
CPU Board have been d iscon-
nected
then
remove
the
Board.
(If
your
unit
uses plastic
spacer
mounts
to
hold
the
Board,
press
the
small
tabs
on
the
mounts
through
the
mounting
holes
in
the
PCB
and
gently
pull
the
CPU Board off.)
FDC
BOARD
(optional):
NOTE:
The
CPU Board
must
be remove
before
removing
the
the
FDC Board.
1.
Be
sure
to
disconnect
all cables
to
the
FDC
Board.
2.
Remove
the
screws
holding
the
FDC Board
to
the
metal
chassis
and
remove
the
Board.
*
*Not
applicable
to
all
units.
NOTE:
The
CPU Board
must
be
removed
before
removing
the
RS-232 Board.
1.
Be
sure
to
remov~
all cables
connecting
the
RS-232
Board.
2.
Remove
the
screws
connecting
the
PC Board
to
the
chassis
and
remove
the
Board.
MAIN POWER SUPPLY:
1.
Remove all
interconnect
cables
to
the
Boards
fastened
on
the
metal chassis brac::ket
(power
supply
cable,
video,
keyboard,
and
cassette
cables,
and
if
applicable,
RS-232
and
F
DC
power
connectors
and
the
Disk
ribbon
cable).
2.
Remove
the
four
screws fasten ing
the
metal chassis
bracket
to
the
case
bottom.
3.
Make sure all
inter-connecting
cables
are
removed,
then
carefully
lift
out
chassis
bracket
and
attached
Boards.
4.
Remove
the
four
screws fastening
the
Power
Supply
to
the
Bracket (notice
where
the
ground
tab
is
fastened),
then
carefully remove
the
power
supply.
DISK
DRIVE
POWER SUPPLY
(optional):
1. Disconnect all cables and wires
connecting
to
the
Power
Supply.
2. Remove
the
four
screws fastening
the
Board
to
the
Disk
Mounting Bracket (notice
where
the
ground
tab
is
fas-
tened),
then
carefully remove
the
Power
Supply.
DISK
DRIVES
(optional):
1.
To
remove
the
Disk Drive
in
the
top
position,
carefully
remove
the
FDC
inter-connect
cable
connected
to
the
rear
of
the
Drive.
2. Remove
the
four
screws
and
washers
(two
on
each side)
which
connect
the
Drive
to
the
Disk
Mounting
Bracket.
3.
Disconnect
the
power
supply
connector
from
the
bot-
tom
of
the
top
board
in
the
Disk Drive
and
also remove
the
ground
wire
from
the
rear
of
the
Drive.
7

Questions and Answers:

Question and Answer IconNeed help?

Do you have a question about the Radio Shack TRS-80 III and is the answer not in the manual?

Radio Shack TRS-80 III Specifications

General IconGeneral
BrandRadio Shack
ModelTRS-80 III
CategoryDesktop
LanguageEnglish

Related product manuals