32
15. Exit ProRAE Studio II.
16. Press [MODE] on the QRAE 3 to exit Communication Mode.
9.2. Deactivating Policy Enforcement
If the QRAE 3 screen displays the message that it must be bump tested or calibrated, and
if the option to bypass bump testing or calibration is not available, you should shut off the
instrument and follow the procedure outlined here if you want to change the Policy
Enforcement settings:
1. Use a USB cable to connect the QRAE 3 in its Travel Charger to a computer running
ProRAE Studio II.
2. Enter Diagnostic Mode on the QRAE 3 (with the instrument turned off, press and
hold [Y/+] and [MODE] until it starts up.
3. After startup, enter the password when prompted (default is “0000”) and press
[MODE].
4. Press [MODE] repeatedly until you see the “Enter Communications Mode?” screen.
5. Press [Y/+] to enter Communications Mode.
6. Start ProRAE Studio II.
7. Select “Administrator.”
8. Input the password (the default is “rae”).
9. Click “OK.”
10. Click “A” (detect instruments automatically).
11. Click on the instrument’s icon when it appears.
12. Click “Select.”
13. Click “Setup.”
14. Click “Policy Enforcement.” The Policy Enforcement pane is shown.
15. Deselect Policy Enforcement features you do not wish to use.
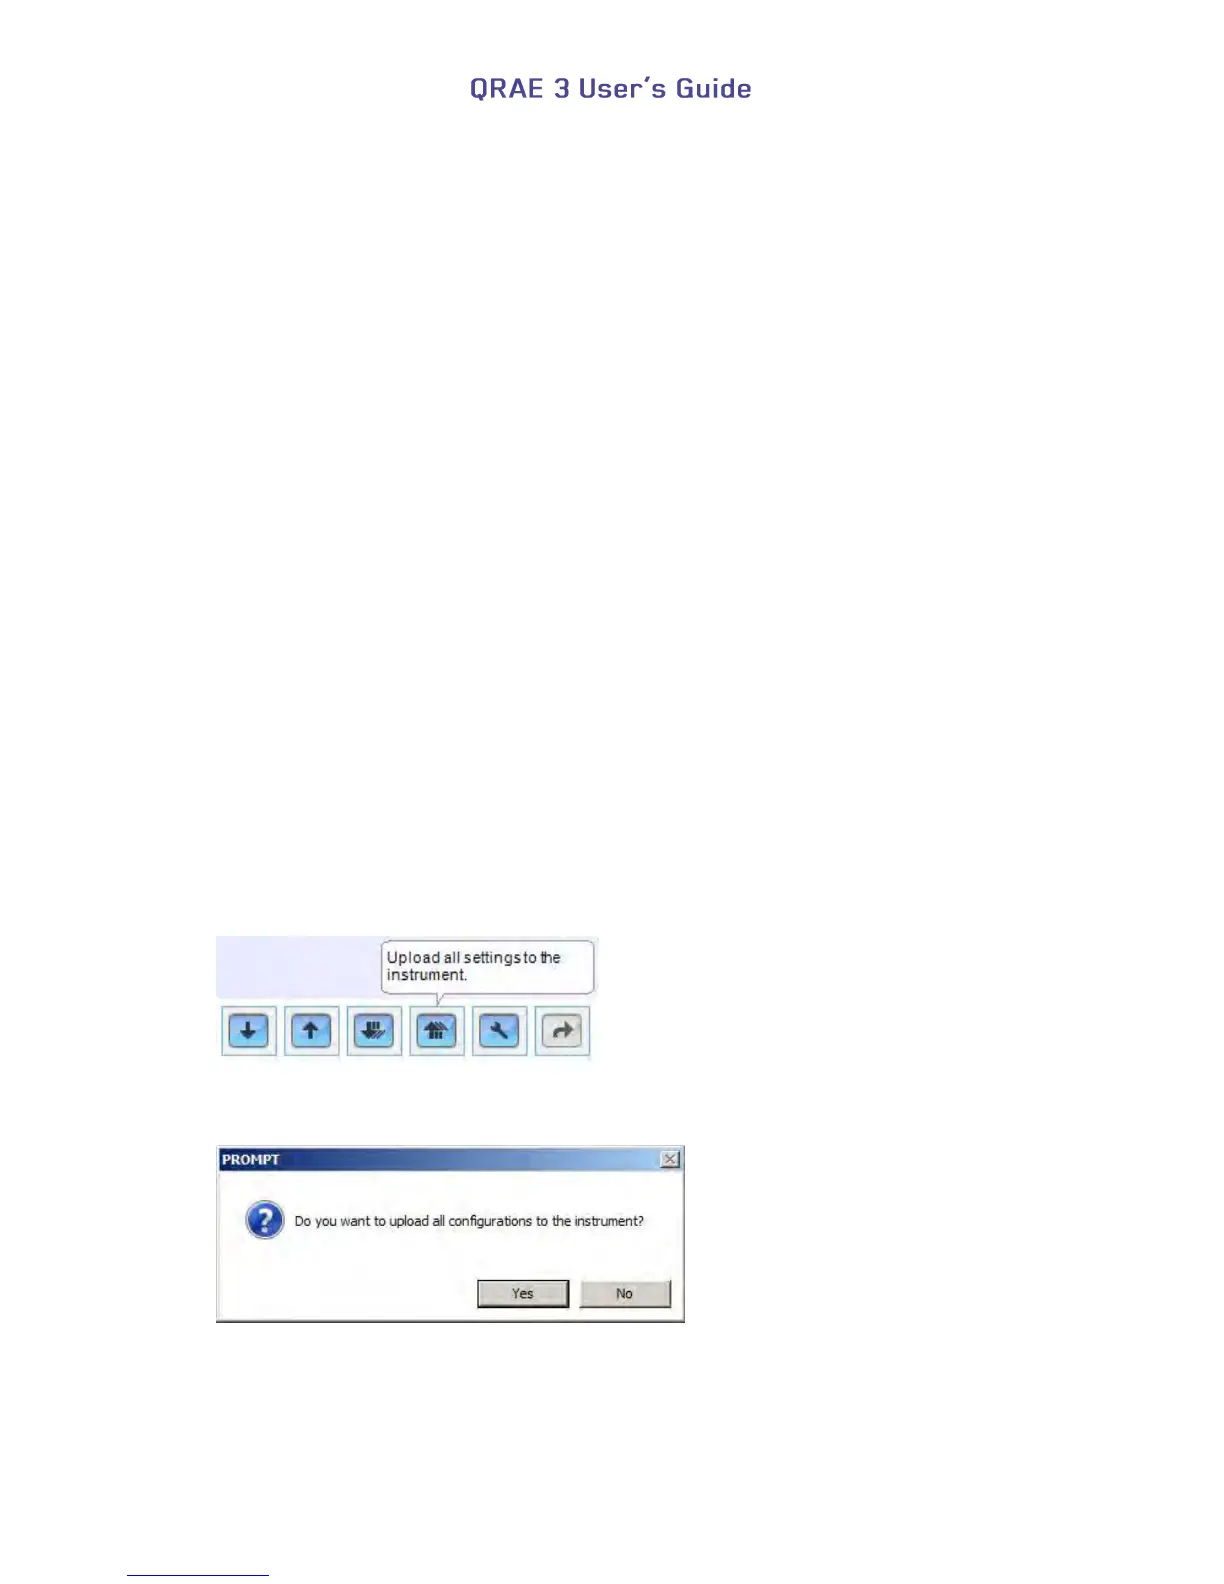
16. Click “Upload all settings to the instrument.”
17. When you see this confirmation. Click “Yes.”
Uploading will take a few seconds, and this progress bar is shown: