13
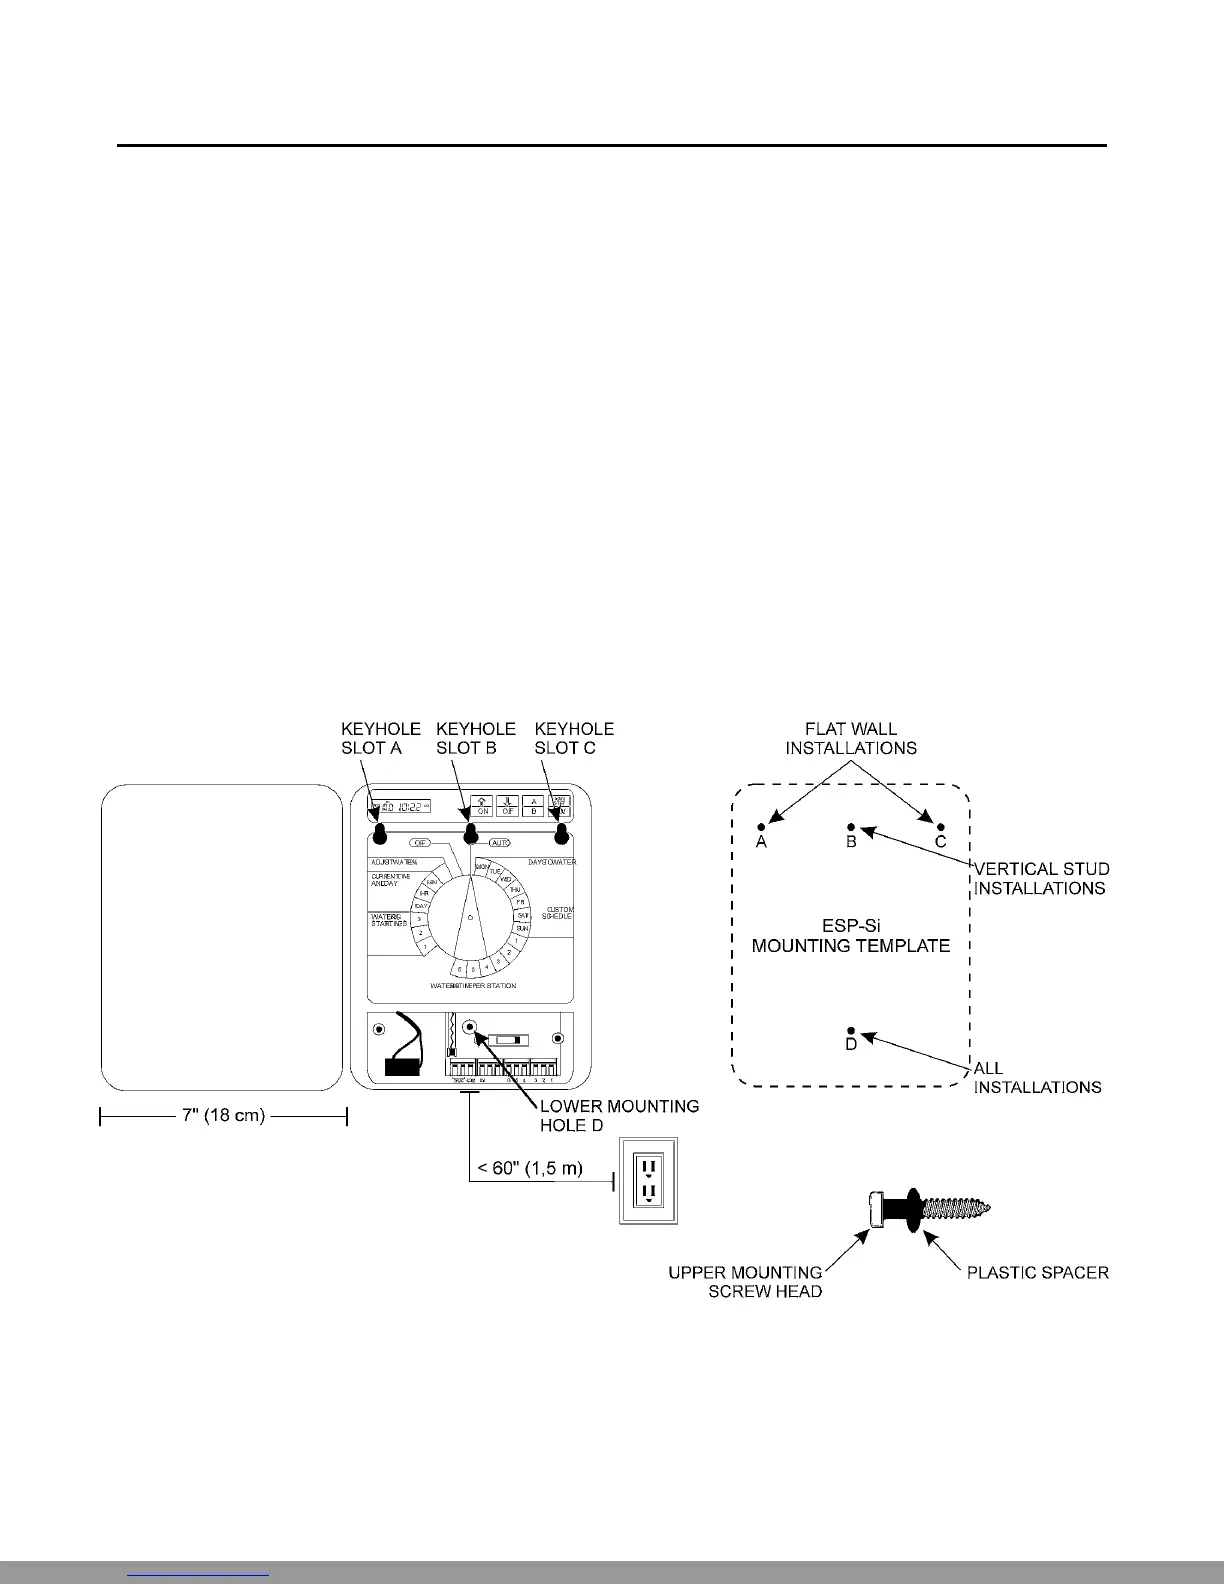
Mount Controller
ŒPlace the supplied mounting template in the desired location on the wall. Mark the screw center locations by
punching through the template with a sharp tool.
•Remove the template. Two plastic spacers are provided for the upper mounting screws only. (See illustra-
tion on the next page.)
Slip the spacers over the screws and drive them into the wall or stud at the upper keyhole marks: holes A
and C for flat surfaces, or hole B only for an exposed stud.
When the wide, flat end of the spacer is pressed against the wall or stud, the screw is at the proper depth.
Do not drive a fastener into location D at this time.
ŽRemove the controller’s lower face panel by gently prying out the panel at the slots on the left and right
sides.
•Hang the controller on the upper keyhole slots. Make sure the spacers are in the upper, narrow portion of
the slots. Then drive a fastener through lower mounting hole D, located just to the right of the fuse. The
controller should now be secure.
Technical Support:1-800-RAIN BIRD
This Manual: http://www.manuallib.com/file/2721363
 Loading...