8
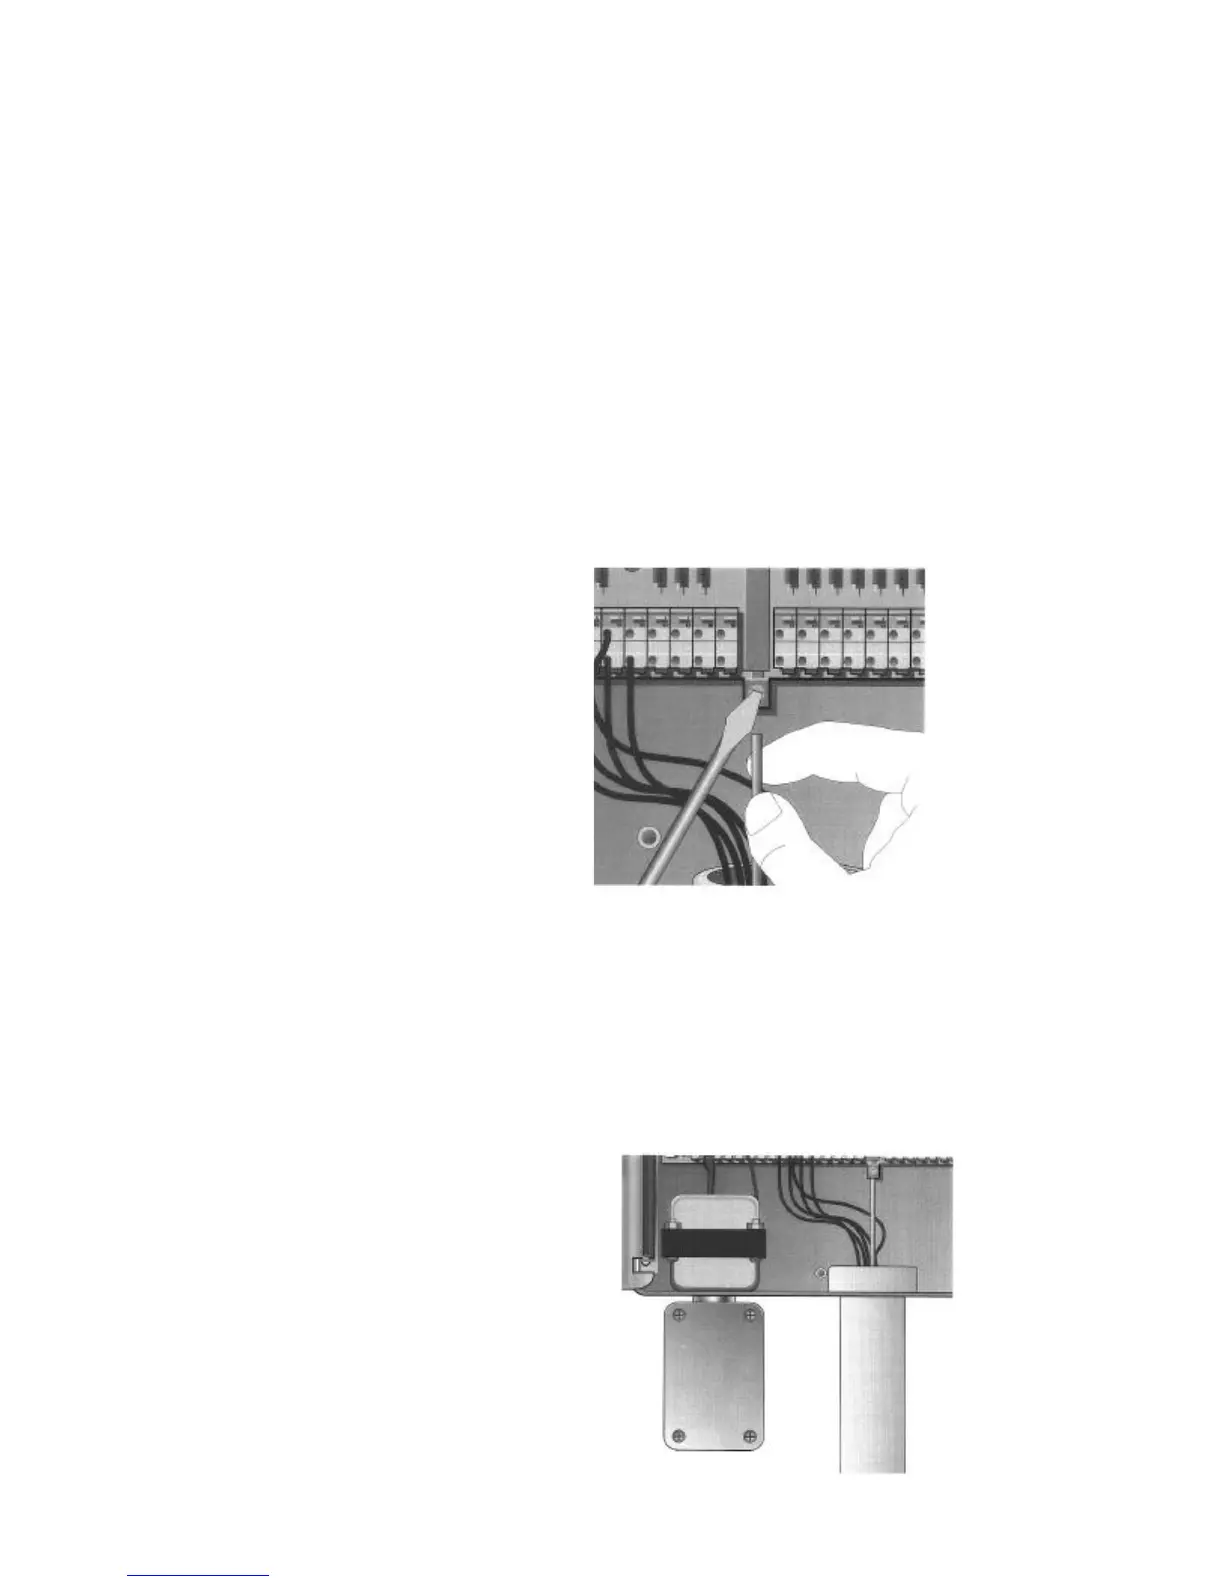
Grounding Connections
The ESP-MC is equipped with built-in electrical surge protection. For this system to
function, the earth ground terminal on the controller must be connected to a ground
rod that is driven into the earth.
Important: Use a #10 (6 mm) or #8 (10 mm) bare wire to connect the controller to the
ground-rod. Use a standard copper clad, 5/8" (1.6 cm) diameter, 8 ' (0.6 m) long rod.
To connect the ground wire,
1. Feed the ground wire up through the large hole at the bottom of the controller cabi-
net (the same hole used for the valve wires).
2.Loosen the screw on the copper earth ground terminal and place the ground wire
into the terminal. Tighten the screw so that the ground wire is secure.
Connections to the Main Power Source
The three main power input wires for the standard 117 volt, 60 Hz/AC transformer are
black, white, and green. The international version 230 volt, 50 Hz wires are black,
white, and green and yellow. These wires exit the controller through the smaller hole
at the bottom of the controller cabinet.
Important: The wires that connect the controller to the main power source must be in-
stalled in a conduit other than the one that contains the field wires.
Insertion of the Ground Wire:
Location of Junction Box:

 Loading...