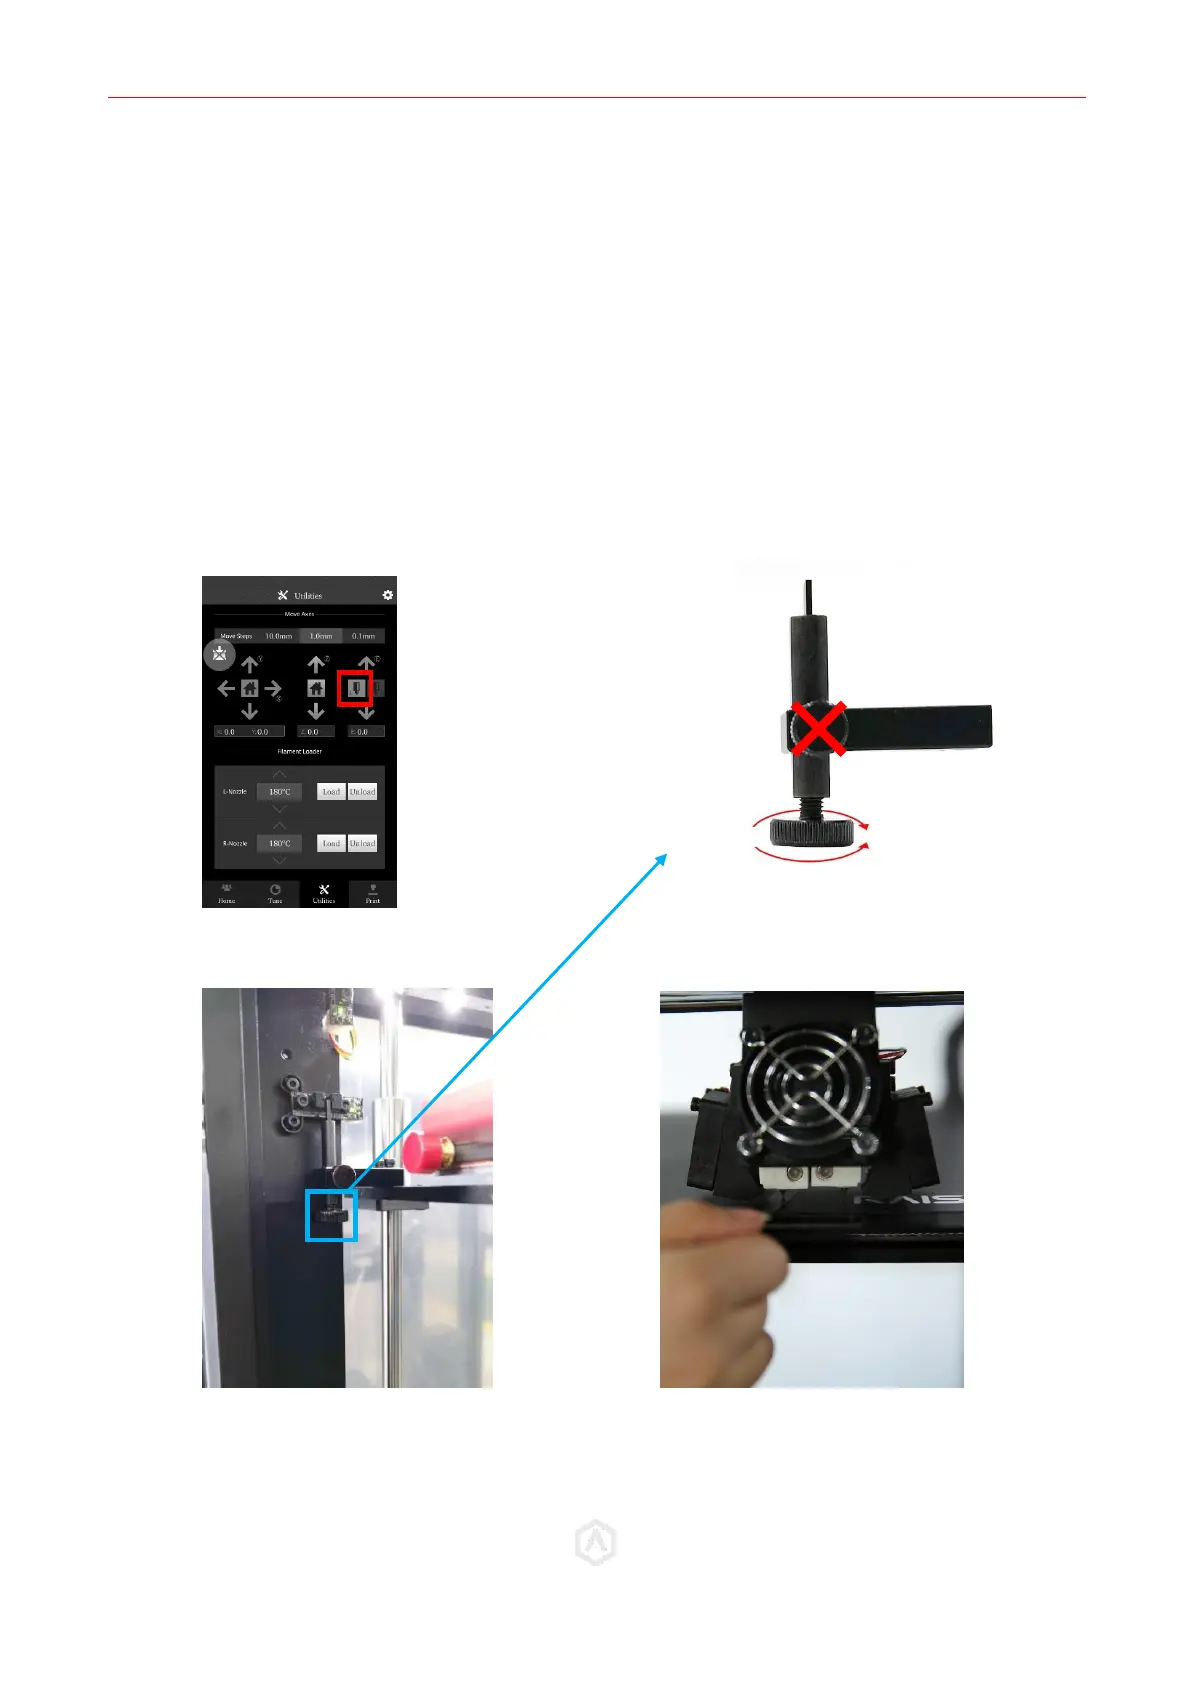
STEP 7: Left Nozzle Calibration
Select the Left Nozzle Icon, and press the down arrow to ensure the left nozzle is enabled.
⚫ Use the feeler gauge (included in printer toolkit) and place it underneath the left nozzle.
⚫ To adjust the nozzle height, rotate the large thumbscrew as depicted in the diagram.
DO NOT adjust the small side-mounted screw.
⚫ Home the Z-Axis, then verify the new height using the feeler gauge.
⚫ Homing is required each time the knob is adjusted.
⚫ Repeat until desired result is achieved.
Adjustments should be made incrementally. Changes in height will NOT be visible until after
homing.