MTR221/A - MTR221/A DHHS
MANUALE ISTRUZIONI / INSTRUCTION MANUAL
Modello/Model R221/A - R221/A DHHS
INSTALLATION
11
R221/A - R221/A DHHS - Installation
Ralco srl
• Mount the flange and spacers to the tube port with 4 screws that must be long enough to
be driven into the tube port face for at least 5 threads.
• Tighten the screws.
Mounting the Collimator to the Flange
• Unscrew the four mounting Allen screws until the four tabs are withdrawn from the
collimator top opening, see Fig. Mounting Flange in this Chapter.
• Manually adjust the collimator shutters to their widest setting. This ensures the near-port
shutters when fully open, do not contact the side of the X-ray tube housing.
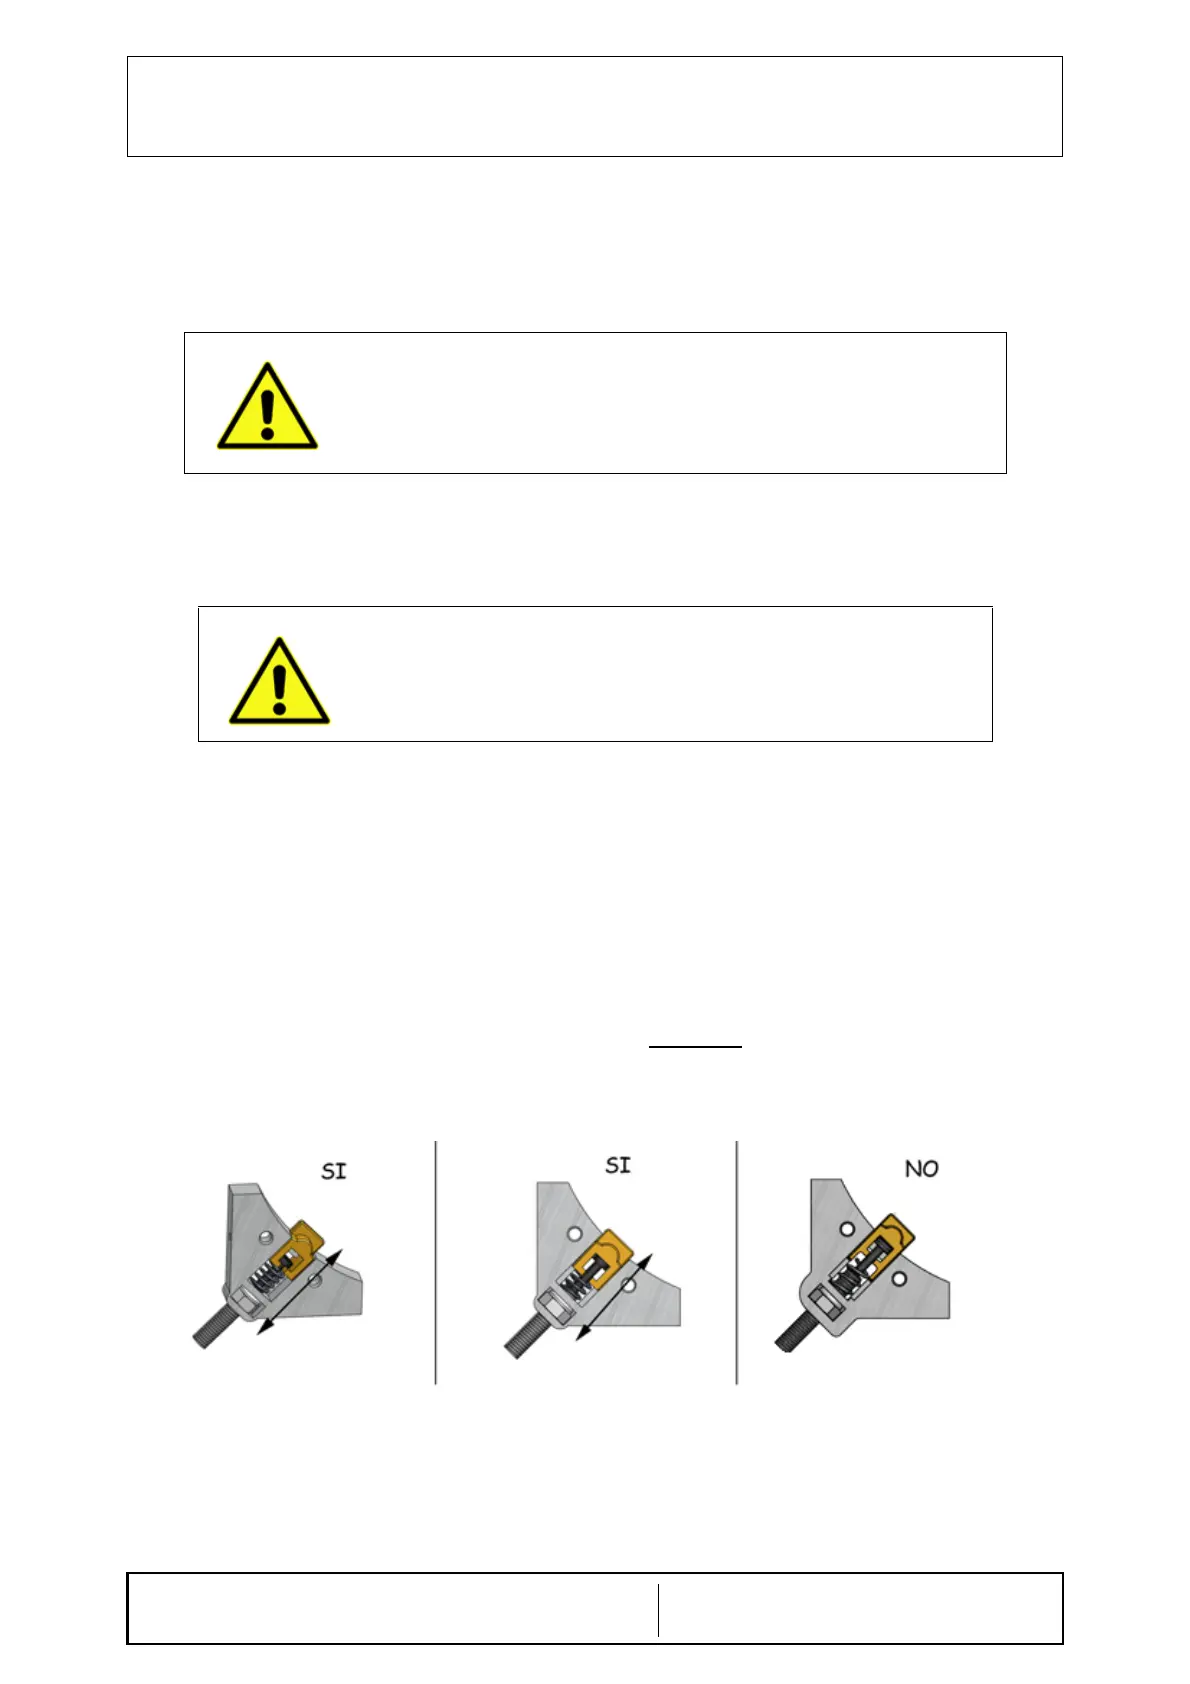
• Carefully couple the collimator with the tube: make sure that the primary near-port shutters
have enough clearance to move in the port opening and in the mounting flange, see Fig.
Tube Compatibility in this Chapter.
For the collimator to rotate to position "Ø", two of the four tabs retract to allow to rotation.
Adjust and tighten the four Allen screws as follows:
screws 1 and 3 = tighten, without excessive force;
screws 2 and 4 = 5½ turns exactly;
See Fig. Mounting Flange in this chapter. Please Note: If Allen screws "2" and "4" are
tightened more than 5 ½ turns, the collimator will not rotate
.
• The collimator control tabs conform to EN60601-1. Secure the tabs along the edge of the
mounting flange but do not lock them. Excessive tightening of the tabs prevents collimator
rotation.
• Check that the distance between the collimator housing and the mounting flange is equal in
all directions and, that the collimator face is parallel to the table axis.
• Loosen the screws and adjust if required.
•
IMPORTANT
TO SAFEGUARD THE OPERATOR AND PATIENT AGAINST THE HAZARD OF A FALLING
COLLIMATOR, THE FOLLOWING INDICATIONS MUST BE RESPECTED.
WHEN UNSCREWING THE ALLEN SCREWS WHICH CONTROL THE TABS, DO NOT
USE FORCE EXCEEDING 0,55 NM.
UNSCREW WITH CARE SO AS NOT TO DAMAGE THE FIXING TABS.
 Loading...