Do you have a question about the Rampage TrailView Soft Top and is the answer not in the manual?
Essential safety guidelines for installation, including checking tightness and wearing goggles.
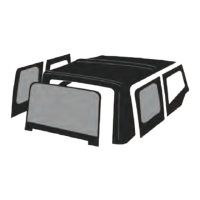
Lists all parts included in the TrailView Soft Top kit for verification before installation.
Lists necessary tools such as screwdrivers, wrenches, and safety glasses for the installation process.
Steps to prepare the vehicle, including removing existing tops and specific components.
Instructions for assembling the driver's side door surround, starting with base and upper corner parts.
Joins front and rear surround sections, attaches brackets, and repeats for passenger side.
Position the assembled door surround onto the vehicle and attach the bracket to the roll bar.
Ensures proper sealing of the windshield gasket against the front surround for a secure fit.
Fit the door surround mount plate on top of the door surrounds and secure it to the roll cage.
Insert and tighten the specific knobs (SM, LR, LF) into the door surround assembly at designated positions.
Use a Torx T25 bit to remove the footman loop from the windshield on both sides.
Place and reattach the latch with the Torx T25 bolt, then fold header channel hardware into the main fabric.
Tuck plastic strip behind latches and lift top assembly onto windshield gasket.
Prep and apply the adhesive Hook & Loop strip onto the door surround for secure fastening.
Lift fabric for bracket access, align, and secure with Allen head screw and nylon lock-nut.
Fold the top toward the windshield to close, secure using latches, and adjust hook tension.
Unfold cover fabric, pull over sound bar, and secure fabric straps around the sound bar.
Adjust ceiling straps around roll bar and seatbelt stud for even top positioning.
Secure side and rear windows to the main cover fabric by zipping them into place.
Insert the side-rear-quarter black plastic piece into the fabric sleeve-pocket of the rear window.
Assemble tailgate bar brackets by sliding plastic backing onto metal extrusion and securing with screws.
Attach tailgate bar brackets to the vehicle and slide the tailgate bar into the bottom of the rear window.
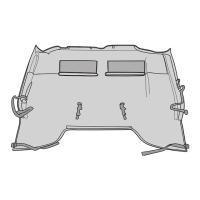
Insert fiberglass anti-puddle poles into the built-in pockets at the rear-ceiling of the top.
Fit the rubber gasket onto the top of the tailgate, pushing it down to seal tightly.
Zip the rear window closed and insert the Tailgate Bar into its brackets.
Attach the main deck belt rail plastic into the upper door surround from front to back.
Secure belt rail plastic of side windows and continue fastening under the lip of the Jeep body.
Wash only with mild soap and dry with a clean cloth. Do not use cleaning solvents.
| Material | Vinyl |
|---|---|
| Color | Black |
| Hardware Included | Yes |
| Type | Soft Top |
| Warranty | 1 Year Limited Warranty |
| Window Material | Plastic |
| Compatibility | Jeep Wrangler JK 2007-2018 |